- 38 -
Caution:
Two installers are required to ensure
safe installation.
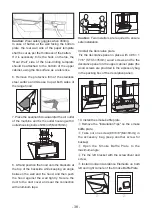
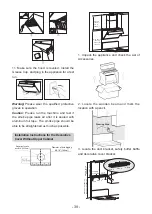
9.Install the decorative plate.
Fix the decorative panel in place with 4 #6 × 1
7/16" (ST3.5×35mm) wood screws and fix the
decorative panel on the upper cabinet plate (the
wood screws are provided in the accessory bag
in the packing box of the decorative panel).
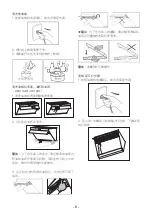
10. Install the smoke baffle plate.
①
Remove the "Installation Tips" on the smoke
baffle plate;
②
Take out one screw(#8×3/8"(M4×8mm)) in
the accessory bag (keep another screw for
backup);
③
Open the Smoke Baffle Plate to the
maximum angle;
④
Fix the left bracket with the screwdriver and
screw;
⑤
Install Collision Avoidance Elements on both
left and right corners of the Smoke Baffle Plate.
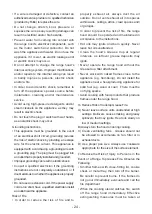
Caution:
Wear safety goggles when drilling.
In case of batten at the wall facing the bottom
plate, the rear wall side of the paper template
shall be cut as per the thickness of the batten.
If it is necessary to fix the hook on the tile, the
“Rear Wall” side of the hole-drilling template
should be attached to the bottom of the upper
cabinet, using the tile surface as a reference.
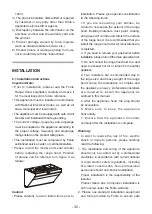
6. Remove the protective film of the stainless
steel surface and Grease Cup at both sides of
the range hood.
7. Place the seal(notch downward)at the air outlet
of the machine and fix the outlet housing with 4
outlet-housing bolts of #8×3/4"(M4×18mm).
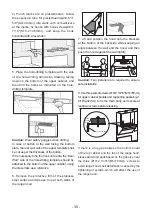
8. Lift and position the hood onto the brackets at
the top of the backside while keeping an angle
between the wall and the hood, and then push
the hood against the wall tightly. Secure the
duct to the duct cover and seal the connection
with aluminum tape.

