


15
w
w
w
w
w
w
.
.
f
f
o
o
s
s
c
c
a
a
m
m
.
.
c
c
o
o
m
m
S
S
h
h
e
e
n
n
z
z
h
h
e
e
n
n
F
F
o
o
s
s
c
c
a
a
m
m
I
I
n
n
t
t
e
e
l
l
l
l
i
i
g
g
e
e
n
n
t
t
T
T
e
e
c
c
h
h
n
n
o
o
l
l
o
o
g
g
y
y
C
C
o
o
.
.
,
,
L
L
i
i
m
m
i
i
t
t
e
e
d
d
T
T
e
e
l
l
:
:
8
8
6
6
7
7
5
5
5
5
2
2
6
6
7
7
4
4
5
5
6
6
6
6
8
8
F
F
a
a
x
x
:
:
8
8
6
6
7
7
5
5
5
5
2
2
6
6
7
7
4
4
5
5
1
1
6
6
8
8
15
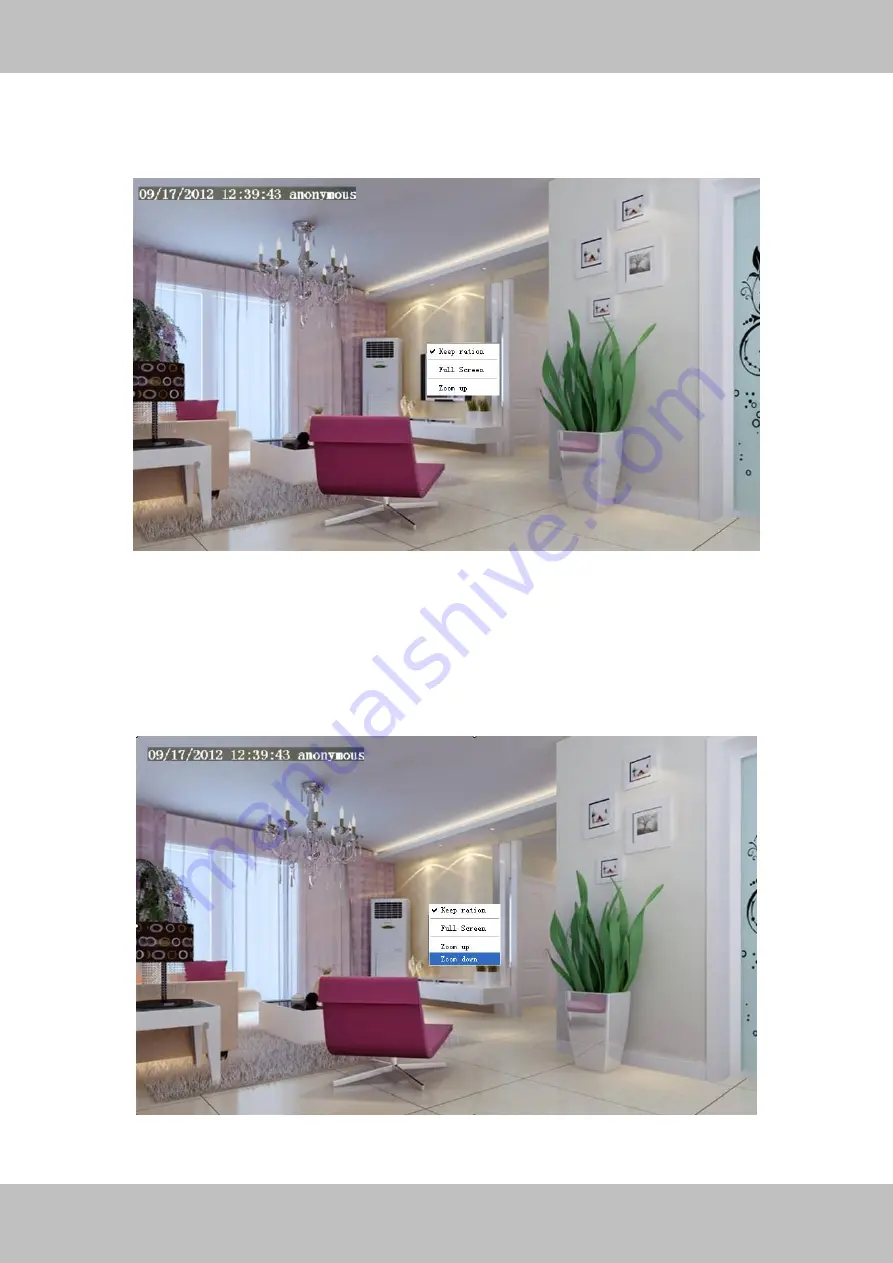
Onscreen Mouse Control
Right click the mouse and you can adjust the screen ration, full screen and Zoom up.
Figure 2.6
Keep ration:
Select it and the camera will adjust the size of live window based on the the
computer monitor automatically.
Full Screen:
Select it and Click it to make full-screen, press ESC and exit full-screen.
Zoom up:
Click it and the live view will be digital zoomed up, then click Zoom Down and the live
view back to original size.
Figure 2.7


