Installing the bezel
FortiMail-2000B hardware installation
FortiMail™ Secure Messaging Platform Version 4.0 Patch 1 Install Guide
48
Revision 2
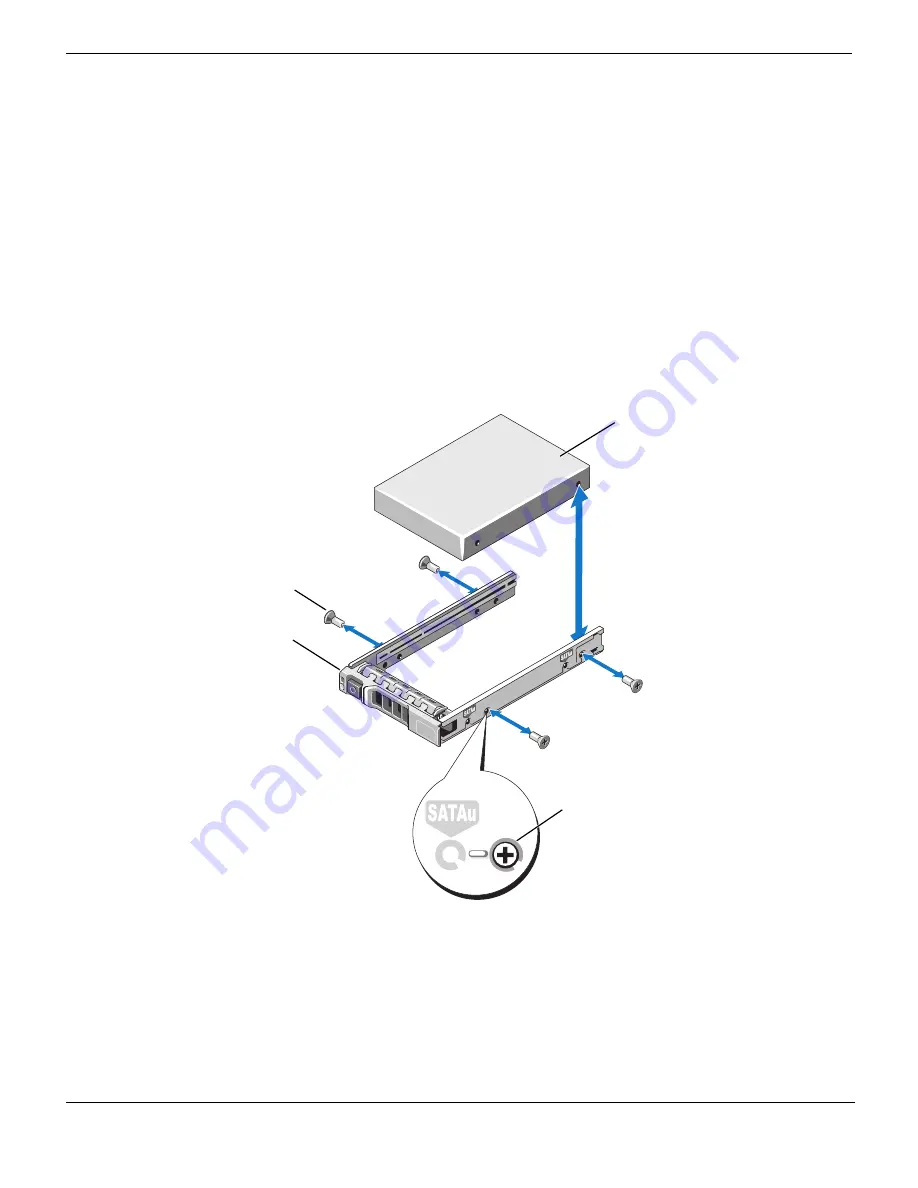
Removing a hard drive from a hard-drive carrier
Remove the screws from the slide rails on the hard-drive carrier and separate the hard
drive from the carrier. See Figure 15.
Installing a hard drive into a hard-drive carrier
1
Insert the hard drive into the hard-drive carrier with the connector end of the drive at
the back. See Figure 15.
2
Align the screw holes on the hard drive with the back set of holes on the hard drive
carrier.
When aligned correctly, the back of the hard drive will be flush with the back of the
hard-drive carrier.
3
Attach the four screws to secure the hard drive to the hard-drive carrier.
Figure 15: Installing a hard drive into a drive carrier
Installing the bezel
A lock on the bezel restricts access to the power button, optical drive, and hard drive(s).
The LCD panel and navigation buttons are accessible through the front bezel.
1
hard-drive carrier
2
screws (4)
3
hard drive
4
SAS screw hole
1
3
2
4
Содержание FortiMail-100
Страница 1: ...FortiMail Secure Messaging Platform Version 4 0 Patch 1 Install Guide...
Страница 173: ...www fortinet com...
Страница 174: ...www fortinet com...


