


24
5-4-3. Correction Area
Video stabilization can be made without enlarging the input video by specifying the correction
area (i.e., the area on the output screen where no image is to be displayed).
How to set the correction area
1) Open the CORRECTION AREA menu.
2) Set the correction area while viewing the output screen by turning the menu control knob.
①
If the correction area is set to “0” to display the whole effective area on the output
screen, the image will be magnified in the ratio set under the Correction level menu and
corrected. However, if the amplitude of shaking is greater than the correction level, the
resulted images are insufficiently corrected.
②
Usually sufficient shake correction is obtained by setting the Correction level high.
However, sufficient shake correction can be obtained by setting a small Correction
area (large set value), although the image will be displayed with black bars.
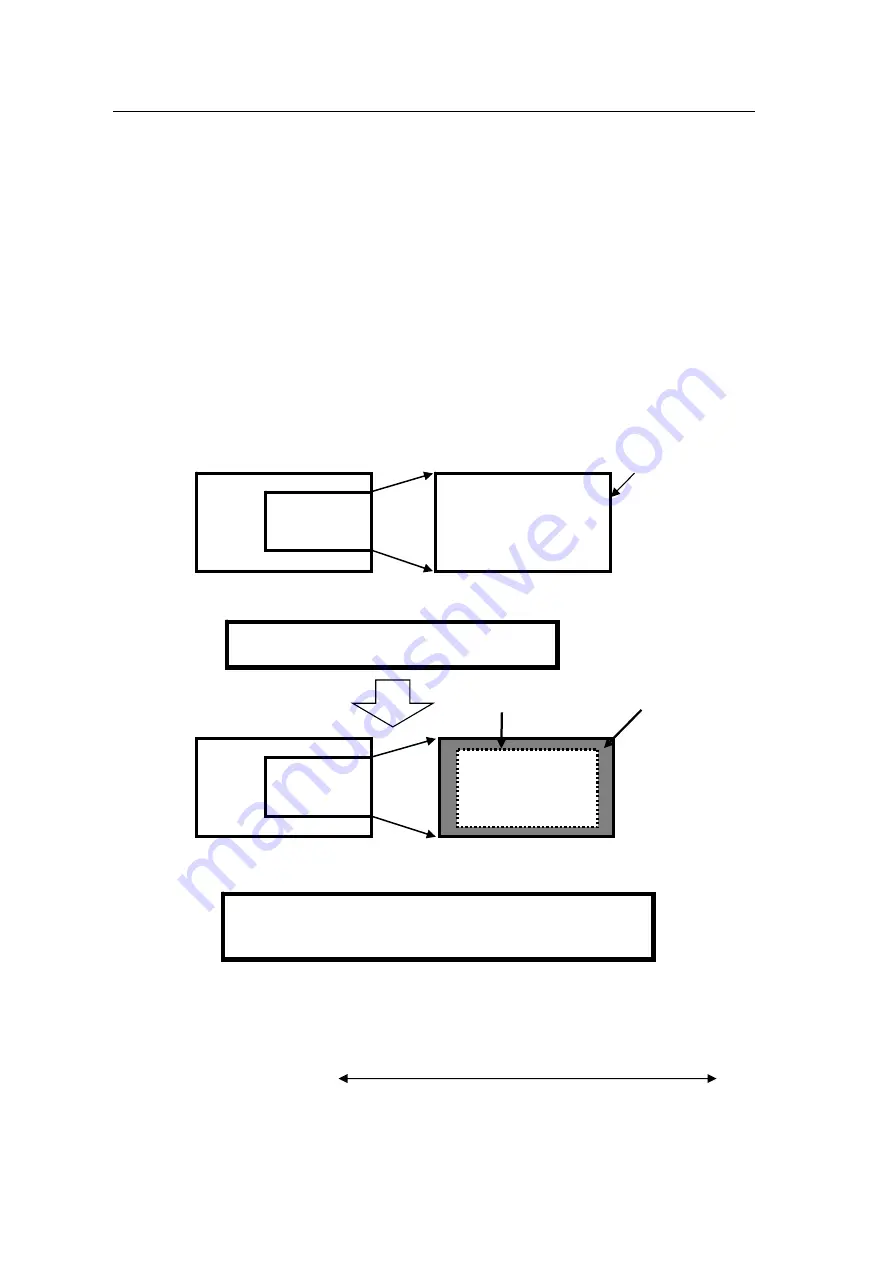
Larger shaking can be corrected by reducing the correction area (i.e., increasing the
Correction Area value) even if the Correction Level is set the same (See the figures
below).
Effective area
Small
Large
Black area
Small
Large
Output image
Large
Small
CORRECTION AREA 0
15
Larger shaking can be corrected using the same magnification rate by
setting the CORRECTION AREA value larger (between 1 and 15).
* The larger the correction area, the larger the black area.
If the whole screen is set to CORRECTION AREA
(set to “0”) and the shake correction is insufficient.
Correction area
Black area
Magnify
Input image
Output image
Correction area: between 1 and 15
④
Effective area
Magnify
Input image
Output image
Correction area
:
0
③
Effective area
Correction area
Содержание IVS-200
Страница 1: ...IVS 200 Video Stabilizer 1st Edition Rev 3 OPERATION MANUAL...
Страница 8: ......


