FONESTAR AIP-4010 Скачать руководство пользователя страница 8

Once all the parameters have been set, select the Exportar option and save the configration file in an SD
memory card SD or a USB storage device.

Then, insert the SD memory card or USB storage device in the corresponding port on the front panel of the
equipment, with the equipment switched off. Then switch the equipment back on.

If configuration was finalized correctly, 30 seconds after switching back on, the indicators will blink 3 times
in blue, and will make three noises at the same time.

On the other hand, if configuration was not finalized correctly, 30 seconds after switching back on, the
indicators will blink 5 times in red and will make 5 noises at the same time. In this case check if all the
configuration data is correct and modify it if necessary to set if correctly.

FIRMWARE UPGRADING

There are two ways to upgrade the 

AIP-4010 

audio transmitter firmware: using an upgrading file or through

the AIP-Go application. For both options, download the upgrading file from the Fonestar (www.fonestar.com)
web page. To do this, go to the product software tab (

AIP-4010

) and download the upgrading file.

UPGRADING FILE

Once the upgrading file has been downloaded, save it on an SD memory card or a USB storage device.

Insert the storage device into the corresponding port on the front panel of the equipment with the equipment
switched off. Then switch the equipment on again.

If the upgrading was performed correctly, 30 seconds after switching on again, the indicators will blink 3
times in blue, and will make three noises at the same time.

On the other hand, if upgrading was not finalized correctly, 30 seconds after switching back on, the indicators
will blink 5 times in red and will make 5 noises at the same time. In this case, try to upgrade the equipment
again.

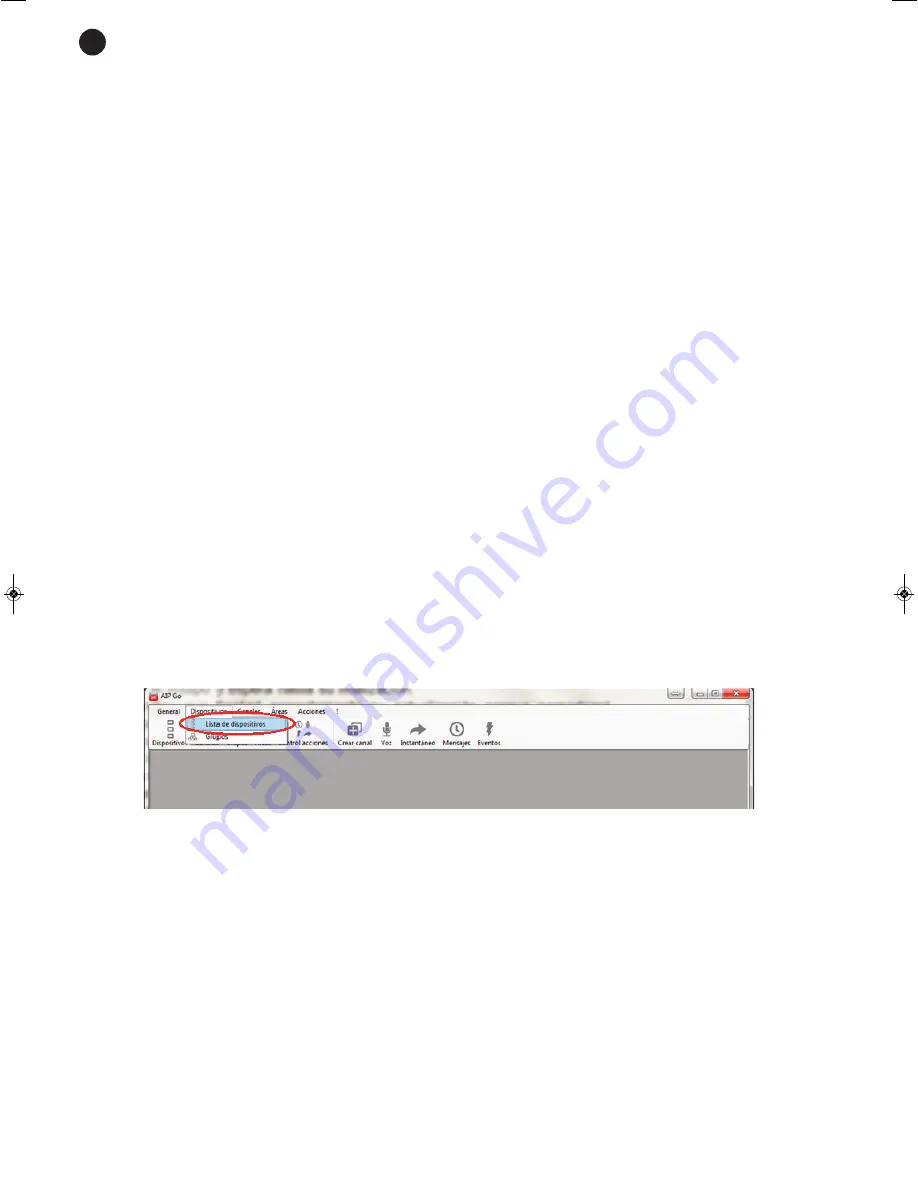
USING THE AIP-GO APPLICATION

To upgrade software using the AIP-Go application, execute the program and follow the steps below:

Select the Device List option on the Devices menu.

- 8 -

EN

AIP-4010_MANUAL_(EN)_20170529_Maquetación 1  29/5/17  9:38  Página 8

Содержание AIP-4010

Страница 1: ...AIP 4010 IP AUDIO TRANSMITTER INSTRUCTION MANUAL...

Страница 2: ...to allow ventilation Avoid direct sunlight heat sources and excessive dust Do not place the machine near magnetic fields or static electricity Do not use surfaces which vibrate or receive impact Do no...

Страница 3: ...shows that when the pro duct is disposed of it must be done properly placing it in a special selective electronic and electrical equipment container or through a dealer when purchasing a similar produ...

Страница 4: ...jack connector 4 Connection port for SD memory cards Only valid for updating firmware 5 Connection port for USB storage devices Only valid for firmware updating 6 Reset button BACK PANEL 1 ETHERNET po...

Страница 5: ...ays to set the AIP 4010 audio transmitter Through the net using the AIP Go application Through an external configuration file generated by the AIP Go application THROUGH THE NET USING THE AIP GO APPLI...

Страница 6: ...e input and relay connector parameters select the I O option 5 For selecting the state of the relays in standby if they are normally open Norm open or normally closed Norm closed 6 For selecting the a...

Страница 7: ...rite the name of the transmitter to be set 3 For activating deactivating the change to the network configuration 4 Activate deactivate the DHCP setting With the DHCP option deactivated the following c...

Страница 8: ...sing an upgrading file or through the AIP Go application For both options download the upgrading file from the Fonestar www fonestar com web page To do this go to the product software tab AIP 4010 and...

Страница 9: ...upgrade and then press the Configure button The Device Setup will open To upgrade the software select the Options tab and press the Upgrade button Now select the upgrading file that you downloaded fro...

Страница 10: ...ing the AIP 4010 transmitter on Below you will find a description of all the operating status for the equipment in accordance with the state of the indicators on the front panel LED INDICATORS STATE F...

Страница 11: ...ure euroblock 1 USB SD port for firmware upgrading OUTPUTS 1 ethernet 10 100 base T RJ 45 4 separate programmable outputs for opening and closing contacts euroblock POWER SUPPLY 100 240 V AC 16 W DIME...

Страница 12: ...onents by unauthorized persons and in general any use that is unrelated to the nature and purpose of the product If any service is needed during the warranty period because of lack of conformity pleas...

Отзывы: