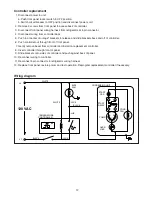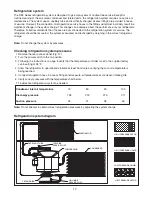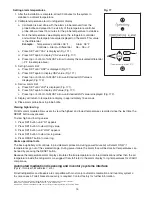
background image

Accessories

Temperature alarm

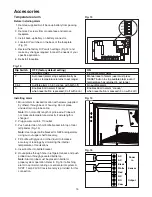
Before installing alarm

  1.  Remove supplied 9-volt back-up battery from packing 

box.

  2.  Remove 2 screws from module face and remove 

faceplate.

  3.  Install back-up battery on battery connector.

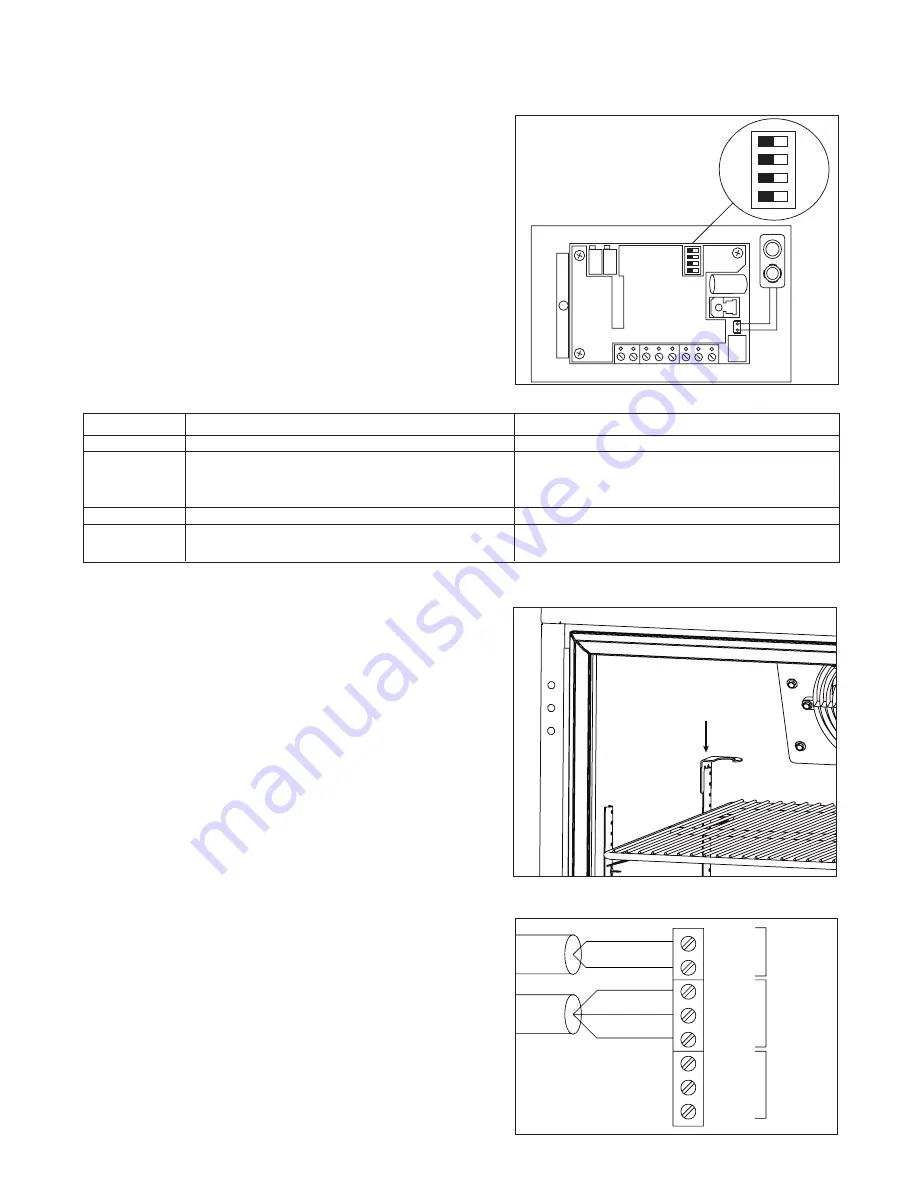
  4.  Locate DIP switches on the back of the faceplate 

(Fig. 13).

  5.  Review the factory DIP switch settings (Fig. 14) and 

make any changes required to meet the needs of your 
specific application.

 6. Reinstall faceplate.

Dip Switch 

OFF (factory default setting) 

ON

No alarm delay 

45 minute alarm delay

Auto reset (alarm stops automatically as 

Manual reset of alarm (user must press   


soon as temperature returns to set range) 

RESET button to stop audible alarm even if 


temperature has returned to set range)

3 & 4  

Audible alarm on (no snooze with both off)  

No audible alarm 

3   

Enables 5 min alarm “snooze”  

Enables 45 min alarm “snooze”


when reset button is pressed (3 off with 4 on) 

when reset button is pressed (3 on with 4 off) 


Fig. 14

Fig. 15

Installing alarm

  1.  Mount alarm in desired location with screws (supplied  

by others) through back of housing. Do not place 
undue strain on probe cable.

 Note:

 Do not modify length of probe wire. Probe will 

not measure temperature correctly if wire length is 
changed.

  2.  Plug power cord into 110 outlet.

  3.  Push center tab of short bottle bracket into top of rear 

left pilaster (Fig. 15).


Note:

 Use longer bottle bracket for REF5 refrigerators 

using cut-out upper shelf accessory.

  4.  Fill bottle with glycerin or other liquid to increase 

accuracy of readings by simulating the internal 
temperature of medications.

  5.  Insert bottle into bottle bracket.

  6.  Route probe through hole in refrigerator back and push 

probe down through gasketed bottle top.


Note:

 Alarm probe must be placed in bottle for

proper system operation. Refer to Fig. 16 if attaching 
alarm to central monitoring or central alarm system. A 
SPDT 1 amp 24V AC resistive relay is provided for this 
connection.

15

OFF

OFF

OFF

OFF

POWER SENSOR OUTPUT

Fig. 13

AC

AC

Black

White

Red

NC

NO

Com

Output

Sensor

Power

in

Fig. 16

Содержание Symphony REF5

Страница 1: ...00128892R02 801 Church Lane Easton PA 18040 USA Toll free 800 523 9361 610 252 7301 Fax 610 250 0696 www follettice com Following installation please forward this manual to the appropriate operations...

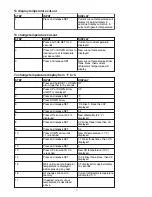
Страница 2: ...ntroller 6 Controller operation 6 Programming the controller 6 Operation 10 How the refrigerator works 10 Temperature control 10 Defrosting 10 Cleaning 10 Service information 11 Latch adjustment 11 Ga...

Страница 3: ...t we can help in the filing of a claim if necessary Specifications Series specifications REF4 ADA 31 25 height fits below 34 high ADA compatible counter 4 0 cu ft capacity REF5 34 00 height fits below...

Страница 4: ...ition cut out upper shelf accessory below evaporator with cut out around drain Installing controller faceplate required 1 Remove F and C faceplates from plastic bag packed inside refrigerator 2 Snap a...

Страница 5: ...Fig 6 2 4 Cover hinge screw holes with screw hole plugs removed from opposite side 5 Reverse door and reinstall hinge screws 6 Reinstall latch on opposite side 7 Remove screws and handle from door Fig...

Страница 6: ...F differential means that with a 34 F set point for example the compressor will turn off at 34 F and turn on when it reaches 38 F Caution Do NOT change the differential HY setting except as indicated...

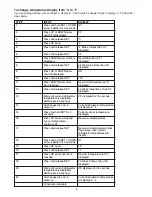
Страница 7: ...il CF is displayed 3 Press and release SET F 4 Press DOWN arrow C 5 Press and release SET C blinks 3 times then HY displayed 6 Press and release SET 0 4 7 Press UP arrow until 2 2 is New differential...

Страница 8: ...es then CF displayed 13 Wait until current refrigerator CF displayed for 15 seconds temperature is displayed before passing any keys 14 All changes are now in Current refrigerator temperature memory w...

Страница 9: ...appropriate programmed key into 5 PIN receptacle on controller back 4 TURN ON refrigerator 5 Values from key automatically download to refrigerator dol message blinks followed by end 6 After 10 second...

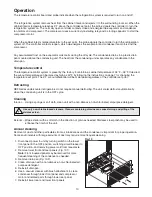
Страница 10: ...mperature set point The 4 F cut out differential will be maintained regardless of the controller set point Defrosting REF Series undercounter refrigerators do not require manual defrosting The unit co...

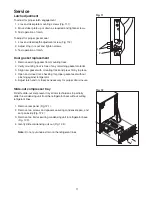
Страница 11: ...essary for proper door closure Slide out compressor tray Follett s slide out compressor tray allows technicians to partially slide the condensing unit from the refrigerator back without cutting refrig...

Страница 12: ...controller 6 Push controller out through front of front panel 7 Gently remove bezel from controller and install on replacement controller 8 Insert controller through front of panel 9 Slide brackets o...

Страница 13: ...m by pressures Checking refrigeration system pressures 1 Remove the rear access panel Fig 12 2 Turn the power switch to the on position 3 Following the instructions on page 6 verify that the temperatu...

Страница 14: ...terminals for power Replace controller if needed 5 Replace controller and or probe 1 Allow to cool or replace 2 Replace as required 3 Replace compressor 1 Replace fan motor 1 Replace controller and o...

Страница 15: ...ressed 3 on with 4 off Fig 14 Fig 15 Installing alarm 1 Mount alarm in desired location with screws supplied by others through back of housing Do not place undue strain on probe cable Note Do not modi...

Страница 16: ...lace alarm probe back in probe bottle 16 2 1 Fig 17 Viewing high low log Follett s alarm module allows users to view the highest and lowest temperatures recorded since the last time the RESET button w...

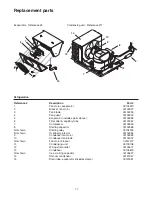
Страница 17: ...tarting relay 00104976 Not shown Overload protector 00104984 9 Condenser fan motor 00104992 10 Condenser fan blade 00105007 Not shown Fan motor bracket 00157412 11 Condensing unit 00105106 12 Wiring s...

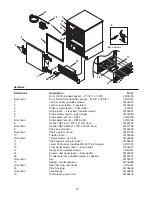
Страница 18: ...1 3 8 x 18 5 8 door 00127738 9 Shelves full each 00103283 Not shown Shelf upper cut out 00127753 10 Pilaster each 00105346 Not shown Thumb screws set of 8 00105353 11 Shelf support snap in each 001562...

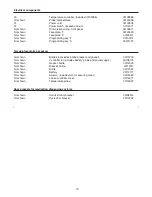
Страница 19: ...Label controller cover 00115071 Not shown Temperature probe 00115097 Door brackets for medication dispensing systems Not shown Omnicell door bracket 00158014 Not shown Pyxis door bracket 00114702 Elec...

Страница 20: ...00128892R02 03 07 801 Church Lane Easton PA 18040 USA Toll free 800 523 9361 610 252 7301 Fax 610 250 0696 www follettice com...

Отзывы: