FASTBACK P-21 FOILFAST PRINTER USER’S MANUAL, L4079 Rev. B
9
PRINTING FOILFAST® TITLE SHEETS
WITH FOILFAST PRINTER (Windows)
E. SINGLE COLOR PRINTING—Suede FTS
IMPORTANT:
The printing procedures for Adobe programs
(Illustrator, InDesign, etc.) are slightly different from the
printing procedures for non-Adobe programs. Because of the
common use of Adobe Illustrator with the Foilfast, both sets of
procedures are given here.
NOTE:
When printing in single color mode, the colors that
appear in you artwork do not matter. All artwork will print in
the chosen foil color. If, for instance, you have created your
artwork in black, but you choose red foil to print. All artwork
will appear in red instead of black If you have used more than
one color in your artwork, all colors will print in the specified
color when single color printing is chosen.
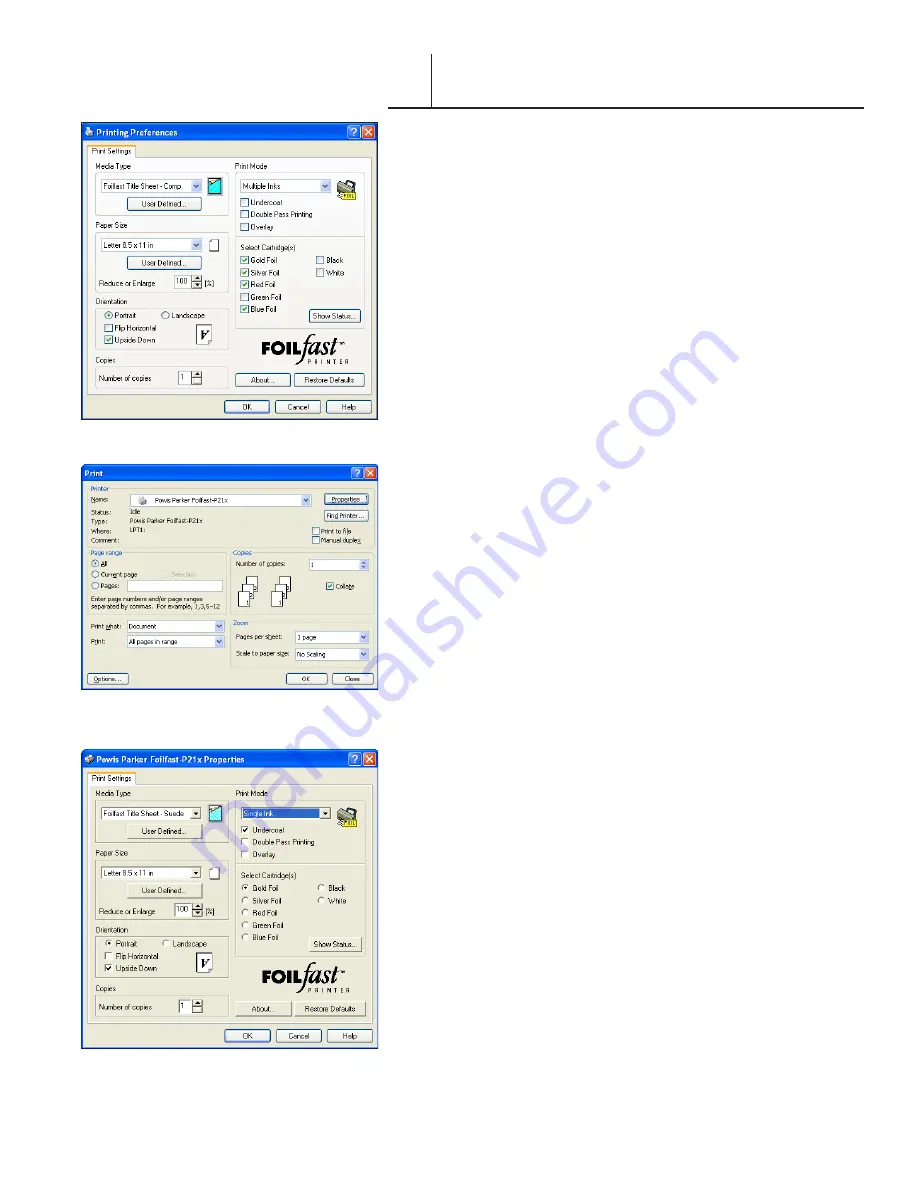
1. Choose Print from File menu.
The main Print dialog box appears (Figure 71).
2. In the Printer Name selection menu, choose the Foilfast
printer and click ‘Properties.’
The Properties dialog box appears (Figure 72). Verify that
“Foilfast Title Sheet - Suede” is selected in the Media Type box,
and that “Single Ink” is chosen in the Print Mode. For Comp
covers printing in single color Gold foil, the default settings
should need no adjustment.
Note that when “Foilfast Title Sheet - Suede” is chosen,
‘Undercoat’ is automatically checked. Make sure that the Foil
Primer cartridge is loaded into the Foilfast printer before
proceeding.
If you are printing in a color other than Gold, Click on the
button next to the desired color under ‘Select Cartridge(s).’ For
more information on the choices in this dialog box, see
About
Printing Properties
, Chapter VII.
3. Click ‘OK.’
The Print dialog box appears (Figure 71).
4. Verify that the paper size matches the setting in the
Properties dialog box. Adjust the number of copies as
required.
5. Load paper into the paper feed.
NOTE:
Clear Cover should be loaded one at a time to avoid
jamming.
6. Click ‘Print.’
F I G U R E
0
F I G U R E
F I G U R E
VI-A


