22
Control 2802 Logic Pro Automation & Control Surface Manual
Control Surface Operation
INSERT Mode (29)
This mode can be used to assign plug-ins to any of the first four insert slots in Logic, and control the
plug-in parameters.
Please note that ASSIGN cannot be selected in INSERT mode.
To assign a Plug-in:
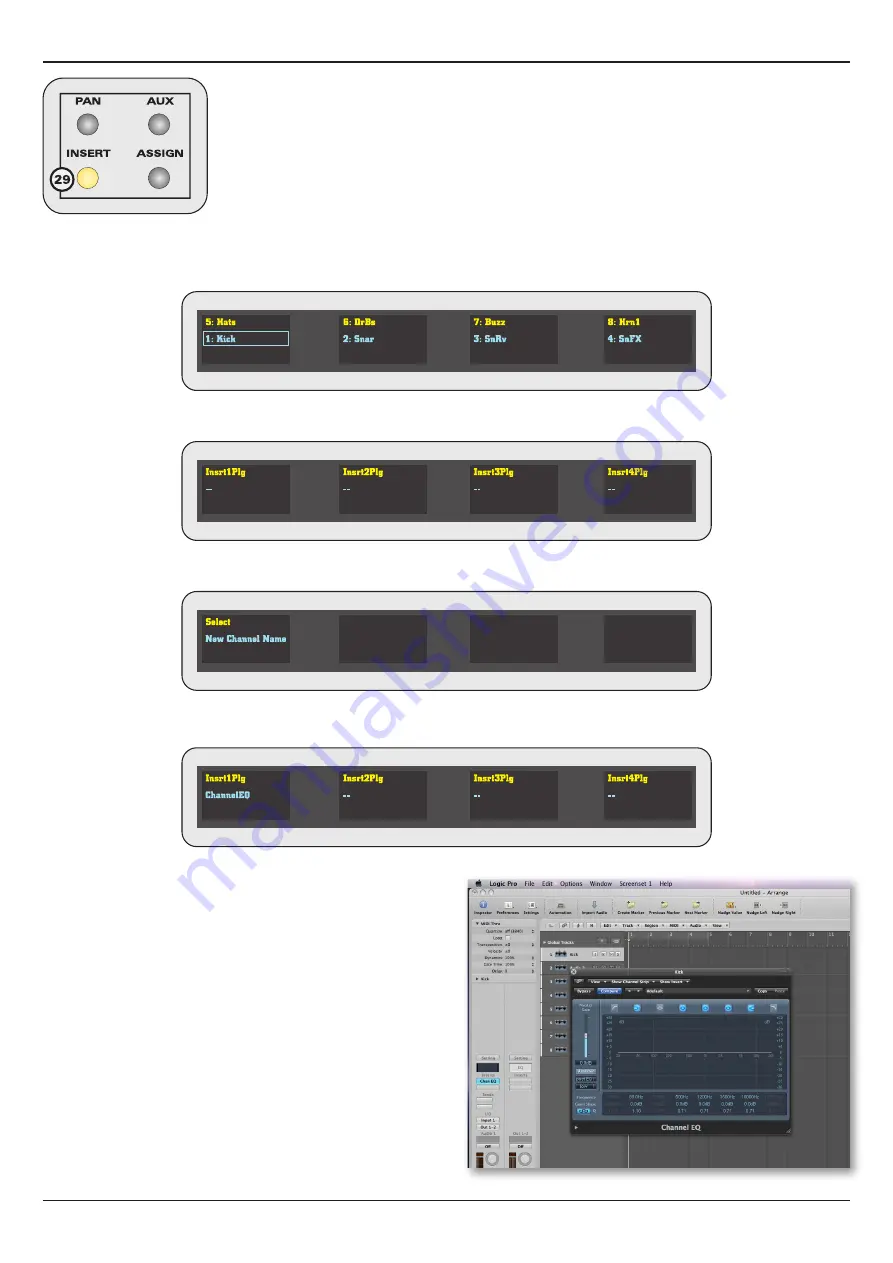
1. Select the track you wish to affect - press SELECT (19), on the SELECT MODE panel, and then press a Fader Strip SEL switch
(18) - the selected channel has a box around its name in the rotary encoder OLED display:
2. Select INSERT (29) - the OLEDs update to show Logic’s first four insert slots for the selected channel (Insrt1Plg to Insrt4Plg) - if
you already have a plug-in assigned, then you see its name in blue on the corresponding display.
Please note that if you select INSERT (29) first, and then change your channel selection (18), the OLEDs temporarily display the
name of the selected channel:
3. Rotate an encoder to select a plug-in - your selection flashes on the OLED display.
4. Press down on the encoder to confirm the assignment:
At this point, the plug-in window will open within Logic. You
can now control the parameters from the rotary encoders as
described on the next page.
If you wish to close the plug-in window, press down (tap) the
INSERT switch (29).
If the plug-in has been added manually, from within Logic, you
may have to refresh the Control 2802 displays by tapping the
INSERT switch again.
To open a plug-in window that is currently closed, tap down on
the corresponding encoder - the plug-in window opens in Logic
(and the OLEDs update to show the parameter editing mode.
Tap the INSERT switch to close the plug-in window on Logic,
and return the OLEDs to the insert plug-in view.


