6
3. NECK POSITION PICKUP (PART G)
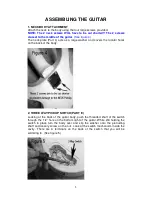
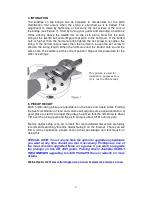
The cavity for the neck position humbucking pickup is located on the upper
part of the body closest to the neck pocket. As you look into the cavity you will
notice that a hole has been drilled that connects the cavity for the neck
position pickup to the cavity that will house the bridge position pickup. Notice
also that the Neck Position Pickup has a thinner mounting ring than the Bridge
Position Pickup. Run the wire attached to the neck position pickup into the
hole from the neck cavity to the bridge pickup cavity. This is same hole that
the wires coming from the selector switch have been run through. Use the
four 5/8” screws to attach the neck position pickup to the body.
4. BRIDGE POSITION PICKUP (PART H)
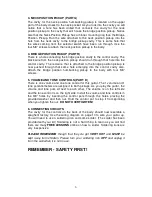
There is a hole connecting the bridge position cavity to the control cavity. The
black wire from the neck position pickup should run through that hole into the
control cavity. The red wire that is attached to the bridge position pickup is
now pushed through that same hole emerging into the control cavity also.
Attach the bridge position humbucking pickup to the body with four 5/8”
screws.
5. VOLUME AND TONE CONTROLS (PART D)
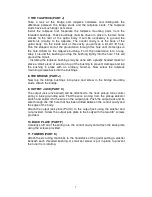
There is one volume and one tone control for this guitar. The 1 volume and 1
tone potentiometers are assigned to both pickups. As you play the guitar, the
volume and tone pots sit next to each other. The volume is on the left side
and the tone control is on the right side. Install the volume and tone controls in
the 3/8” holes by inserting the control pots through the holes, placing the
provided washer and then nut. Hold the control pot to stop it from spinning
when you tighten the nut.
DO NOT OVERTIGHTEN!
6. CONNECTING CIRCUITS
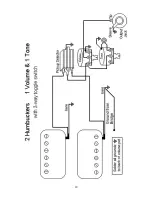
The cavity for the controls on the back of the body should now resemble a
spaghetti factory. Use the wiring diagram on page 10 to wire your guitar up.
You will need to use a soldering iron and some solder. (The solder has been
provided with your kit) Soldering is not a hard thing to learn as you will find
there are many
FREE LESSONS
online on how to solder. Soldering irons are
very inexpensive.
PLEASE REMEMBER
though that they do get
VERY HOT
and
MUST
be
kept away from children. Please turn your soldering iron
OFF
and unplug it
from the wall when it is not in use.
REMEMBER - SAFETY FIRST!
Содержание SPR01
Страница 11: ...10...


