

WHITE DUST
After installation of the Air Cleaner, you may notice
some white dust on tabletops and shelves. Most large
particles such as lint, are too heavy to remain airborne
and tend to settle quickly, never reaching the air cleaner.
This white visible dust is normally referred to as “clean
dust.” As the Air Cleaner is removing the dark and
staining particles from the air, the lint will also be cleaner.
Lint dust is most noticeable on dark furnishings; in
homes containing new carpeting; and where there is a lot
of household traffic from occupants and pets. To reduce
lint dust, use continuous fan operation and keep return
vents unrestricted to create an efficient airflow.
Note:
The Air Cleaner does NOT produce more lint or
dust.
MAINTENANCE
It is important to follow a scheduled maintenance for
maximum performance of the Air Cleaner.
Cell And Prefilter Cleaning
The collecting cells and prefilters must be cleaned on
a regular basis for the Air Cleaner to function at its peak
efficiency. The frequency of cleaning will vary from one
location to another. On average, the cells should be
cleaned every 3 months.
1. Turn off power switch. Open access door and remove
collecting cells and prefilters.
2. Place cells in a laundry tub. Rinse with hot water and
spray completely with DAX Detergent (or a non-
chlorine, non-corrosive, non-abrasive liquid household
detergent.) Allow detergent to run down both sides of
plates and ionizing wires. Let stand for 5 minutes and
rinse with hot water. Repeat process three times.
3. Rinse cells well with hot water (maximum 120°F/49°
C).
4. If dirt remains, let cells soak in a solution of DAX
Detergent and hot water for 30-60 minutes, then rinse.
5. Tilt cells on 45° angle on their short side, with arrows
pointing sideways. Allow to dry completely,
approximately 12-24 hours. A hair dryer may be used
to speed up drying time.
6. To wash prefilters, spray with DAX Detergent, rinse
and let dry. Do not wash in the same water as
collecting cells.
7. Place cells and prefilters back into cabinet. Close door
and turn power switch
ON
. If the performance light
does not come on or arcing occurs, turn Air Cleaner
OFF
and allow air from system fan to dry cells
completely.
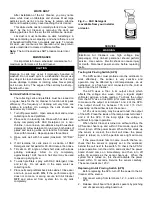
Fig. 2 — DAX Detergent
is available from your installer
or dealer.
SERVICE
Testing Air Proving Switch (APS)
The APS sensor must protrude into the airstream to
work effectively. The sensor is very sensitive and
operation may be affected by cold temperatures, an air
exchanger, or a fresh air duct connected to the cold air
return near the Air Cleaner.
The APS uses a Triac in its output circuit, which
affects the voltage sine wave. Using a regular digital
voltmeter will give a false reading. To check the output
from the APS, use a true RMS (root mean square) meter
to measure the output at terminals 1 and 4 of the APS.
The output should be between 105 and 115 VAC,
depending on the airflow across the sensor.
A 125 volt neon lamp may be used to test the output
of the APS. Place the leads of the lamp across terminals 1
and 4 of the APS. If the lamp lights, the voltage is
sufficient for proper operation.
When the Air Cleaner is turned on without airflow, the
APS sensor heats up and within 30 seconds, opens the
circuit to turn off the power board. When the fan starts up
(the sensor is cooled), the circuit will close, the power
board is turned on, and the performance light will come
on.
If the power board fails to come on with the fan on,
check that the sensor is properly set in the airstream
behind the cell next to the switch. To check the APS for
proper operation, turn the unit on and activate. The power
board should come on immediately, and then turn off
within 30 seconds as the sensor heats up. When the
system fan is turned on, this should activate the power
board within 10 seconds. Service the sensor carefully.
The sensor leads are 120 V.
Replacing An Air Proving Switch (APS)
Before replacing the APS, turn off the power to the Air
Cleaner at the source.
1. Disconnect wiring from terminals 1, 2, 3, and 4 on the
APS.
2. Release circuit board from plastic spacers by pinching
end of spacer and pulling board out.
CAUTION
Damage to cells may occur if improperly handled or
washed. Do not wash cells in a dishwasher. Never use
any object to clean between the cell plates, as this may
cause damage to plates or ionizing wires. Never place
cell in oven to dry. The edges of the cell may be sharp -
handle with care.
WARNING
Electronic Air Cleaners use high voltage (low
amperage). Only trained personnel should perform
service. Use caution. Electric shock can cause injury
or death. Disconnect power source before replacing
parts.
Содержание FS-GM20AS-A
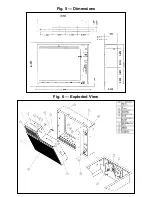
Страница 8: ...Fig 6 Exploded View Fig 5 Dimensions ...