background image

F4000N Series Operating Manual  

Section 1: Introduction 

Part # 562187N-1  

Rev. D  Sep 2012 


© 2012 Fisnar Inc. 

Note:  The robot automatically assigns the program number as its filename when saved to 

the USB drive. It uses this filename to load the program to the same number on the 
robot.  


Updating Robot Software  

Instructions: 

1) 

On the USB drive, create an “updata” folder and copy the software files. The 
software folder should include the batch (.bat), MS-DOS (.com) and executable 

(.exe) files. 

2)  Turn the robot OFF. Insert the USB drive into the port and turn the robot ON. 

3) 

The robot will automatically locate the “updata” folder in the drive and run the batch 
file to update the software. You should see the Machine Home screen after the 

update. 

4)  Verify the software by pressing F3 (Menu 2) 

 System Information. 

5)  Turn the robot OFF and remove the USB drive. 

 
Note:  The robot will keep updating the software whenever it sees an “updata” folder, 

rename the folder (and still keep it in the drive) in order to avoid this. 

Содержание F400N Series

Страница 1: ...F4000N Series Operating Manual Part 562187N 1 Rev D Sep 2012 F4000N SERIES ROBOT OPERATING MANUAL...

Страница 2: ...nu Within Menu1 21 3 4 Menu 2 F3 22 3 5 Setup Menu F4 23 SECTION 4 PROGRAMMING EXAMPLE 25 1 PROGRAMMING EXAMPLE 26 2 GOOD PROGRAMMING PRACTICES 29 3 EDITING A PROGRAM 30 3 1 Changing a Point s XYZ loc...

Страница 3: ...nter 69 3 8 Key Beep 70 3 9 Test Function 70 4 F3 MENU 2 72 4 1 Numerical Move 72 4 2 Save Temp Point 72 4 3 Move To Temp Point 72 4 4 Undo Program 72 4 5 Redo Program 72 4 6 Debug Program 72 4 7 Move...

Страница 4: ...ntrol Connector 101 2 3 Output Signals 102 2 4 Input Signals 103 2 5 Input Output Schematic 104 2 6 Input Output Power Specifications 104 2 7 Robot External I O Card 105 3 SYSTEM SPECIFICATIONS 106 4...

Страница 5: ...F4000N Series Operating Manual Section 1 Introduction Part 562187N 1 Rev D Sep 2012 4 2012 Fisnar Inc SECTION 1 Introduction...

Страница 6: ...d 1 5 The F4000N series robots should only be operated in an environment between 0 and 40 degrees Celsius with humidity of 20 to 95 percent and no visible condensation 1 6 Do not store or setup the ro...

Страница 7: ...e included with the robot Main Unit F4000N Enclosure CE Units Only Not Included Teach Pendant Barrel Holder Spare Screws and Hex Key Teach Pendant Cable Power Cord Dispenser Cable RS232 Cable and Null...

Страница 8: ...recommend using any other USB drives other than the one provided Fisnar Inc will not be held liable for any issues arising from external hardware being used with the robot without a written consent f...

Страница 9: ...ftware folder should include the batch bat MS DOS com and executable exe files 2 Turn the robot OFF Insert the USB drive into the port and turn the robot ON 3 The robot will automatically locate the u...

Страница 10: ...F4000N Series Operating Manual Section 1 Introduction Part 562187N 1 Rev D Sep 2012 9 2012 Fisnar Inc 3 Connector and Switch Locations Front View Rear View...

Страница 11: ...F4000N Series Operating Manual Section 2 Setup Part 562187N 1 Rev D Sep 2012 10 2012 Fisnar Inc SECTION 2 Setup...

Страница 12: ...pon start up ensure that the SHORTED plug is firmly in place 2 1 When using an enclosure or light curtain connect the external start stop box and enclosure door switch or light curtain to the External...

Страница 13: ...F4000N Series Operating Manual Section 3 Teaching Overview Part 562187N 1 Rev D Sep 2012 12 2012 Fisnar Inc SECTION 3 Teaching Overview...

Страница 14: ...bot will move the X Y and Z axes to that location Depending on the type of point registered at that location the robot may also perform other functions such as turning the dispenser on or off The most...

Страница 15: ...nt type The high point of the arc is registered as an ARC POINT The end of the arc is registered as a LINE END point Lines and arcs can also be combined to dispense a bead of material along a complex...

Страница 16: ...s which are executed when that key is pressed alone To access the function shown in the red colored area at the top of a key press and release the Shift key first the LED on the Shift key will be flas...

Страница 17: ...released the jog motion will decelerate Key Assignments Moves backward 1 memory address Changes the display to memory address number 1 Inserts a memory address before the current address Moves forwar...

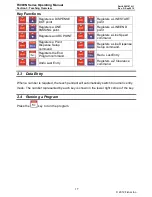
Страница 18: ...OINT Registers a Line Speed command Registers a Point Dispense Setup command Registers a Line Dispense Setup command Registers the End Program command Redo Last Entry Undo Last Entry Registers a Z Cle...

Страница 19: ...nd Program Registers the current memory address as the end of the program Dispense On Off Registers an instruction which turns the dispenser on or off at the current XYZ location GOTO Address Causes t...

Страница 20: ...tions on changing the location of the home position Loop Address Causes the program to execute a group of memory addresses a user specified number of times Dummy Point Registers the current XYZ locati...

Страница 21: ...ser to register a name for the current program number Z axis Limit mm Sets the MAXIMUM Z axis value the lowest tip position Once the Z axis limit is set the robot will prevent the tip from jogging bel...

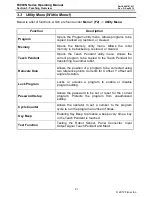
Страница 22: ...e copied to the Teach Pendant for transferring to another robot Relocate Data Allows the position of a program to be corrected using two reference points Corrects for X offset Y offset and angle of ro...

Страница 23: ...hich was stored with Save Temp Point Undo Program Cancels the last change to the program Returns to the program state prior to the last change Redo Program Restores the last change to the program whic...

Страница 24: ...g time and waiting time at the end of dispensing tail time for dots The registered values will be used from the current memory address forward until another POINT DISPENSE SETUP instruction is found D...

Страница 25: ...gency signal Acceleration Parameter that controls the robot s acceleration Pause Status Sets the position to which the tip moves after pressing the Start button The tip can go to the Home position or...

Страница 26: ...F4000N Series Operating Manual Section 4 Programming Example Part 562187N 1 Rev D Sep 2012 25 2012 Fisnar Inc SECTION 4 Programming Example...

Страница 27: ...ot please follow the instructions below to create a program which dispenses in the following pattern Notes We will create the above program in program 10 We will use a line speed of 40 mm second for t...

Страница 28: ...PROG 10 EMPTY 6 The display shows we are at memory address 2 and that it is empty Jog the dispensing tip to the first location in the diagram above 1 Line Start To jog the X and Y axes press the arro...

Страница 29: ...s now complete The next step is to register the dispense settings for the dots Press the F4 Setup key then 3 to register the dot dispensing time Point Dispense Setup Dis Time Tail Time unit sec 15 Typ...

Страница 30: ...the setup commands at the beginning of every program The following setup commands are the most commonly used Dispense End Setup Point Dispense Setup Line Dispense Setup Line Speed Z Clearance Retract...

Страница 31: ...t you want to change is shown in the display You can confirm that the correct point is in the display by pressing the MOVE key This will cause the tip to move to the XYZ position shown in the display...

Страница 32: ...Program 99 is designed for autorun on Run mode When starting the robot with this program the robot starts automatically without pressing the Start Home key for initialization 5 Changing from Teach Mo...

Страница 33: ...F4000N Series Operating Manual Section 5 Point Type Function Reference Part 562187N 1 Rev D Sep 2012 32 2012 Fisnar Inc SECTION 5 Point Type Function Reference...

Страница 34: ...can be controlled by registering a Dispense End Setup instruction and or a Z Clearance instruction in a previous memory address Dispense End Setup and Z Clearance instructions are registered using th...

Страница 35: ...the dispenser will be turned OFF Z Lift 1 Yes 2 No Selection If you want the Z axis tip to lift while going through the Over Angle you must select 1 Otherwise select 2 The speed must be set in a previ...

Страница 36: ...controlled by registering a Line Dispense Setup instruction in a previous memory address The Line Dispense Setup instruction is registered by pressing the F4 SETUP key See also SECTION 5 5 2 Line Disp...

Страница 37: ...FF before the end of a line to prevent excess material at the line end Problem Too much material at the end of the line Solution Turn the dispenser OFF before the end of the line To register a DISPENS...

Страница 38: ...een each cycle Step Repeat X is useful when a fixture is mounted on the robot which holds many identical work pieces aligned in rows and columns The user needs only to create a program for the first w...

Страница 39: ...tup H Speed 100 mm s L Speed 15 mm s L Length 5mm 2 Z Clearance Relative 10 mm 3 Point Dispense Setup Disp Time 0 25 s Tail Time 0 10 s 4 Dispense Point 5 Dispense Point 6 Dispense Point 7 Dispense Po...

Страница 40: ...ressing the key 3 Step Repeat Address 8 1 X 2 Y Start Address Columns X Rows Y 3 Type 1 to select X direction and then press ENTER Step Repeat Address 8 1 X 2 Y 1 Start Address Columns X Rows Y F1 Add...

Страница 41: ...25 to specify 25 mm and then press ENTER Step Repeat Address 8 X Offset 30 Y Offset Unit mm 9 The display will prompt you to select 1 S Path or 2 N Path Selecting S Path will cause the first row 1 to...

Страница 42: ...of the following instructions Address Instruction 1 Dispense End Setup H Speed 100 mm s L Speed 15 mm s L Length 5mm 2 Z Clearance Relative 10 mm 3 Point Dispense Setup Disp Time 0 25 s Tail Time 0 1...

Страница 43: ...ween S Path and N Path is the order in which the pieces are run Step Repeat X 1 11 Step Repeat Y Step Repeat Y works just as Step Repeat X does with one difference priority is given to the Y axis inst...

Страница 44: ...ns below Instruction Display Shows 1 Press F1 ENTER to open the Point Menu POINT 1 3 1 Dispense Dot 2 Line Start 7 End Program 2 Press X to go to page 2 POINT 2 3 4 Brush Area 3 Press 4 to select Brus...

Страница 45: ...a determined Brush Width distance after each pass along the X axis After registering the Brush Area Rectangle command teach a Line Start point at the top left corner of the area to be brushed and a Li...

Страница 46: ...ne Start point Then jog the tip directly across to the center of the circle and register that location as a Line End point the tip will not dispense a straight line between these two points If for exa...

Страница 47: ...om the outside of the rectangle to the center After registering the Brush Area Rectangle 1 command teach a Line Starting point at the top left corner of the area to be brushed and a Line End point at...

Страница 48: ...m the outside of the rectangle to the center After registering the Brush Area Rect Band command teach a Line Start point at the top left corner of the area to be brushed and a Line End point at the bo...

Страница 49: ...circle After registering the Brush Area Circle Band command jog the tip to a point on the outside limit of the circle to be brushed and register that location as a Line Start point Then jog the tip di...

Страница 50: ...Then jog the tip directly across on the outside limit of the circle to be brushed and register that location as a Line End point the tip will not dispense a straight line between these two points If...

Страница 51: ...he address immediately after the Call Subroutine instruction The Call Subroutine function is most useful to repeat a pattern anywhere on the work piece as opposed to the Step Repeat function where the...

Страница 52: ...jump to the specified program number and execute the program data in the destination program until the End Program command is reached When the destination program is executed the robot will return to...

Страница 53: ...nd of the program After program completion the dispensing tip moves to the home position If used in the body of the program the tip is moved to the home position and the next instruction is executed T...

Страница 54: ...label that can be used as a reference when used with the GOTO Loop address Set I O Step repeat X Step repeat Y and Call Subroutine commands Label can be used instead of Address number A maximum of 64...

Страница 55: ...up and point dispense setup The default dispense output port number is zero Programming Sample Address Instruction 1 Line Dispense Setup Head Time 0 1 Tail Time 0 1 Node Time 0 Tail Length 0 2 Dispens...

Страница 56: ...t From and the ending number of the group to edit To GROUP EDIT FROM 1 TO 1 1 4000 F1 All F2 End 2 Type 1 then press ENTER to register 1 in From Type 20 then press ENTER to register 20 in To GROUP EDI...

Страница 57: ...r of the group to edit To GROUP EDIT FROM 1 TO 1 1 4000 F1 All F2 End 2 Type 15 then press ENTER to register 15 in From Type 25 then press ENTER to register 25 in To GROUP EDIT ADDR 15 25 1 Copy 5 Dis...

Страница 58: ...ype 20 then press ENTER to register 20 in To GROUP EDIT ADDR 10 20 1 Copy 5 Dispense Time 2 Delete 6 Offset 3 Move 7 Offset R E 4 Line Speed Select 3 The Group Edit menu will then appear allowing the...

Страница 59: ...T ADDR 1 200 1 Copy 5 Dispense Time 2 Delete 6 Offset 3 Move 7 Offset R E 4 Line Speed Select 3 The Group Edit menu will then appear allowing the user to select an operation to be applied to the range...

Страница 60: ...opy 5 Dispense Time 2 Delete 6 Offset 3 Move 7 Offset R E 4 Line Speed Select 3 The Group Edit menu will then appear allowing the user to select an operation to be applied to the range of points Press...

Страница 61: ...0 then press ENTER to register 200 in To GROUP EDIT ADDR 1 200 1 Copy 5 Dispense Time 2 Delete 6 Offset 3 Move 7 Offset R E 4 Line Speed Select 3 The Group Edit menu will then appear allowing the user...

Страница 62: ...ip location you should see that the tip is not exactly at the reference point Line Start X 50 Y 10 Z 35 X 50 Y 10 Z 35 2 Jog the tip to the correct location for the reference point Line Start X 50 Y 1...

Страница 63: ...f the user brings memory address number 8 into the display and then selects F2 MENU 1 Expand Step Repeat address 8 will be expanded into the 44 points which it represents bringing the total number of...

Страница 64: ...se the Z and Z keys to bring the Z axis to the highest and lowest point the Z axis should be allowed to travel the highest Z axis numeric value then select F2 Menu 1 4 Z axis Limit mm The Z axis range...

Страница 65: ...peed setting allows the user to select the jog speed for programming in Teach mode The Jog speed can be set to Low Middle or High speed The default value is 2 Middle 2 9 Adjust Origin Allows the posit...

Страница 66: ...t which it was interrupted such as the middle of a program If Resume is set to 1 and a program is stopped by an emergency stop signal or by the enclosure door switch open signal the program will resta...

Страница 67: ...a backed up with function 1 Backup above The current program number data is restored 3 Clear Erases data in the current program number 4 Copy Copies the current program number to a different program n...

Страница 68: ...rection for X offset Y offset and angle of rotation If for example the work piece fixture has been changed the program position can be adjusted automatically for the new fixture The Relocate Data func...

Страница 69: ...point Point 1 9 Relocate Save To 1 2 Point 6 Press 2 to save the second location in temporary position 2 Then press ENTER 7 Press F2 Menu 1 then 7 Utility Menu and select Relocate Data Relocate Data...

Страница 70: ...for a NEW PASSWORD Type the new password and press ENTER If the password is left blank and ENTER is pressed the password will be removed After changing or resetting the password the robot power should...

Страница 71: ...urn off if you select the DISABLE option 3 9 Test Function The F4000N Series robots offer the convenience of the Test Function command The Test Function is a diagnostic command used for troubleshootin...

Страница 72: ...STOP 0 PROGRAM NUMBER 1 Teach Pad Test Press Key on Teachpad SCANCODE RS232 Test Cross RS232 Pin2 Pin3 Send Char NO RESPONSE Motor Test Table go back 10mm 1 X 2 Y 3 Z IO Test IN 1 1 1 1 1 1 1 1 1 OUT...

Страница 73: ...bered 1 9 The save temp point function is also used with the Relocate Data function See SECTION 5 3 4 Relocate Data 4 3 Move To Temp Point Move To Temp Point retrieves a XYZ position which was stored...

Страница 74: ...ogram instruction It can be used during program editing to confirm the location of the home position 4 8 System Information System information will display the dispensing Software version currently in...

Страница 75: ...move to the start of the line turn on the dispenser and wait for the time period specified in the head time setting before moving The time value can be adjusted to ensure that the material begins flo...

Страница 76: ...spense Setup instruction 5 3 Point Dispense Setup Registers POINT DISPENSE SETUP values which set dispensing time and waiting time at the end of dispensing tail time for dots The registered values wil...

Страница 77: ...s it may encounter on the way to the next point Values for H Speed L Speed and L Length are registered with the Dispense End Setup function by pressing the F4 Setup key then choosing Dispense End Setu...

Страница 78: ...tup key then choosing Z Clearance The Z Clearance value will be used by all points from that memory address forward until another Z Clearance value is found Normally a Z clearance instruction should b...

Страница 79: ...e Speed sets default X and Y axis movement speed as the tip moves between figures in a program such as from one dispense point to another or from the end of line dispensing to the next start of line d...

Страница 80: ...a program cycle if the End Program or Home Point instruction is registered The default home position is X 0 Y 0 Z 0 To change the home position jog the tip to the desired location for the new home pos...

Страница 81: ...reference point must be registered in the program data This only needs to be done one time such as when the program is originally created Instruction Display Shows 1 Jog the tip to the reference poin...

Страница 82: ...Counter 2 Adjust Origin 3 Relocate Data 2 Press 2 to select Adjust Origin MESSAGE BOX Press ENTER Adjust Position 3 Press the Enter key The tip will move to the reference point previously saved X 10...

Страница 83: ...nsing high viscosity or stringy materials as it will lay the material s tail down on the dispensed bead There are five types of the Retract Setup functions 0 Normal 1 Back 2 Square Back 3 Forward and...

Страница 84: ..._______________________________________________________ _______________________________________________________________________ _______________________________________________________________________...

Страница 85: ...rom the line end must be smaller than the value of Z clearance in that point RETRACT SPEED the speed at which the tip moves along the retract path RETRACT TYPE 0 NORMAL 1 BACK 2 SQUARE BACK 3 FORWARD...

Страница 86: ...part materials that have a very short pot life For example if a Wait Time of 5s and a Purge Time of 2s is registered in the Auto Purge Setup the following chart shows the Purge pattern 5 13 ESTOP Out...

Страница 87: ...on parameter is inversely related to the robot s acceleration A small value will result in a high acceleration and vice versa Very small values can make the motors slip and can cause the driver cards...

Страница 88: ...OFF 5 Connect the USB drive to Robot USB port and then turn the robot ON 6 Initialize the robot by pressing the Home Start button 7 Press the F4 Key Setup Menu and go to page 3 8 Select USB Up Down Lo...

Страница 89: ...OFF and insert the USB drive into the port 8 Turn the robot ON 9 The robot will automatically locate the updata folder in the drive and run the batch file to update the software You should see the Mac...

Страница 90: ...F4000N Series Operating Manual Section 6 Sample Programs Part 562187N 1 Rev D Sep 2012 89 2012 Fisnar Inc SECTION 6 Sample Programs...

Страница 91: ...sing the tip Sets a wait time of 0 10 sec at line passing point with the dispenser on Sets a length of 5mm before the end of the line where the dispenser will be off 0003 Point Dispense Setup Dispense...

Страница 92: ...5 25 35 Registers an Arc point at X 5 mm Y 25 mm Z 35 mm 0009 Line Passing 10 30 35 Registers a Line Passing point at X 10 mm Y 30 mm Z 35 mm 0010 Line End 10 40 35 Registers a Line End point at X 10...

Страница 93: ...ser will be off 0003 Dispense End Setup H Speed 75 mm sec L Speed 15 mm sec L Length 10 mm Programs the robot to rise after dispensing The tip will rise 10 mm L Length at 15 mm sec L Speed then contin...

Страница 94: ...Setup Dispense Time 0 50 sec Tail Time 0 25 sec Sets the dispensing time for all dots to 0 5 seconds Sets the waiting time after dispensing a dot to 0 25 seconds 0002 Dispense End Setup H Speed 75 mm...

Страница 95: ...a dot at X 185 mm Y 20 mm Z 35 mm First Part third dot 0007 Dispense Dot 185 25 35 Dispenses a dot at X 185 mm Y 25 mm Z 35 mm First Part four dot 0008 Step Repeat Y Columns 4 Rows 3 X Offset 25 mm Y...

Страница 96: ...Time 0 50 sec Tail Time 0 25 sec Sets the dispensing time for all dots to 0 5 seconds Sets the waiting time after dispensing a dot to 0 25 seconds 0002 Dispense End Setup H Speed 75 mm sec L Speed 15...

Страница 97: ...0 seconds Wait for 0 20 seconds 0010 LOOP ADDRESS Count 10 Address 8 Repeat instructions 0008 0009 10 times 10 times a wait time of 0 20 seconds 2 00 seconds 0011 GOTO Addr 0013 If after 2 0 seconds t...

Страница 98: ...F4000N Series Operating Manual Section 7 Error Messages and Specifications Part 562187N 1 Rev D Sep 2012 97 2012 Fisnar Inc SECTION 7 Error Messages and Specifications...

Страница 99: ...ssing point an Arc point or a Line End point without first registering a Line Start point Resolution Register a Line Start point before registering a Line Passing point Arc point or a Line End point 1...

Страница 100: ...Over Memory An attempt was made to move data but the move would exceed the maximum memory address Resolution Reduce the data to be moved 1 7 System Error This message indicates a problem with the CF...

Страница 101: ...ges and Specifications Part 562187N 1 Rev D Sep 2012 100 2012 Fisnar Inc 2 I O Specifications 2 1 Dispenser Connector Pin Description 1 NOM Normally Open 2 COM Common 3 EARTH Ground Notes Maximum Volt...

Страница 102: ...Rev D Sep 2012 101 2012 Fisnar Inc 2 2 Ext Control Connector The pin assignments for the external control connector are as follows Pin Description 1 Start Signal 2 Start Signal 3 Door Switch COM 4 Doo...

Страница 103: ...ype Photo coupler Output Power F4300 4400 4500N output signals are able to provide a maximum of 24 volts F4300 4400 4500N output signals are able to provide a maximum of 250 milliamps per pin Function...

Страница 104: ...sure to install a diode as shown to prevent damage to the output photocoupler 2 4 Input Signals Pin Description 1 IN 1 2 IN 2 3 IN 3 4 IN 4 5 IN 5 6 IN 6 7 IN 7 8 IN 8 9 Reserve 10 Reserve 11 GND 12 G...

Страница 105: ...fications Part 562187N 1 Rev D Sep 2012 104 2012 Fisnar Inc 2 5 Input Output Schematic 2 6 Input Output Power Specifications F4300N F4400N F4500N Inputs Internal Power Supply Outputs Internal Power Su...

Страница 106: ...t External I O Card The F4000N robots have an optional accessory I O Card P N A113005103 C which can be used to power external devices for longer periods of time Please contact Fisnar for more details...

Страница 107: ...02mm Axis Resolution 0 001mm Axis Data Memory capacity 100 programs 4000 points program Drive System Stepping Motor 3 Phase Motion Control PTP CP Linear Circular Interpolation 3 axes Teaching Method...

Страница 108: ...F4000N Series Operating Manual Section 7 Error Messages and Specifications Part 562187N 1 Rev D Sep 2012 107 2012 Fisnar Inc 4 Machine Dimensions 4 1 F4300N Dimensions UNIT millimeters mm...

Страница 109: ...F4000N Series Operating Manual Section 7 Error Messages and Specifications Part 562187N 1 Rev D Sep 2012 108 2012 Fisnar Inc 4 2 F4400N Dimensions UNIT millimeters mm...

Страница 110: ...F4000N Series Operating Manual Section 7 Error Messages and Specifications Part 562187N 1 Rev D Sep 2012 109 2012 Fisnar Inc 4 3 F4500N Dimensions UNIT millimeters mm...

Страница 111: ...F4000N Series Operating Manual Section 7 Error Messages and Specifications Part 562187N 1 Rev D Sep 2012 110 2012 Fisnar Inc 4 4 Work Table Dimensions Work Table mm Z Axis Plate mm...

Страница 112: ...F4000N Series Operating Manual Section 8 Maintenance and Periodic Inspection Part 562187N 1 Rev D Sep 2012 111 2012 Fisnar Inc SECTION 8 Maintenance and Periodic Inspection...

Страница 113: ...ge the internal cables timing belts and other components of the unit Use only the greasing materials recommended by the manufacturer of the machine 1 2 Check Cycles and Points The check cycles of the...

Страница 114: ...bration Motor running condition Infiltration of grease Performance degradation due to overload Replace motor see agent Motions connections and joints The axes are not moving smoothly Noises vibrations...

Страница 115: ...entistokes Recommended THK brand white lithium grease solid or spray or equivalent Greasing period every 6 months 2 2 Accessing Parts to be Greased a Unscrew the bolts shown with arrows in the followi...

Страница 116: ...F4000N Series Operating Manual Section 8 Maintenance and Periodic Inspection Part 562187N 1 Rev D Sep 2012 115 2012 Fisnar Inc Y Axis...

Страница 117: ...F4000N Series Operating Manual Section 8 Maintenance and Periodic Inspection Part 562187N 1 Rev D Sep 2012 116 2012 Fisnar Inc Z Axis...

Страница 118: ......

Отзывы: