| Start-up
22
|
50145736
Fisherbrand
Chapter 5
1. Loosen the two screws [1] in the bottom panel, then remove the entire bottom panel by lifting
it out of its two embossings.
Figure 5-5.
Bottom Panel Removed
2. Grab the two retaining springs [1] at their tabs and pull them downwards out of the
embossings, then pull off the lateral air baffle.
Figure 5-6.
Removing the Lateral Air Baffle
3. For the lateral air baffles to install correctly, the two retaining springs [1] must be facing
upwards. Place the lateral air baffle on the lower embossings and tilt it upwards against the
side wall of the work space.
4. Clamp the two retaining springs [1] into the upper embossings.
5. Replace the bottom panel into the embossings and secure it by fastening the two screws at [1].
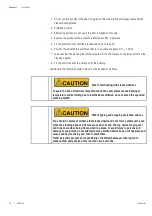
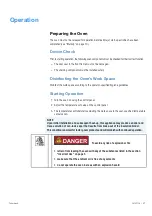
Risk of damage to sensor!
To prevent accidental damage, be sure to avoid collision with the sensor when
installing or uninstalling panels in the oven‘s workspace.
Содержание Fisher Sei 100L Gravty
Страница 1: ......
Страница 5: ...Fisherbrand 50145736 3 Chapter 15 Spare Parts and Accessories 51 Chapter 16 Device Log 53 ...
Страница 6: ...4 50145736 Fisherbrand ...
Страница 8: ...2 50145736 Fisherbrand ...
Страница 14: ... Safety Notes 6 50145736 Fisherbrand Chapter 1 ...
Страница 34: ... Start up 26 50145736 Fisherbrand Chapter 5 ...
Страница 40: ... Handling and Control 32 50145736 Fisherbrand Chapter 7 ...
Страница 42: ... Shut down 34 50145736 Fisherbrand Chapter 8 ...
Страница 46: ... Cleaning and Disinfection 38 50145736 Fisherbrand Chapter 9 ...
Страница 52: ... Disposal 44 50145736 Fisherbrand Chapter 11 ...
Страница 54: ... Error Codes 46 50145736 Fisherbrand Chapter 12 ...
Страница 60: ... Spare Parts and Accessories 52 50145736 Fisherbrand Chapter 14 ...
Страница 62: ... Device Log 54 50145736 Fisherbrand Chapter 15 ...


