background image

20

£

Modifiable parameters located in PROGRAM SETUP MENU

TO VIEW AND MODIFY A PROGRAMMABLE PARAMETER: 

Use the NEXT or BACK key to scroll to PROGRAM SETUP. Press the MODE key to enter the sub-
menu showing all program setup parameters. Pressing the MODE key while in the sub-menu will
exit the sub-menu, and the next main menu item will be displayed. While in the sub-menu, pressing
the NEXT key will scroll forward through the sub-menu. Pressing the BACK key will scroll back-
ward through the sub-menu. When a modifiable parameter is displayed, the top line will indicate
MDFY TO CHANGE while the bottom line will indicate the current item and its current value.
Pressing the RESET/MDFY key will allow the displayed parameter to be modified. The item to be
modified will move to the top line while its value will remain on the bottom line. At an infrequent
rate, the top line will indicate MDFY TO SAVE. Use the NEXT or BACK keys to select the value to
suit the application and when done, press the RESET/MDFY to save the value to memory.

Note 1:

 Not affected by 8 hour burn-in or LOCK SETTINGS.

Refer to SYSTEM INFO Sub Menu, page 27, for language selection.

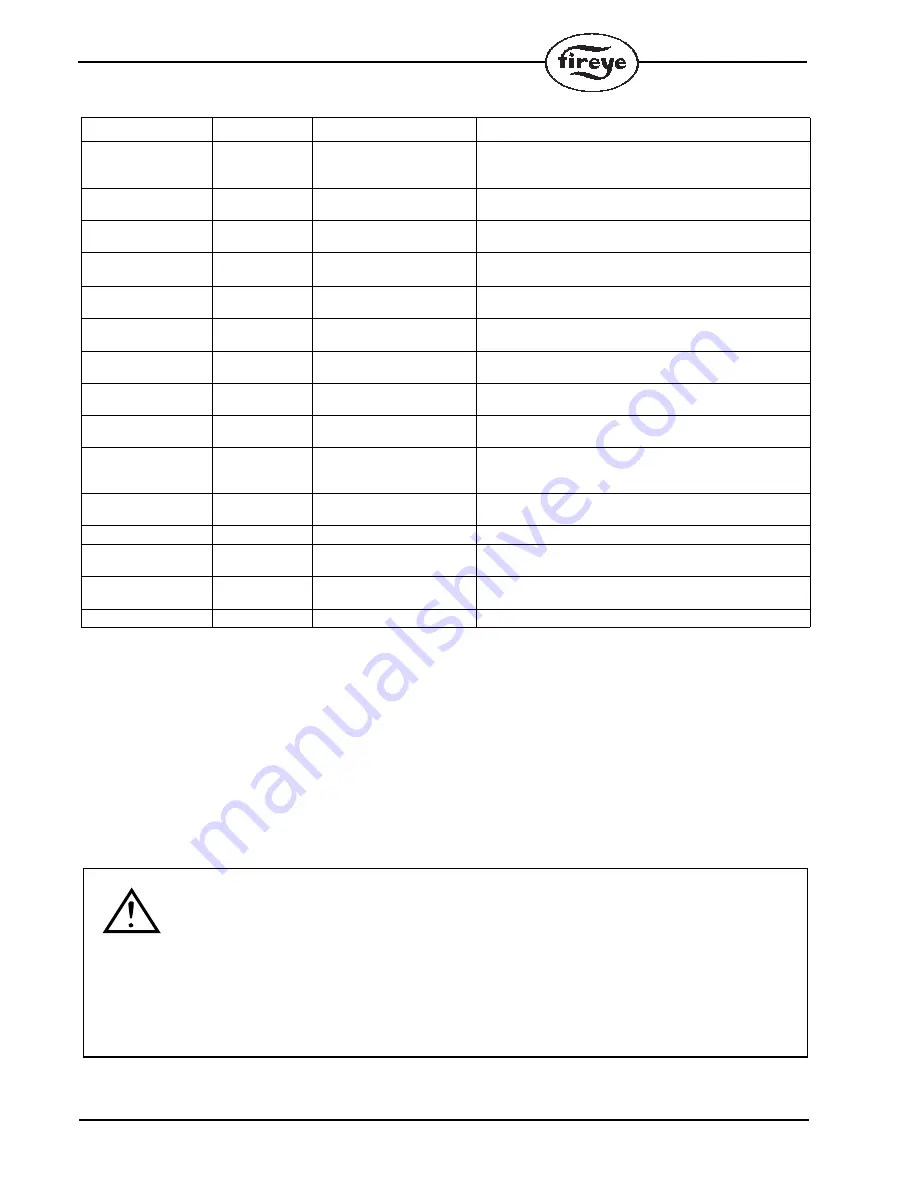
Parameter

Factory Default

Range

Description

Purge time

00:30s

0:30s – 60:00m, 15 second 
increments.
(0:00s - 60:00m in YP3XX)

Applies to open damper purge time in YP1XX and YP2XX pro-
grammers and to low fire start time in YP3XX programmers

Count method

DOWN

UP, DOWN

1

Time counts UP to final value or DOWN to zero from starting 
value. This setting will apply to all timer values.

Prove 3-P open at start

NO

YES, NO

Prevents jumped terminals. Requires the 3-P circuit to be 
open at the start of a cycle.

PTFI*MTFI timing

10/10*10/15

YP113 = 5/5*3/5

See chart on page 15

Applies to terminals 5 and 6 operation during PTFI and MTFI.

Terminal 6 interrupted 

or intermittent

INTRP

INTRP, INTMT

Provide interrupted or intermittent operation on terminal 6.

Prove M-8 open

NO

YES, NO

If YES, M-8 must be open at start of open damper purge 
period. (YP1XX Series only).

Prove M-D open

NO

YES, NO

If YES, M-D must be open at end of open damper purge 
period. Does not apply to YP3XX Series.

Post purge

0:15

0:15s - 1:00m, 5 second 
increments.

Selects Post Purge time

3-P Recycle

YES

YES, NO

Applies to YP3XX series only. Allows non-recycle operation of 
3-P circuit.

M-D WAIT 10m

YES

YES, NO

Select YES for lockout on M-D open for 10 minutes. Select 
NO for indefinite wait for M-D to close. This wait time applies 
prior to pilot trial for ignition.

PROVE M-D TFI

NO

YES, NO

Select YES to force lockout on M-D opening during PTFI and 
MTFI

Baud rate

9600

4800, 9600, 19200

1

Sets communication rate

Unit address

00

00-31

1

Multi-drop requires unique addressing. Lowest address 
allowed for modbus is 01

Lock Settings

NO

YES, NO

Parameters can be stored to memory before automatic 8 hour 
store.

DO IR LEARN

NO

YES, NO

1

Select YES to activate IR LEARN process. See IR operation.

All programmed settings become permanent if the BurnerLogix system has been powered
continuously and 8 hours of main burner (terminal 7) on time has been accumulated. If the
AC power is removed prior to accumulating 8 hours of main burner on time, the system
burn-in time clock will be reset to zero. It is not necessary for the main burner on time to be
continuous. The BurnerLogix accumulates burner on time in seconds. For example, assume
power has been applied for 10 hours and the main burner has been on for 4 hours. If the AC
power is removed and then restored the accumulated main burner on time will be reset to 0.
If necessary, the programmed settings can be made to become permanent anytime before
the required 8 hours of main burner on time through the use of the optional keypad and the
LOCK SETTINGS option under the PROGRAM SETUP sub menu. 

Содержание BurnerLogiX YB110

Страница 1: ... 2 lines by 16 characters per line and is available in either vacuum fluorescent or liquid crystal formats The advantage of VFD is high brightness and extended temperature range to 40 F Both displays contain a fully functional keypad allowing the user to easily scroll through the various menus to view the current operating status review program mer configuration and lockout history An advantage of...

Страница 2: ... occurs after 8 hours of main valve on time A run check switch which allows the operator to stop the program sequence in any of four different positions Purge PTFI MTFI or Auto Remote Display mounting with NEMA 4 protection Remote Reset Programmable communication baud rate allows for DCS compatibility Keypad selectable language readout Revert to pilot can increase burner turn down Additional termi...

Страница 3: ...NSTALLATION INFRARED SCANNER TYPE 48PT2 23 OPERATION IR LEARN 24 INSTALLATION 69ND1 FLAME ROD 26 SYSTEM INFO SUB MENU 27 SYSTEM OPERATION 27 YP100 OPERATING SEQUENCE 28 START UP NORMAL CYCLE 29 YP200 OPERATING SEQUENCE 31 YP300 OPERATING SEQUENCE 32 YP138 PROGRAMMER 35 LOCKOUTS 38 SAFETY SHUTDOWN 38 DIAGNOSTIC MESSAGES 39 RESETTING THE CONTROL 39 LOCKOUT CODES 40 LOCKOUT HISTORY SUB MENU 41 COMMUN...

Страница 4: ... F 40 C BLL510 LCD Display 140 F 60 C 4 F 20 C Scanner UV1A UV2 UV8A UV90 45UV3 200 F 93 C 40 F 40 C 45UV5 1005 45UV5 1105 45UV5 1007 45UV5 1009 55UV5 1007 55UV5 1009 200 F 93 C 40 F 40 C 48PT2 140 F 60 C 40 F 40 C Flame Rod Tip 2460 F 1500 F 816 C 40 F 40 C Humidity 90 R H Non condensing Terminal Typical Load A Maximum Rating 120V 50 60 Hz B Maximum Rating 230V 50 60 Hz C Alternate Rating M Burne...

Страница 5: ...nition Trm 5 Delayed Valve Trm W 1 C E No Load No Load 2 B E No Load No Load 3 No Load E No Load B 4 E E A No Load 5 No Load E A E 6 D E A No Load 7 D D A D 8 No Load D A No Load A B C D E 4 5A Ignition 120 VAC 50 VA Pilot Duty plus 4 5A ignition 120 VAC 180 VA Ignition plus motor valves with 660 VA inrush 360 VA open 250 VA hold 2A Pilot Duty 120 VAC 65 VA Pilot Duty plus Motor valves with 3850 V...

Страница 6: ...g No NG 2510BT0347 DIN CERTCO Reg No 5F233 08 WARNING This equipment generates and can radiate radio frequency energy and if not installed and used in accordance with the instruction manual may cause interference to radio communications It has been tested and found to comply with the limits for a Class A computing device pursuant to Subpart J of part 15 of FCC Rules which are designed to provide r...

Страница 7: ...110FR YB110DC YB230UV X X X YB230UVSC X X X YB230IR X X X BurnerLogix Programmer Module YP100 X X X YP102 X X X YP138 X X X YP118 X X X YP200 X X X YP202 X X X YP300 X X X YP302 X X X YP113 X X X X X X BurnerLogix Displays BLV512 X X X X X X BLL510 X X X X X X BurnerLogix Wiring Bases 60 2810 1 X X X X X 60 2812 1 X X X X X 60 2814 1 X X X X X X CERTIFICATION IN HAND APPROVED ...

Страница 8: ...en damper proving indefinite pilot hold revert to pilot from auto 4 second FFRT YP118 Keypad selectable parameters non recycle operation modulation open damper proving indefinite pilot hold revert to pilot from auto 1 second FFRT YP200 Keypad selectable parameters recycle operation modulation 4 second FFRT YP202 Keypad selectable parameters recycle operation modulation 2 second FFRT YP300 Keypad s...

Страница 9: ...ight mount 96 2438mm flex conduit Infrared 1 2 straight mount 48 1219mm flex conduit Infrared 1 2 90 angle mount 48 1219mm flex conduit Replacement photo detector YB110IR YB230IR SC 103 UV1A3 UV1A6 UV8A UV2 UV2A6 45UV3 1050 UV90 3 UV90 6 UV90 9 UV 1 2 straight 36 915mm flex conduit UV 1 2 straight 72 1830mm flex conduit UV 1 2 90 head 72 1830mm flex conduit UV 3 8 straight 36 915mm flex conduit UV...

Страница 10: ...OUNT 60 2812 1 CLOSED BOTTOM CONDUIT KNOCKOUT 60 2814 1 SHOWN SIDE VIEW CHASSIS AMPLIFIER 120 VAC 50 60 Hz YB110UV YB110UVSC YB110IR YB110FR YB110DC 230 VAC 50 60 Hz YB230UV YB230 UVSC YB230IR PROGRAMMER MODULE YP100 YP102 YP200 YP202 YP300 YP302 YP113 YP138 YP118 DISPLAY MODULE BLV512 VACUUM FLUORESCENT BLL510 LIQUID CRYSTAL WITH OPTIONAL PROGRAMMER AND DISPLAY INSTALLED ...

Страница 11: ...y M Brown Output Combustion Blower 120 VAC 9 8 FLA 58 8 LRA 3 Yellow Input Operating Control 120 VAC 1 mA 13 Orange Input Fuel Valve End Switch Pre Ignition Interlock 120 VAC 1 mA P Gray Input Running Interlock 120 VAC 1 mA D Wht Brn Input Low Fire Start Switch 120 VAC 1 mA 8 Wht Gry Input Open Damper Proving Switch 120 VAC 1 mA W Wht Orn Output Delayed Main Valve See Load Ratings 5 LT Blue Output...

Страница 12: ...meters to terminal inputs Operating limits interlocks valves etc b Flame Detector lead wires see section on flame scanners c Remote reset The maximum length of wire is 500 feet 152 meters to a normally open remote reset push button but should remain within sight and sound of the burner d Modbus communications The maximum cable length of wire is 3300 feet 1000 meters for RS 485 A good ground system...

Страница 13: ...the neutral wire L2 at the power source Remove the test probe from the grounded terminal and reconnect it to Terminal L2 in the wiring base With the other probe touch each other terminal It is normal to obtain a resistance reading on the meter at some terminals during this test as there are resistive loads coils transformers lamps etc connected whose normal DC resistance may be less than 5 ohms Ho...

Страница 14: ...RE FACTORY DEFAULT YP100 30 YES YES INTRP NO 10 10 10 15 Non recycle 4 YES YP102 30 YES YES INTRP NO 10 10 10 15 Non recycle 2 YES YP138 30 YES YES INTRP NO 10 10 10 15 Non recycle 4 YES YP118 30 YES YES INTRP NO 10 10 10 15 Non recycle 1 YES YP113 30 YES YES INTRP NO 5 5 3 5 Non recycle 1 YES YP200 30 NO YES INTRP NO 10 10 10 15 Recycle 4 YES YP202 30 NO YES INTRP NO 10 10 10 15 Recycle 2 YES YP3...

Страница 15: ... in the CHECK position during Purge PTFI MTFI and AUTO OPEN DAMPER Will blink when the modulator motor is being driven to the high fire position circuit 10 X made Once the high purge switch closes M 8 this LED will light constant This LED pro vides the status of the high fire purge interlock circuit M 8 This LED lights anytime the M 8 circuit closes during Prepurge PTFI MTFI Post Purge CLOSE DAMPE...

Страница 16: ...fore another attempt to apply power For installations requiring CE certification Only Fireye or a Fireye trained technician is allowed to replace the fuse All other installations The fuse is located on the printed circuit board containing the relays To replace the fuse remove power from the system and remove the control from its wiring base Using an appropriate tool remove the defective fuse and d...

Страница 17: ...high and low fuel pressure switches oil temperature switches atomizing media pressure switches and excess smoke den sity controls These interlocks prove proper conditions for normal operation of the burner They are wired in series and connected between Terminals 3 and P 6 Low Fire Start Interlock Generally a firing rate motor linkage position switch or a damper position switch will prove both the ...

Страница 18: ... reset the BurnerLogix from a lockout condition force a recycle of the programmer indicate to the system the value displayed is to be modified or when done with the modification FIGURE 2 BURNERLOGIX MENU STRUCTURE BNR LOCKOUTS BNR CYCLES START HERE Scrolls through menu clockwise Keypad Legend PROGRAM SETUP SYS HOURS STANDBY L1 3 OPEN BNR HOURS MODE STANDBY PROGRAMMER YP100 LOCKOUT HISTORY MODE LO ...

Страница 19: ...BACK keys are used to scroll through the menu as well as change the operational parameter P MDFY TO CHANGE FLM FAIL TIME 4 SEC AMP IR PROGRAMMER YP100 DO IR LEARN NO LOCK SETTINGS NO START HERE MODE PROVE 3 P OPEN N MDFY TO CHANGE COUNT METHOD DOWN MDFY TO CHANGE PURGE 0 30 UNIT ADDRESS 1 BAUD RATE 9600 PROVE M D TFI NO M D WAIT 10m YES POST PURGE 0 15 PROVE M D OPEN NO PROVE M 8 OPEN NO TERMINAL ...

Страница 20: ... MTFI Terminal 6 interrupted or intermittent INTRP INTRP INTMT Provide interrupted or intermittent operation on terminal 6 Prove M 8 open NO YES NO If YES M 8 must be open at start of open damper purge period YP1XX Series only Prove M D open NO YES NO If YES M D must be open at end of open damper purge period Does not apply to YP3XX Series Post purge 0 15 0 15s 1 00m 5 second increments Selects Po...

Страница 21: ...ipe temperature 4 Install the scanner on a standard NPT pipe UV1A 1 2 UV2 3 8 45UV5 1 whose position is rigidly fixed If the scanner mounting pipe sights through the refractory do not extend it more than halfway through Swivel flanges are available if desired 60 302 for UV1A UV2 Scan ners 60 1664 3 for 45UV5 The sight pipe must permit an unobstructed view of the pilot and or main flame and both pi...

Страница 22: ...nuous or where the burner is on for long periods of time without recycling In addition ultra violet self checking systems are mandatory in some locations The operation of this type of system consists of maintaining the flame scanning capability at all times while also proving that the ultra violet tube is firing properly This is done periodically by mechani cally closing off the sight of the UV tu...

Страница 23: ... be installed in the same conduit with flame detector wires INSTALLATION INFRARED SCANNER TYPE 48PT2 Where possible obtain the burner manufacturer s instructions for mounting the scanner otherwise proceed as follows A single scanner is used to detect both pilot and main flames The sight pipe on which the scanner mounts must be aimed so that the scanner sights a point at the intersection of main an...

Страница 24: ...timum flame on and flame off thresholds can be set during the LEARN process Out of the box the BurnerLogix IR system is shipped with its sensitivity and thresholds set to detect most firing conditions The purpose of the LEARN process is to trim the sensitivity either upward or downward to the level required for reliable flame detection and most importantly for an overall improvement in detecting a...

Страница 25: ...creases in amplitude or radiation may cause the displayed value to increase or decrease Should the displayed value continue to decrease possibly due to changing conditions in the boiler such as a bright background causing a reduction in scanner sensitivity it is suggested to activate a new DO IR LEARN during AUTO Without shutting the burner off scroll to PROGRAM SETUP and in that sub menu modify D...

Страница 26: ...refractory 3 Flame rod should enter the pilot flame from the side so as to safely prove an adequate pilot flame under all draft conditions 4 If the flame is nonluminous air and gas mixed before burning the electrode tip should extend at least 1 2 into the flame but not more than halfway through 5 If the flame is partly luminous the electrode tip should extend only to the edge of the flame It is no...

Страница 27: ...ional operation of the Burnerlogix control e g purge timing trial for ignition timings recycle or non recycle operation etc For purposes of illustration we will be looking at the YP100 Programmer functions and messages associated with the BLL510 display module in this bulletin Because the messages change depending upon which YP style programmer is being used it is necessary to check the bulletin c...

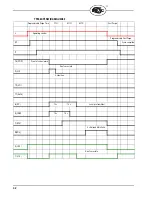
Страница 28: ...ust close within 10 seconds of HFS M 8 closing P Valve closes in one second 13 POC Proof of valve closure Don t care state X HI Purge Complete 12 LO 11 Auto PTFI MTFI times keypad selectable 6 PV 15 s 10 s 5 IGN PV 10 s W IGN 5s 7 MV Programmable time begins 30 sec minimum 8 HFS LFS must be closed Don t care state D LFS 30 s LFS ...

Страница 29: ...the beginning of a cycle the top line of a display will switch to PURGE 10 seconds 6 When the prepurge is completed the firing rate motor is driven toward the low purge damper position 10 12 circuit made The BLV512 will display 7 Following the minimum 30 second delay to permit the firing rate motor to get to the low fire position the control will wait for the low fire switch M D to close When it c...

Страница 30: ...n 10 11 circuit made and is under the command of the proportional controller The BLV512 will display Normal Shutdown 1 When the operating control circuit L1 3 opens the main fuel valve is de energized The firing rate motor is driven to the low purge position 10 12 circuit made 2 Following a 15 second post purge the burner blower motor is de energized 3 The burner is now off and the BLV512 will dis...

Страница 31: ...TO Post Purge 3 Operating control M Cycle complete Air Flow terminal P must close within 20 seconds of cycle start P 13 POC Proof of valve closure Programmable time begins 30 sec minimum Don t care state X HI 12 LO 11 Auto 6 PV 10 s 15 s 5 IGN 10 s 10 s 7 MV Ignore M 8 Input 8 HFS Don t care state D LFS 30 s ...

Страница 32: ... Post Purge 3 Operating control Programmable Post Purge M Cycle complete P 13 POC Proof of valve closure Don t care state X HI 5 s Ignition 12 LO 11 Auto 6 PV 10 s 15 s Usually Intermittent 5 IGN 10 s 10 s 7 MV 5 s Delayed Main Valve W DV 8 HFS Don t care state D LFS ...

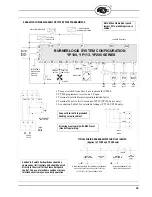
Страница 33: ...ectly in the circuit of the Flame Safeguard control The use of electronic switches to close interlock circuits may cause erratic operation YP100 YP113 YP200 SERIES Tf P L2 N 13 Means and Overload Protection Required ALARM BLOWER SUGGESTED WIRING DIAGRAM FOR YP100 YP200 PROGRAMMERS FUEL VALVE END SWITCH 1 Purge air switch from M to 8 not required for YP200 2 YP200 programmer recycles on 3 P open 3 ...

Страница 34: ...CH RECYCLING INTERLOCKS NON RECYCLING RUNNING INTERLOCKS BURNERLOGIX SYSTEM CONFIGURATION 8 SCANNER TERMINALS YP300 SERIES Tf P 13 ALARM BLOWER W FUEL VALVE END SWITCH NOT USED MV PV 11 12 5 FUEL 5 SECS MAIN FUEL MV SV 7 X 6 PRIMARY SECONDARY OIL VALVE OIL VALVE L2 TERMINAL 5 Interrupted Pilot Valve TERMINAL 6 Selectable intermittent interrupted operation TERMINAL W Energized 5 seconds into AUTO T...

Страница 35: ...the circuit of the Flame Safeguard control The use of electronic switches to close interlock circuits may cause erratic operation 1 Terminal 6 selectable interrupted intermittent pilot 2 Terminal W active first 5 seconds of PTFI 3 See chart on Table 2 for selectable timings Connect terminal E to grounded bonding screw in cabinet All wiring must comply with NEC Class 1 Line Voltage wiring JUMPER WI...

Страница 36: ...ow fire position and the sys tem waits for the low fire start switch M D to close While in this wait mode the display indicates HOLD T16 42 while in AUTO Terminal 16 closes M D LIMIT OPEN wait for low fire interlock to close Once the low fire start switch is detected as closed terminal 6 is energized to open the pilot valve A 20 second time delay is then imposed with both the main valve 7 and pilo...

Страница 37: ...16 At the conclusion of PTFI if T16 is open the control will advance through MTFI to AUTO If START INPUT T21 and PILOT HOLD T16 are both active in AUTO T16 has priority and revert to pilot will be initiated The user shall contact the burner manufacturer to determine if the pilot assembly is rated for intermittent operation ...

Страница 38: ...PROVE M D OPEN is selected as YES and the M D switch is closed at the end the high fire purge cycle the control will hold for thirty 30 seconds for it to open If after thirty 30 seconds the M D is still closed the control will lockout d If PROVE M D TFI is selected as YES the low fire start switch located between terminals M D must be closed during PTFI and MTFI 7 If pilot flame is not detected af...

Страница 39: ...B chassis amplifier Replace YB module CHECK WIRING Voltage is detected on terminals at improper time Check system wiring Measure voltages on input output terminals CHECK SCANNER Flame signal detected during shut ter close time in 45UV5 or 55UV5 scanner Check power on shutter terminals and or replace shutter in scan ner Runaway UV tube Replace UV tube part number 4 314 1 CHECK EXPANSION MODULE Inte...

Страница 40: ...D SWITCH OPEN z z M D LOW FIRE START OPEN z z M D LOW FIRE START OPEN PTFI z z z M D LOW FIRE START OPEN MTFI z z z z M D CLOSED z z M 8 CLOSED z z M 8 HIGH PURGE CIRCUIT OPEN z FALSE FLAME STANDBY z z FLAME FAIL PTFI z z z z FLAME FAIL MTFI z z z z z FLAME FAIL AUTO z z z 3 P RUN INTLK OPEN PREPURGE z z z 3 P RUN INTLK OPEN PURGE z z z 3 P RUN INTLK OPEN PTFI z z 3 P RUN INTLK OPEN MTFI z z z 3 P...

Страница 41: ...he Burner Hour followed by the Burner Cycle when the lockout occurred The NEXT key will advance to the next lockout and repeat the sequence listed above The BACK key can be used to scroll back up through the sub menu items The MODE key will exit the sub menu P START HERE MODE LO 9 PURGE BNR HOUR 3 PRESS KEY FROM MAIN MENU LOOP LO 9 PURGE 3 P INTLK OPEN LO 10 STANDBY BNR CYCLE 8 LO 10 STANDBY BNR H...

Страница 42: ...If 4 words were requested then DBC would be 8 and there would be 8 data bytes or 4 data words containing the requested data The format of the data is N 8 1 meaning no parity and 1 stop bit Baud rate is selectable through the keypad display As shipped the baud rate is 9600 Communication to the BurnerLogix control is made through either of the RJ 12 jacks located on the underside of the control note...

Страница 43: ...LOCKOUT 40002 01 1 MSGN Current message being displayed see Table 7 40003 02 1 GSTAT Defines Timer Type 40004 03 1 TIMER Time in seconds 40005 04 1 FLAME Flame Signal 40006 05 1 LOGSTAT Current logic module PURGE PTFI AUTO see Table 6 40007 06 1 INPUTS Input limits state 40008 07 1 OUTPUTS Output relays state 40009 08 2 SYSMINS System on minutes 40011 10 2 BNRMINS Burner on minutes 40013 12 2 CYCL...

Страница 44: ...muni cation format is considered half duplex That is only one user is permitted on the communication lines at a time The information contained in INPUTS and OUTPUTS represents the status of the interlocks and out put relays respectively For the INPUTS a 1 in the interlock position defines the interlock as being on or active where a 1 in any bit position in the OUTPUT register signifies the relay a...

Страница 45: ...x 2 Aux 1 Op Control Bit 7 Bit 0 Term 57 Term 56 Term 55 Term 54 Term 52 Term 51 Term 49 Term 48 Aux 4 High Temp High Pres sure Aux Gas High Gas Pressure Low Gas Pressure Low Atomizing Media Low Oil Pressure Bit 7 Bit 0 Term P Term 60 Term 59 Term 58 Unused Unused Unused Unused Air Flow Aux 7 Aux 6 Aux 5 AUX LIMIT 3 AUX LIMIT 2 AUX LIMIT 1 OPERATING CONTROL HIGH WATER LOW WATER 42 41 40 L2 N HIGH ...

Страница 46: ...r operating control closes when blower motor is energized 3 03H PURGE Open Damper Purge or waiting for air flow and or high fire switch to close 4 04H PURGE Low Fire Purge 5 05H PTFI Pilot Trial for Ignition 6 06H PTFI Pilot Trial for Ignition for YP3XX programmers 7 07H PTFI If PTFI is greater than 5 seconds and early spark termination is not needed 8 08H PTFI If PTFI is greater than 5 seconds an...

Страница 47: ... LOCKOUT 3 P INTLK CLOSED 23 17 H HOLD 3 P INTLK CLOSED STANDBY 24 18 H HIGH FIRE PURGE 25 19 L LOCKOUT M D LIMIT OPEN MTFI 26 1A L LOCKOUT 3 P INTLK OPEN AUTO 27 1B L LOCKOUT 3 P INTLK OPEN MTFI 28 1C L LOCKOUT 3 P INTLK OPEN PTFI 29 1D L LOCKOUT T13 FVES OPEN 30 1E L LOCKOUT 3 P INTLK OPEN PREPURGE 31 1F C CHECK FLAME SIGNAL PTFI 32 20 C CHECK M 8 HI LIMIT HI FIRE PURGE 33 21 C CHECK M D LOW LIM...

Страница 48: ...MIT CLOSED 79 4F H HOLD M D LIMIT CLOSED 80 50 L LOCKOUT M D LIMIT CLOSED 81 51 Reserved for future use 82 52 Reserved for future use 83 53 L LOCKOUT FLAME FAIL PILOT 84 54 L LOCKOUT 3 P INTLK OPEN PILOT 85 55 L LOCKOUT M D LIMIT OPEN PILOT 86 56 L LOCKOUT T13 FVES OPEN PILOT 87 57 L LOCKOUT T13 FVES OPEN POST PURGE DEC HEX BURNERLOGIX MESSAGES ...

Страница 49: ...PEN 53 35 L 59 60 AUX 7 OPEN 40 28 L 60 P AIR FLOW OPEN DEC HEX STATE TERMINAL YZ300 INTERLOCK ANNUNCIATOR HOLD MESSAGES 94 5E H L1 40 OP CONTROL OPEN 60 3C H 40 41 L1 3 AUX 1 OPEN 61 3D H 41 42 L1 3 AUX 2 OPEN 62 3E H 42 3 L1 3 AUX 3 OPEN 63 3F H C 3 43 HIGH WATER 64 40 H C 43 44 LOW WATER 65 41 H C 51 52 HIGH GAS PRESSURE 66 42 H C 50 51 LOW GAS PRESSURE 95 5F H C 52 54 AUX GAS 67 43 H C 47 48 L...

Страница 50: ...MS port jack and the jack is located next to the EXP port Use caution so as NOT to plug the jack into the EXP port The test jacks accept standard plugs having a diameter of 0 078 2mm The maximum input impedance allowed is 100 ohms The chart below correlates the test jack current to the numerical value shown on the display FIGURE 3 COMMS COMMS EXP EXP RUN CHK RUN CHK 4 6 8 10 12 14 16 18 20 0 10 13...

Страница 51: ...Run will allow the control to advance 3 During the PTFI period switching to the Check position will stop the program in the PTFI period allowing for pilot and or scanner alignment adjustments to be made The control will display It will hold in this position indefinitely as long as the flame signal strength is above the threshold of 10 If it drops below 10 for thirty 30 consecutive seconds lockout ...

Страница 52: ...e failure response and lockout 6 Tight shut off of all fuel valves Voltage Test A Voltage Check is necessary to identify a potential problem with the supply to the control This could be caused by an improperly sized or faulty transformer faulty load coils or low entry voltage Follow this procedure 1 Monitor the L1 L2 supply throughout a complete burner cycle The acceptable voltage range is 102V 13...

Страница 53: ...l supply Within 4 seconds after main flame goes out the fuel valve will be de energized The alarm circuit will be energized following safety lockout Minimum Pilot Test This test assures that the flame detector will not detect a pilot flame too small to reliably light off the main flame The test should be made on every new installation and following any repositioning or replacement of the flame det...

Страница 54: ...r 14 AWG copper conductor is adequate wide straps or brackets are preferred rather than lead wires 4 The ground path needs to be low impedance less than 1 ohm to the equipment frame which in turn needs a low impedance to earth ground For a ground path to be low impedance at RF fre quencies the connection must be made with minimum length conductors having maximum sur face areas 5 All connections sh...

Страница 55: ...y ignition cable should be checked periodically for cracking connections and aging In applications using flame rod units it may be beneficial to route a separate return wire from the S2 terminal to the flame rod assembly This will minimize the effects of transient currents flowing into the BurnerLogix In all cases scanner wires should be routed in separate conduit and not joined with any high volt...

Страница 56: ...grated into systems designed or manufactured by others the Fireye warranty as stated in its General Terms and Conditions of Sale pertains only to the Fireye products and not to any other equipment or to the combined system or its overall performance WARRANTIES FIREYE guarantees for one year from the date of installation or 18 months from date of manufacture of its products to replace or at its opt...

Отзывы: