AnF Enclosures
REV. 8-29-18 Page 4
STEP 4
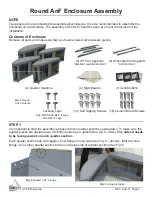
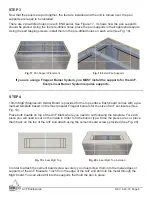
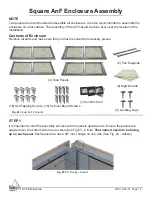
10mm MgO (Magnesium Oxide) Board is provided for the top surface. Each board comes with a
pre-marked template based on the most popular Firegear burners for the size of AnF enclosures
(See Fig. 8).
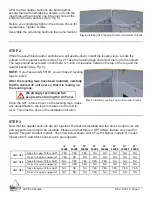
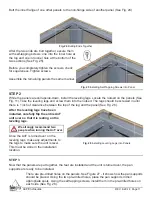
Place all (4) boards on top of the AnF. Mark where you need to cut following the template. For each
piece you will need to cut on the inside (for the pan) and the outside (for the edge of the AnF). Once
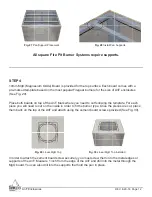
the pieces are cut, place them back on the top of the AnF and attach using the cement board screws
provided (See Fig. 9). You can install the cement board screws anywhere there is metal underneath
the MgO board top. (See Fig. 10).
Fig. 8
Round MgO Top
Fig. 9
Round MgO Top Installed
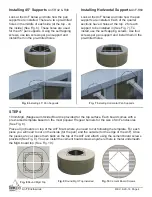
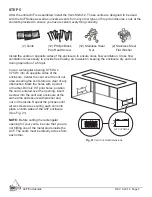
Fig. 6
Installing 45° Pan Supports
Installing 45° Supports
Look at the AnF below and note how the pan
supports are installed. There are two pre-drilled
holes in the middle of each side (at the top - on
the inside) (See Fig. 6). These holes are used
for the 45° pan supports. Using the self tapping
screws, use two screws per pan support and
install them in the pre-drilled holes.
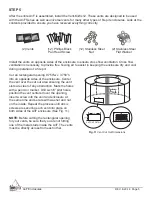
Installing Horizontal Supports
Look at the AnF below and note how the pan
supports are installed. Each of the quarter
sections have 4 holes at the top, 2 for each
support to be installed in (See Fig. 7). To
install, use the self sapping screws. Use four
screws per pan support and install them in the
pre-drilled holes.
Fig. 7
Installing Horizontal Pan Supports
Fig. 10
Cement Board Screws
AnF-R42 & R48
AnF-R60


