38
DAILY MAINTENANCE
5.
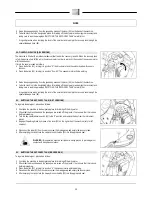
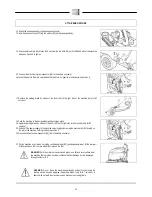
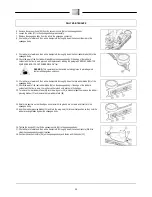
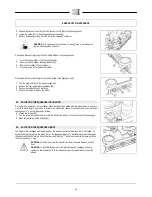
Remove the vacuum hose (05) from the vacuum nozzle (06) on the squeegee body.
6.
Loosen the knobs (07) in the squeegee body pre-assembly.
7.
Remove the squeegee body from the slits in the squeegee connector.
8.
First with a jet of water and then with a damp cloth, thoroughly clean the vacuum chamber of the
squeegee body.
9.
First with a jet of water and then with a damp cloth, thoroughly clean the front rubber blade (08) of the
squeegee body.
10.
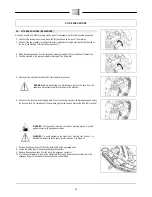
Check the wear of the front rubber blade(08) on the squeegee body; if the edge of the rubber in
contact with the floor is worn proceed with replacement, reading the paragraph "REPLACEMENT OF
SQUEEGEE BODY FRONT RUBBER BLADE" first.
WARNING: This operation must be carried out using gloves to protect against
contact with dangerous solutions.
11.
First with a jet of water and then with a damp cloth, thoroughly clean the rear rubber blade (09) of the
squeegee body.
12.
Check the wear of the rear rubber blade (09) on the squeegee body; if the edge of the rubber in
contact with the floor is worn, the rubber can be turned onto another of its 4 edges.
13.
To remove the rear rubber blade (09), turn the wing nuts (10) to horizontal position, remove the rubber-
pressing blades (11) and remove the rear rubber blade (09).
14.
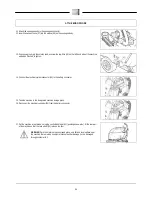
Rotate into position so that the edges in contact with the ground are not worn and insert into the
squeegee body.
15.
Insert the rubber-pressing blades (11) and turn the wing nuts (10) into vertical position so they hold the
rubber-pressing blades against the squeegee body.
16.
Tighten the knobs (12) that fix the vacuum nozzle (06) to the squeegee body.
17.
First with a jet of water and then with a damp cloth, thoroughly clean the vacuum nozzle (06). Also
clean the squeegee body support surface.
18.
Position the vacuum nozzle (06) on the squeegee body and fasten with the knobs (12).

