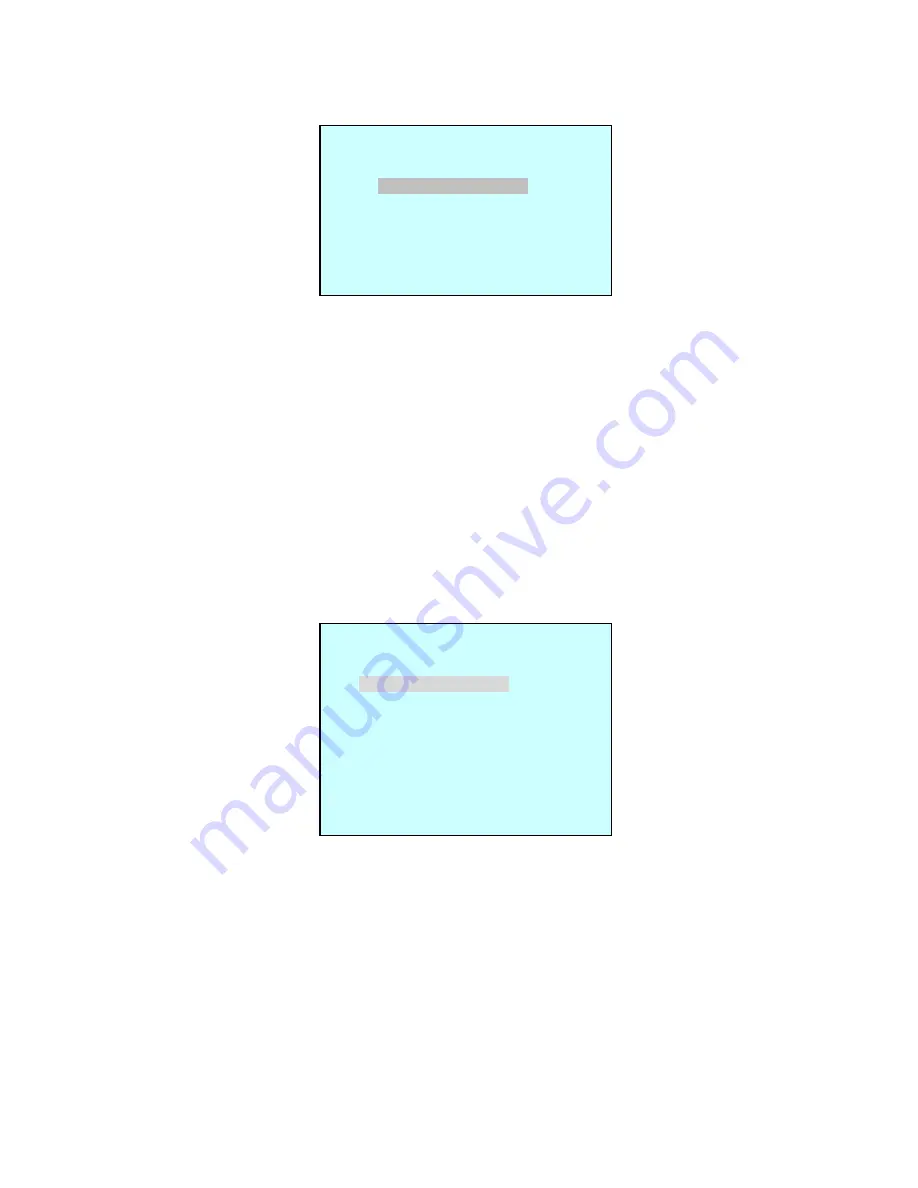
background image


22 

 
ALARM MENU 


<Alarm Menu Screen> 


This screen allows you to set up the actions KBD controller will take when there is an alarm 
condition. 
 
Alarm Check 

When set to ON, the KBD controller will check alarm signal and each port of 
J-box can be connected 32 dome cameras. When set to OFF, it will not 
check alarm signal and each port of J-box can be connected 128 dome 
cameras..  

Alarm Beep 

When set to ON, the KBD controller will sound beep when alarm signal is 
detected. 

Alarm Delay 

When set to 0~99 Sec, the KBD controller will show Alarm status for the 
setting time. When set to Latch, the KBD controller will show the Alarm 
status until cleared by user. 


ALARM BOX (future function) 


<Alarm box Menu Screen> 


Alarm latch 

When set to On, Alarm message does not disappear until you erase the 
massage. 

Alarm hold time  You can set time from Off to 99 second. 
Alarm Schedule  Enters the Alarm Schedule submenu. 
Alarm History


Enters the Alarm History submenu. 


    ALARM BOX MENU 
 
  ALARM LATCH : ON 
  ALARM HOLD TIME : 04SEC 

ALARM SCHEDULE 
ALARM HISTORY 

  SAVE AND EXIT 


ALARM MENU 


    ALARM CHECK : ON 
    ALARM BEEP  : ON 
    ALARM DELAY : LATCH 
    ALARM BOX 

    SAVE AND EXIT


Содержание SD5LCDN

Страница 1: ...I FASTRAX ll E KEYBOARD CONTROLLER Please read this manual thoroughly before use and keep it handy for future reference Rev M70601 Instruction Manual ...

Страница 2: ...sh with arrowhead symbol within an equilateral triangle is intended to alert the user to the presence of uninsulated dangerous voltage within the product s enclosure that may be of sufficient magnitude to constitute a risk of electric shock to persons The exclamation point within an equilateral triangle is intended to alert the user to the presence of important operating and maintenance servicing ...

Страница 3: ...RENCE TO RADIO COMMUNICATIONS OPERATION OF THIS EQUIPMENT IN A RESIDENTIAL AREA IS LIKELY TO CAUSE HARMFUL INTERFERENCE IN WHICH CASE THE USER WILL BE REQUIRED TO CORRECT THE INTERFERENCE AT HIS OWN EXPENSE CAUTION CHANGES OR MODIFICATIONS NOT EXPRESSLY APPROVED BY THE PARTY RESPONSIBLE FOR COMPLIANCE COULD VOID THE USER S AUTHORITY TO OPERATE THE EQUIPMENT THIS CLASS A DIGITAL APPARATUS COMPLIES ...

Страница 4: ...cement of the obsolete outlet 10 Protect the power cord from being walked on or pinched particularly at plugs convenience receptacles and the point where they exit from the apparatus 11 Only use attachments accessories specified by the manufacturer 12 Unplug this apparatus during lightning storms or when unused for long periods of time 13 Refer all servicing to qualified service personnel Servicin...

Страница 5: ...Keyboard Configuration Menu Setup 15 y MAIN MENU 15 y CONFIGURATION MENU 16 y CHANGE USER PASSWORD 16 y CHANGE ADMIN PASSWORD 17 y NETWORK SETUP 17 y SET BAUD RATE 17 y COMMUNICATIONS PORTS 18 y MULTIPLEXER CONFIGURATION 18 y ALIAS PRESET MENU 19 y SLAVE KEYBOARD SETUP MENU 19 y SLAVE KEYBOARD UNIT 20 y GRANT ACCESS DOME 20 y DATA BANK 21 y TIME DATE 21 y ALARM MENU 22 y ALARM BOX 22 y ALARM SCHED...

Страница 6: ...ONTROL ZOOM CONTROL GLBL GLOBAL COMMAND 3 4 Summary of Keyboard Controls 36 KEYS FOR DOME CAMERA KEYS FOR MULTIPLEXER KEYS FOR DVR KEYS FOR KEYBOARD CONTROLLER FUNCTION Appendix A Specifications 39 Appendix B Short Cut Key 40 Appendix C Trouble Shooting 41 Appendix D Control the other camera 42 Appendix E Control the DVR for over version 3 1 0 45 ...

Страница 7: ...meras to the specific spot monitors as programmed in the KBD controller menu Two levels of password are supported for higher security administrator and user Up to 254 dome cameras controllable including 64 dome cameras with Alarm mode Multiplexers Max 255 and DVR system Max 99 can be controlled remotely at each KBD controller regardless Master or Slave Using 3 5 multiplexers and 4 Keyboard control...

Страница 8: ...2 UP TO 254 CAMERA UP TO 255 MULTIPLEXER UP TO 99 DVR J box Alarm Input UP TO 8 Alarm Output UP TO 4 Sensor Siren Flashing Light Master Keyboard J box J box J box Figure 1 Typical System Configuration ...

Страница 9: ...ox 1 3m 8pin cable Shielded cable for video signal 1 3m 8pin cable Unshielded cable 1 M4 x L10 Self tapping screws 4 Instruction manual 1 12VDC Power supply SMPS 1 Power Cord 1 2 2 Required Installation Tools No special tools are required to install the KBD controller Refer to the installation manuals for the other items that make up part of your system ...

Страница 10: ...4 2 3 Basic Configuration of Fastrax ll E Dome System FIGURE 2 BASIC INSTALLATION DIAGRAM ...

Страница 11: ...ices in an installation must have the data line terminated by setting the DIP switch Without proper termination there is potential for control signal errors Total length of the cable for communication should not exceed 4000ft 1 2km Figure 3 Termination diagram ...

Страница 12: ...he data2 port of J box 5 Connect the BNC cable from the Aux of appropriate switching device to J box if needed 6 Turn on the KBD power after all dome cameras have initialized 7 The keyboard controller will search for all the attached dome cameras and then show the ID of dome cameras found 8 The user will be prompted for a password for authorization The user must enter a 4 digit PIN code There are ...

Страница 13: ... controller s LCD Scanning dome Screen Scanning Slave K B Screen Input Password Screen OSD Screen MS CAM 0001E 10 52 42 NUM 2 ALARM 049E 0123 MUX 01 SPOT DVR 001 INPUT PASSWORD SCANNING SLAVE K B FOUND 3 SLAVE K B OK ID 1 2 3 SCANNING DOME 009 FOUND SCAN DATA1 254 001 003 004 033 049 SCAN DATA2 254 007 008 009 011 ALARM CAMERA ID SELECTED SPOT SELECTED CAMERA ID REAL TIME CLOCK PRESSED KEY SELECTE...

Страница 14: ... CONTROL CABLE FOR MUX SPOT MONITOR IN OUT Figure 5 Single user Mux installation 2 Single user system with two Multiplexers 31 cameras max OUT IN SPOT MONITOR REMOTE CONTROL CABLE FOR MUX OR MUX PIN 4 MUX PIN 6 J BOX MUX RS485 IN PIN 6 SLAVE KBD SLAVE KBD RS485 IN PIN 4 RS485 RS485 RS485 RS485 RX TX DOME1 DOME1 RX TX DOME J BOX MAIN MONITOR VIDEO CABLE MUX 1 MUX 2 4 RS485 6 RS485 MAIN MONITOR RS48...

Страница 15: ...2 Aux 1 Master KBD Slave 1 SPOT 4 SPOT 3 SPOT 2 SPOT 1 REMOTE CONTROL CABLE FOR MUX RS485 DOME CONTROL CABLE Max 1 2km RS485 RS485 RX TX DOME1 DOME1 RX TX DOME J BOX MUX 1 MUX 2 4 RS485 6 RS485 RS485 RS485 RS485 IN PIN 4 SLAVE KBD SLAVE KBD RS485 IN PIN 6 MUX J BOX MUX PIN 6 MUX PIN 4 OR Figure 7 Multi user two Mux installation ...

Страница 16: ... 3 Slave 2 Aux 4 Aux 3 Aux 2 Aux 1 Master KBD Slave 1 Mux 3 Aux 1 4 Cam 9 13 Cam 13 16 Mux 4 Aux 1 4 Mux 2 Aux 1 4 Cam 5 8 MUX5 Cam 1 4 Mux 1 Aux 1 4 SPOT 4 SPOT 3 SPOT 2 SPOT 1 MUX 5 MUX 4 MUX 3 REMOTE CONTROL CABLE FOR MUX MUX 1 MUX 2 4 RS485 6 RS485 RS485 RS485 RS485 IN PIN 4 SLAVE KBD SLAVE KBD RS485 IN PIN 6 MUX J BOX MUX PIN 6 MUX PIN 4 OR Figure 8 Multi user multi Mux installation ...

Страница 17: ...tion By pressing No CAM the video of the selected camera is automatically switched to the specific keyboard controller s monitor Mux 01 01 Cam 1 02 Cam 2 03 Cam 3 04 Cam 4 05 Cam 5 06 Cam 6 07 Cam 7 08 Cam 8 09 Cam 9 10 Cam 10 11 Cam 11 12 Cam 12 13 Cam 13 14 Cam 14 15 Cam 15 16 Cam 16 Aux1 Aux2 Aux3 Aux4 Main Keyboard Slave Keyboard 1 Slave Keyboard 2 Dome ID Slave Keyboard 3 MUX CONFIG PAGE 01 C...

Страница 18: ...witching methods that will be the same as single Mux system See example 1 But first group of 16 cameras goes to Spot AUX of first Mux And second group of 16 cameras goes to Spot AUX of second Mux That is Spot AUX monitor is not inter changeable Yet camera ID should be continuous No 1 2 3 2 and camera selection is done by pressing 1 3 2 CAM Dome ID Mux 01 01 Cam 1 02 Cam 2 03 Cam 3 04 Cam 4 ID Mux ...

Страница 19: ...7 7 Dome ID Mux 03 Cam 4 Cam 8 8 33 Cam 1 Cam 5 Cam 9 9 34 Cam 2 Cam 6 Cam 10 10 35 Cam 3 Cam 7 Cam 11 11 36 Cam 4 Cam 8 Cam 12 12 37 Cam 5 Cam 9 Cam 13 13 38 Cam 6 Cam 10 Cam 14 14 39 Cam 7 Cam 11 Cam 15 15 40 Cam 8 Cam 12 Cam 16 16 Mux 04 41 Cam 9 Cam 13 Aux 1 Cam 1 42 Cam 10 Cam 14 Aux 2 Cam 2 43 Cam 11 Cam 15 Aux 3 Cam 3 44 Cam 12 Cam 16 Aux 4 Cam 4 45 Cam 13 Aux 1 Cam 5 46 Cam 14 Aux 2 Cam 6 ...

Страница 20: ...12 12 49 Cam 1 Cam 5 Cam 9 Cam 13 13 50 Cam 2 Cam 6 Cam 10 Cam 14 14 51 Cam 3 Cam 7 Cam 11 Cam 15 15 52 Cam 4 Cam 8 Cam 12 Cam 16 16 Mux 05 53 Cam 5 Cam 9 Cam 13 Aux 1 Cam 1 54 Cam 6 Cam 10 Cam 14 Aux 2 Cam 2 55 Cam 7 Cam 11 Cam 15 Aux 3 Cam 3 56 Cam 8 Cam 12 Cam 16 Aux 4 Cam 4 57 Cam 9 Cam 13 Aux 1 Cam 5 58 Cam 10 Cam 14 Aux 2 Cam 6 59 Cam 11 Cam 15 Aux 3 Cam 7 60 Cam 12 Cam 16 Aux 4 Cam 8 61 Cam...

Страница 21: ...chedule Enters the Schedule setup submenu to set macro weekly annual schedule sequence MAIN MENU CONFIGURATION NETWORK DATA BANK TIME DATE ALARM SCHEDULE LCD EXIT Special Key action in the Menu PGM Key Press PGM Key to save and exit to previous menu ESC Key Press ESC Key to exit current menu without saving ON Key Press ON Key when you need to insert or fill the data field automatically OFF Key Pre...

Страница 22: ...60Min the KBD controller s LCD power will be turned off after elapsed time You can set time OFF to 60 minute Change user password Enters the change user password submenu Change admin password Enters the change administrator password submenu Rescan dome Rescan the connected dome cameras Save and exit Save the changed settings and return to the previous menu CHANGE USER PASSWORD Change User Password...

Страница 23: ... Setup Screen Set Baud rate Enters the Baud rate setup submenu Communication Ports Enters the Communications Ports setup submenu MUX Configurations Enters the MUX configurations setup submenu Set Slave Keyboard Enters the Slave KBD controller submenu SET BAUD RATE Baud Rate Setup Screen CURRENT PASSWORD XXXX NEW PASSWORD YYYY CONFIRM PASSWORD YYYY NETWORK SET BAUD RATE COMMUNICATION PORTS MUX CONF...

Страница 24: ...IN auxiliary signal input simplex mode AUX I O when auxiliary signal input respond to the signal Half duplex mode MULTIPLEXER CONFIGURATION Multiplexer Configuration Setup Screen This screen allows you to set multiplexer switching settings when you select the camera by pressing No CAM Up to 64 Cameras can be installed using 5 MUXs and 4 KBD controllers It is equivalent to a 64x4 matrix system All ...

Страница 25: ...r than Ver1 13 to use Alias Preset command This screen allows you to set the KBD controller s internal alias preset each alias preset can have 3 dome cameras position You can execute this function when alarm signal is detected or press No ALRM This programmed data is saved at the KBD controller s memory Alias preset can be saved up to 1024 You can save alias preset by press No CTRL ALRM at the sel...

Страница 26: ...When set to ON Slave KBD controller is allowed to access Dome menu setup Grant dome access Enters the Grant Dome Access submenu NOTE If the number of connected Slave KBD controllers is not matched master KBD controller will display error message SLAVE KEYBOARD UNIT Slave Keyboard Unit Screen This screen allows you set up each Slave KBD controller ON or OFF Slave ID No When set to ON Slave KBD cont...

Страница 27: ...era to KBD controller non volatile memory and upload the downloaded data to the selected dome camera and clear the data bank Clear This Data Clear saved data in the KBD controller TIME DATE Time Date Setup Screen This screen allows you to set the KBD controllers Time Date Display When set to Off the KBD controller will hide the time TIME DATE DISPLAY ON DATE DAY 29 THR MONT JAN YEAR 2004 HOUR 15 M...

Страница 28: ...ected Alarm Delay When set to 0 99 Sec the KBD controller will show Alarm status for the setting time When set to Latch the KBD controller will show the Alarm status until cleared by user ALARM BOX future function Alarm box Menu Screen Alarm latch When set to On Alarm message does not disappear until you erase the massage Alarm hold time You can set time from Off to 99 second Alarm Schedule Enters...

Страница 29: ... row not used PGM key Save And Exit ALARM HISTORY Alarm History Screen Alarm History has 32 pages and is capable of displaying 256 events Cam ID of alarm activated dome Alarm 1 2 3 5 In case of less than 5 alarm No represents activate alarm inputs 0XFF In case of more than 5 alarms corresponding digits are set to 1 COMM When communication error occurred ALARM HISTORY PAGE 01 CAM ALARM DATE TIME 00...

Страница 30: ...y alarm and its programmed schedule Macro Setup Screen Cam ID of installed domes 1 2 3 64 1 254 Alarm check OFF Function Functions to be executed Auto Scan Pattern Tour MACRO 01 PAGE 01 CAM FUNCTION NO 005 AUTO SCAN 001 ON INS OFF DEL PGM ESC MACRO TABLES MACRO 1 MACRO 2 MACRO 3 MACRO 4 MACRO 5 MACRO 6 MACRO 7 MACRO 8 EXIT SCHEDULE MACRO TABLES WEEKLY SCHEDULE ANNUAL SCHEDULE NIGHT SHOT SEQUENCE E...

Страница 31: ...annual schedule to execute Macro command on the set time Macro Macro No 01 08 to be executed Date Specific date of year Time Time to execute the macro Day Week of day NIGHT SHOT SCHEDULE Night Shot Schedule Setup Screen NIGHT SHOT NIGHT SHOT ON ON TIME 19 30 OFF TIME 07 30 SAVE AND EXIT ANNUAL SCHEDULE MACRO DATE TIME DAY 01 JAN 01 17 05 SAT ON INS OFF DEL PGM ESC WEEKLY SCHEDULE MACRO TIME DAY 01...

Страница 32: ...Sequence Setup Screen This screen allows you to set the specific camera is displayed specified spot output of the MUX for programmed time No No of Seq 01 02 03 64 Cam No of Mux channel Preset Preset No to be called Normal camera won t be changed Aux no Spot output No of MUX Dwell Dwell time of switching You can set time from 3 to 99 second or skip CAM SEQ 1 PAGE 01 NO CAM PRESET AUX NO DWELL 01 00...

Страница 33: ... of the J box This connection enables DVR control remotely from KBD controller 2 Connect 8pin Multi cable between the data2 port of the KBD and the J BOX 3 Connect wires between the TX of DVR and DOME2 of J Box This connection enables DVR PTZ control from the keyboard controller 4 How to setup the KBD controller A Switch the KBD controller ON B Input password Factory setting is 9 9 9 9 C Open the ...

Страница 34: ...e Menu button Input password according to the instruction Factory setting is 4321 C If the below screen is appeared set Quick Setup to Off D Press OK and the below screen will be appeared E Select System Information on the system menu and change UNIT ID ...

Страница 35: ...None 8 1 PTZ Control 6 After setting Unit ID Camera and RS232 RS485 installing dome camera is basically completed Please refer to the manual of DVR for the other installation 7 Press the related number of the controller which is correspondent to unit ID of DVR Then press DVR button and adjust unit ID of the controller 8 Make sure if any change is appeared on screen when you press button of the con...

Страница 36: ...m KBD controller 2 Connect 8pin Multi cable between the data2 port of the KBD and the J BOX 3 Plug the RS 232C TO RS 485 converter in the RS 232C Port of PC DVR Connect wires between the TX of converter and DOME2 of J Box This connection enables PC DVR PTZ control from KBD controller 4 How to setup the KBD controller A Switch the KBD controller ON B Input password Factory Setting is 9 9 9 9 C Open...

Страница 37: ...t camera input number that dome camera connected Then install as below to select set up PTZ after checking PTZ box D If PTZ is not necessary for PC DVR cable and installation here is not needed PC DVR is able to be controlled remotely and there s no PTZ function Port COM1 RX Device Fastrax Baud Rate 9600 Data 8 Parity None Stop Bit 1 ...

Страница 38: ... box please install as below to select Setup remote control Device ID is not allowed number 0 C Make sure if any change is appeared on screen to press QUAD Next Screen button of a controller for basic testing If there s no change appeared check cable connection and installation again Port COM2 Baud Rate 9600 Date 8 Parity None Stop Bit 1 Device ID XX ...

Страница 39: ...ernately you can check the status of your multiplexer by pressing the Menu key of the multiplexer and then selecting item 9 If you see the Protocol option line in the Communication Setup menu your multiplexer has the new ROM and you do not need to replace the ROM If your multiplexer has the old ROM version contact your distributor on how to get new a ROM CAUTION Before opening the multiplexer make...

Страница 40: ...put of the second multiplexer by pressing camera No 1 to 31 CAM For example 1 CAM will switch camera 1 to the second multiplexer spot output and you can control all functions of the selected camera using the keyboard controller If you install more than two Multiplexers the unit number address of the Multiplexer and selection of the Multiplexer must be the same in order to control the Multiplexer w...

Страница 41: ...om control has two steps of speeds and is proportional to the amount the zoom handle is twisted Glbl Global command It is possible to cause all cameras to move to preset positions simultaneously with this feature For example pressing 1 ENTR GLBL make all dome cameras to move to Preset 1 at the same time Global preset can call presets 1 to 240 if programmed properly Pressing 8 8 8 ENTR GLBL will ca...

Страница 42: ...g menu directly Recalls programmed presets or functions sequentially e g 1 8 TOUR Pattern PTRN Pressing PTRN will bring up the pattern programming menu directly Repeats the selected pattern of the current dome camera e g 1 4 PTRN Auto Scan SCAN Pressing Scan will bring up the Auto Scan programming menu Calls Auto panning function e g 2 SCAN repeats Auto Scan 2 Configuration MENU Enters programming...

Страница 43: ...y camera 2 as a spot output of the current Multiplexer Select Mux ID MUX Select Multiplexer e g 1 or 2 MUX Cursor movement ENTR Joystick Up Down Left Right control in the ZOOM and SET UP mode Handle turn clockwise for SET mode Handle turn counterclockwise for ESC mode Keys for DVR Some function may be different according to the DVR Function Key Label Descriptions Id Selection DVR ID Selection e g ...

Страница 44: ...eed in PC DVR Shuttle ring CTRL ENTR Joystick The Shuttle Ring only functions in the Playback mode Turning the ring clockwise plays video forward Turning the ring counterclockwise plays video backward Jog dial CTRL ENTR Zoom Handle The Jog Dial only functions when playback video has been paused By turning the jog dial clockwise you can play video forward image by image Spot Sequence AUX1 4 Toggle ...

Страница 45: ...meras including 32 Alarm mode on MUX SLAVE KBD Port RS 485 Multiplexer Connection Max 255 DVR Connection Max 99 Slave Keyboard Connection Max 3 DVR RS 232 Remote control for DVR Alarm PC RS 232 Alarm Box or PC connection MECHANICAL Dimension See Figure 18 Unit mm Unit Weight Approx 1 8 kg Shipping Weight Approx 3 8 kg Shipping Size 452 x 283 x 162 Unit mm ENVIRONMENT Operating temperature 0 C to 5...

Страница 46: ...hot on 10 OFF Night Shot off 11 ON BLC on 11 OFF BLC off 12 ON Digital Zoom on According to digital zoom setting 12 OFF Digital Zoom off 13 ON Dome camera OSD on 13 OFF Dome camera OSD off 14 ON Dome camera Area Title Display on 14 OFF Dome camera Area Title Display off 15 ON View Direction on 15 OFF View Direction off 100 ON Shutter speed auto 101 ON Shutter speed 1 4 PAL 1 3 sec 102 ON Shutter s...

Страница 47: ...he data cable for the multiplexer has the correct Pin configuration 1 1 2 2 3 3 8 8 2 Check the communication menu of Multiplexer as per Pages 15 setting Multiplexer No Video on the KBD controller 1 Check that Back ground Screen On Off 2 Check if the Dome camera is menu status Tip 1 Dome Holding Time of the slave keyboard setup menu When the dome2 port set AUX IN even if the slave keyboard is not ...

Страница 48: ...guration ID PROTOCOL 05 F2E 07 Pelco D 01 F2E 09 F2E 10 Pelco P MAIN MENU Press CTRL MENU to enter the KBD controller main menu You will see the following menu CAMERA To set the type of cameras CAMERA SETUP CAMERA SETUP PAGE 001 CAM PROTOCOL PORT BAUD 001 F2E DOME1 9600 005 F2E DOME1 9600 009 F2E DOME1 9600 OFF DEL PGM SAVE ESC EXIT MAIN MENU CONFIGURATION NETWORK CAMERA DATA BANK TIME DATE ALARM ...

Страница 49: ...out saving 7 Press the OFF button to delete the selected CAM line Note The baud rate of the F2E is according to the value of the set baud rate menu in the network menu When the keyboard has that the alarm option is OFF at the first power on the camera setup displays the blank menu and set the all camera as above Follow above procedure to set the camera You can set 254 cameras up to the page 32 CAM...

Страница 50: ...l store current view as a preset directly The programmable presets are numbered 1 32 35 82 and 100 150 of the Spectra III SE system Refer to the manual of the dome camera The following presets are predefined for specific functions 90 91 Manual limit stops 92 93 Scan limit stops Recall Pattern No PTRN Pressing PTRN will run the selected pattern Dome MENU MENU Enters menu Or 95 CTRL PGM PRST will en...

Страница 51: ...motely from KBD controller 2 Connect 8pin Multi cable between the data1 port of the KBD and the J BOX 3 Connect 8pin Multi cable between the data2 port of the KBD and the J BOX 4 Connect wires between the TX of DVR and RX of PTZ cameras 5 Switch the KBD controller ON A Input password Factory setting is 9 9 9 9 B Open the menu of the KBD controller by pressing CTRL MENU Key C Set as below in Networ...

Страница 52: ...f the PTZ camera by the number of the input channel not the ID number of the PTZ camera For example when the PTZ camera with the 5 ID number is installed the number 1 of the input jack of the DVR to control the camera you select 1 CAM not 5 CAM Action Key pressing Remark LCD display DVR selection 1 DVR Displays DVR 001 at the bottom line 1 CAM or 16 CAM CAM 0001 at the top line Camera selection 17...

Страница 53: ... Port of the RS232 to RS485 converter 4 Connect PTZ cameras to the RS485 Port of the RS232 to RS485 converter 5 Repeat the step 3 4 each DVR 6 Set the system ID number of each DVR from 1 to the last DVR increasing 1 7 Set the network menu of the keyboard as below Note The baud rate of DOME1 should be the same as one of the RS485 of the DVR 8 How to setup DVR A Switch the DVR on B Enter the Menu ac...

Страница 54: ...g PTRN will bring up the pattern programming menu directly Repeats the selected pattern of the current dome camera e g 1 4 PTRN Auto Scan SCAN Pressing Scan will bring up the Auto Scan programming menu Calls Auto panning function e g 2 SCAN repeats Auto Scan 2 Configuration MENU Enters programming menu CTRL MENU will invoke Keyboard set up menu Program CTRL PGM No CTRL PGM PRST will store current ...

Страница 55: ...okes the event log search menu Freeze Freeze the current live screen Zoom Display the digital zoom screen Sequence Sequence Display Mode Toggle between different display formats The available formats are full 4x4 3x3 2x2 and PIP Display Mode 1 2 3 4 QUAD PIP 1 Quad 2x2 2 Quad 3x3 3 Quad and 4x4 4 Quad Enter Select a highlighted item or completes an entry that you have made Spot Sequence AUX1 AUX4 ...

Страница 56: ...FASTRAX ll E KEYBOARD CONTROLLER VER3 0 50301659E ...

Отзывы: