


July 2013
more quick guides @ www.farmscanag.com/jackal
AM-Jackal-2
16
User Defined Setup (Manual)
USER DEFINED SETUP (MANUAL)
DESCRIPTION
At any stage you can manually setup the Jackal to your requirements without using the wizard.
Manual setup of the Jackal requires setup in multiple areas. Navigate from the front screen via
SETUP
FRONT SCREEN > SETUP
INPUTS
Select & enable the Input that sensors are connected into the rear of the Jackal
CALIBRATE
Calibrate each input following the
TARGET
or
MANUAL RATIO
method
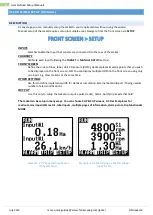
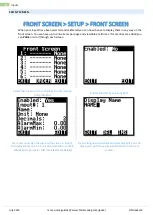
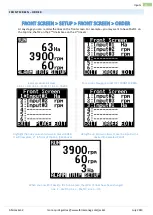
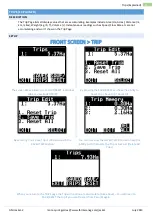
FRONT SCREEN
Define the order of lines, label, Unit of measure (UOM), decimal places & alarm points that you wish
to be displayed on the front screen. NB: You can display multiple UOM on the front screen using only
one input. E.g. View Ha & Ac at the same time.
OTHER SETTINGS
Use this to define implement width for Ha/Ac accumulation, External Run/Hold port if being used &
number of alarm notifications
OUTPUT
Use this only to setup the Jackal to output a pulse (radar), Alarm, batch/trip & external hold.
The Jackal can be setup in many ways. You can choose 2UP & 3UP screens, 0-3 Decimal places for
readouts, mix imperial & metric, label inputs, multiple pages of information, alarm points, trip functions &
MORE
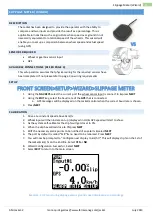
Example : 2 UP Speed & Area Meter
(Wheel Sensor)
Example: 3 UP Monitoring 2x Shaft & Wheel
input for Ha
Содержание Jackal v2
Страница 1: ......


