11
Assembly - 1066 & 1076 Conventional Auger
Assembly Instructions
One must use extreme caution when assembling this auger. Lifting devices (i.e. loader tractor,
forklift, etc.) are required as well as various wrenches and tools. Assemble the auger on a flat
surface. Right, left, front and back refer to looking at the auger from the intake end.
1. Lay the top (Ref. #1) and bottom (Ref. #2) auger tubes flat with the center joint spaced two feet
apart.
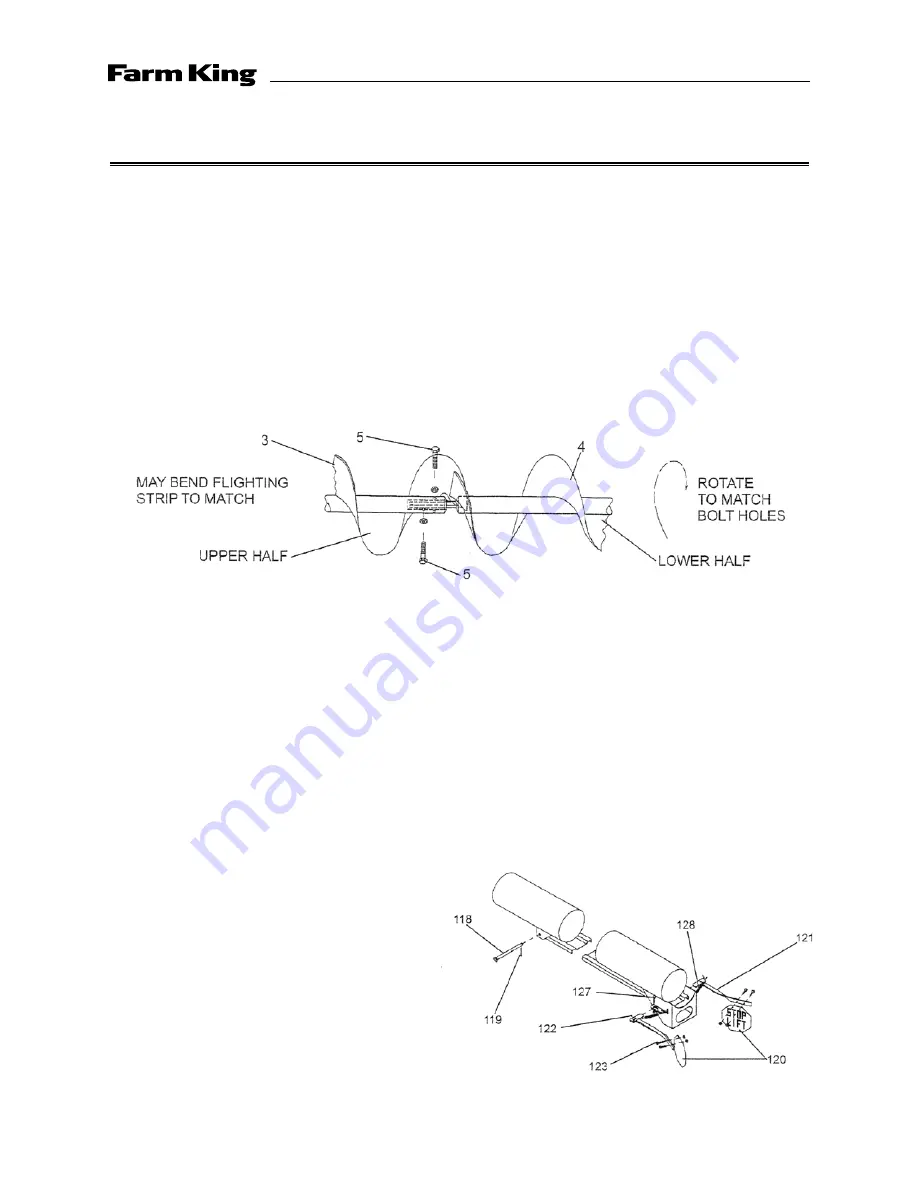
2. Fasten the flighting assemblies with two fine thread nuts and bolt combinations (Ref. #5).
Fasten the flighting assemblies so that the lower assembly (Ref. #4) overlaps the upper
assembly (Ref. #3). For the 1076 model, the upper and center assemblies are already
connected, but the lower and center assemblies must be connected. Be sure that the lower
assembly (Ref. #4) overlaps the center assembly (Ref. #4A).
3. Be sure the top (Ref. #1) and the lower (Ref. #2) tubes are straight in line. Slide the tubes
together and connect at the flange ring using the 1/2" x 1-1/2" bolt, nut and lockwasher
combinations (Ref. #25). NOTE: Do not fully tighten the bolts in the flange ring connection
the first time. Work around the flange at least twice to gradually pull the connection together.
Fully tightening the bolts on one side will pull the auger tubes out of alignment. Be sure the
driveline couplers join when joining the tubes. Install the driveline shield splice (Ref. #45)
4. Clamp the intake cage (Ref. #90) to the lower tube using 3/8" x 1-1/4" bolt, nut and lockwasher
combinations (Ref. #93). Be sure to have 1/2" clearance between the flight core and the
bearing. NOTE: Thrust load must be carried at the top of the auger.
5. Mount the drop spout (Ref. #83) with
3/8" x 1-14" bolt, nut and lockwasher
combinations and one half clamp (Ref.
#84).
6. Attach stop flags (Ref. #120) to the stop flag
arms (Ref. #121) using the 3/16" x 3/4" bolt,
nut and lockwasher combinations (Ref.
#123). The lettering must face the auger
tube when the arms are parallel to the
tube. These flags will swing out when the
track car approaches the end of the track.
NOTE: The operator must stop raising the
auger when these swing out.
7. Add No. 90 gear lube until 1/2 full.
Gearbox is shipped dry from the factory.
Содержание 1066
Страница 1: ...Operator and Parts Manual 112010 Conventional Auger Model 1066 1076 SZ000252...
Страница 2: ......
Страница 8: ...8 Assembly 1066 1076 Conventional Auger 1066Trussing 1076Trussing...
Страница 27: ......


