


10
Assembly
en
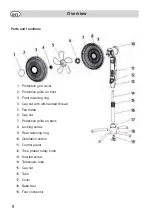
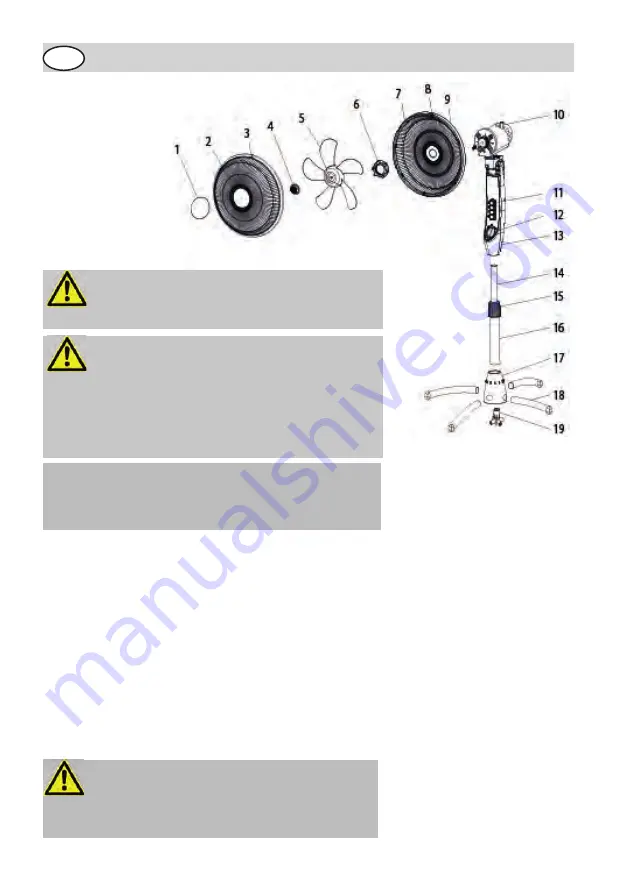
Assemble in the following order:
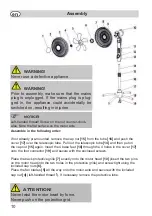
If not already pre-mounted, remove the cap nut
[15]
from the tube
[16]
and push the
cover
[17]
over the telescopic tube. Pull out the telescopic tube
[14]
and then put on
the cap nut
[15]
again. Insert the 4 base feet
[18]
through the 4 holes in the cover
[17]
onto the foot connector
[19]
and secure with the enclosed screws.
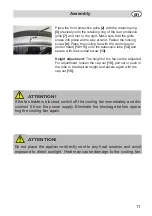
Place the back protective grille
[7]
exactly onto the motor head
[10]
(insert the two pins
on the motor head into the two holes in the protective grille) and screw tight using the
included cap nuts
[6].
Place the fan blades
[5]
all the way onto the motor axle and secure with the included
cap nut
[4]
(left-handed thread
!
). If necessary remove the protective tube.
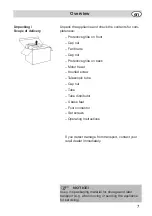
NOTICE!
Left-handed thread! Screw on the nut counter-clock -
wise. Note the flat surface on the motor axle
WARNING!
Prior to assembly, make sure that the mains
plug is unplugged. If the mains plug is plug-
ged in, the appliance could accidentally be
switched on, resulting in injuries.
ATTENTION!
Never twist the motor head by force.
Never push on the protective grid.
WARNING!
Never use a defective appliance.
Содержание prestige VC 20 S
Страница 1: ...Bedienungsanleitung Stand Ventilator de DE prestige VC 20 S...
Страница 17: ...Notizen 17 de...
Страница 18: ...Notizen 18 de...
Страница 19: ...Notizen 19 de...
Страница 21: ...prestige VC 20 S Operating Instructions Pedestal cooling fan en EN...
Страница 37: ...17 Notes en...
Страница 38: ...18 Warranty en...
Страница 39: ...19 Notes en...


