
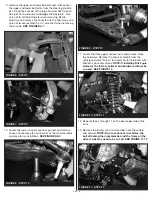
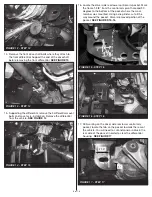
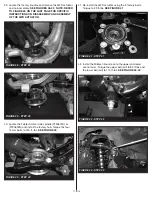


9. Remove the upper and lower ball joint nuts. Disconnect
the upper and lower ball joints from the steering knuckle
by striking the knuckle with a large hammer next to each
ball joint on the knuckle to dislodge the ball joints. Use
care not to hit the ball joints when removing. Retain
hardware and remove the knuckle with the hub. Use extra
care not to over extend the C.V. axle shaft when removing
the knuckle.
SEE FIGURES 6-7
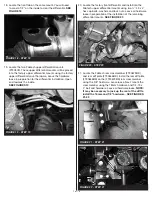
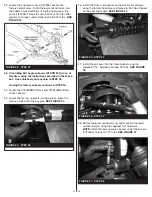
10. Locate the lower shock mount bar pin nuts and remove.
Loosen and remove the control arm at the crossmembers
and save for re-installation.
SEE FIGURES 8-9
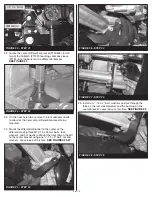
11. Locate the three upper coilover nuts and remove. Save
the hardware. Remove the shock assembly from the
vehicle and mark “Driver” for assembly to install later with
Fabtech shock extensions.
NOTE: If installing Dirt Logic
coilovers the factory coilover and hardware will not be
re-used. SEE FIGURE 10
12. Repeat steps 4 through 11 on the passenger side of the
truck.
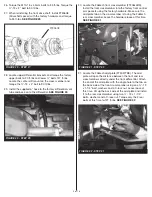
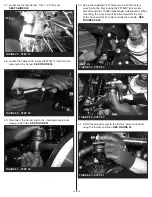
13. Remove the factory rear crossmember from the vehicle
and discard.
NOTE: Due to variances in vehicles, the
bolt attaching the crossmember and the frame on the
drivers side may need to be cut off.
SEE FIGURE 11-12
5 of 16
FIGURE 6 - STEP 9
FIGURE 7 - STEP 9
FIGURE 8 - STEP 10
FIGURE 9 - STEP 10
FIGURE 10 - STEP 11
FIGURE 11 - STEP 13


