


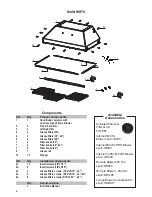


9
3.
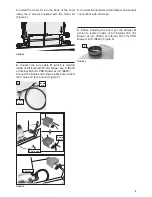
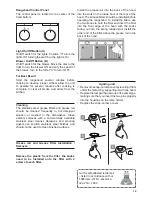
Install the motor kit into the back of the hood
using the 2 screws supplied with the motor kit
(Figure 4).
5.
Connect the ductwork to the damper and seal all
connections with duct tape.
4.
Connect the wire cable
D
(which is located
inside of Kit Internal 300 cfm Blower sku #; IB300
or Internal 600 cfm PRO Blower sku #; IB600).
Connect the 6 hole end to the wire box and connect
the 9 hole end to the motor (Figure 5).
FIGURE 4
6 hole
end
9 hole
end
D
FIGURE 5
9 hole end
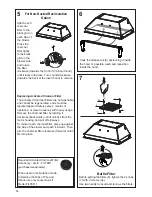
FIGURE 6
A
6.
Before installing the hood, put the damper
A
(which is located inside of Kit Internal 300 cfm
Blower sku #; IB300 or Internal 600 cfm PRO
Blower sku #; IB600) (Figure 6).
9 hole end
6 hole
end
Содержание INCA PRO PLUS
Страница 16: ...16 Wiring Diagram...
Страница 32: ...32 Sch ma de c blage...
Страница 34: ......
Страница 35: ......
Страница 36: ...991 0463 718_01 170516 D003712_00...


