40 |
P a g e
22.
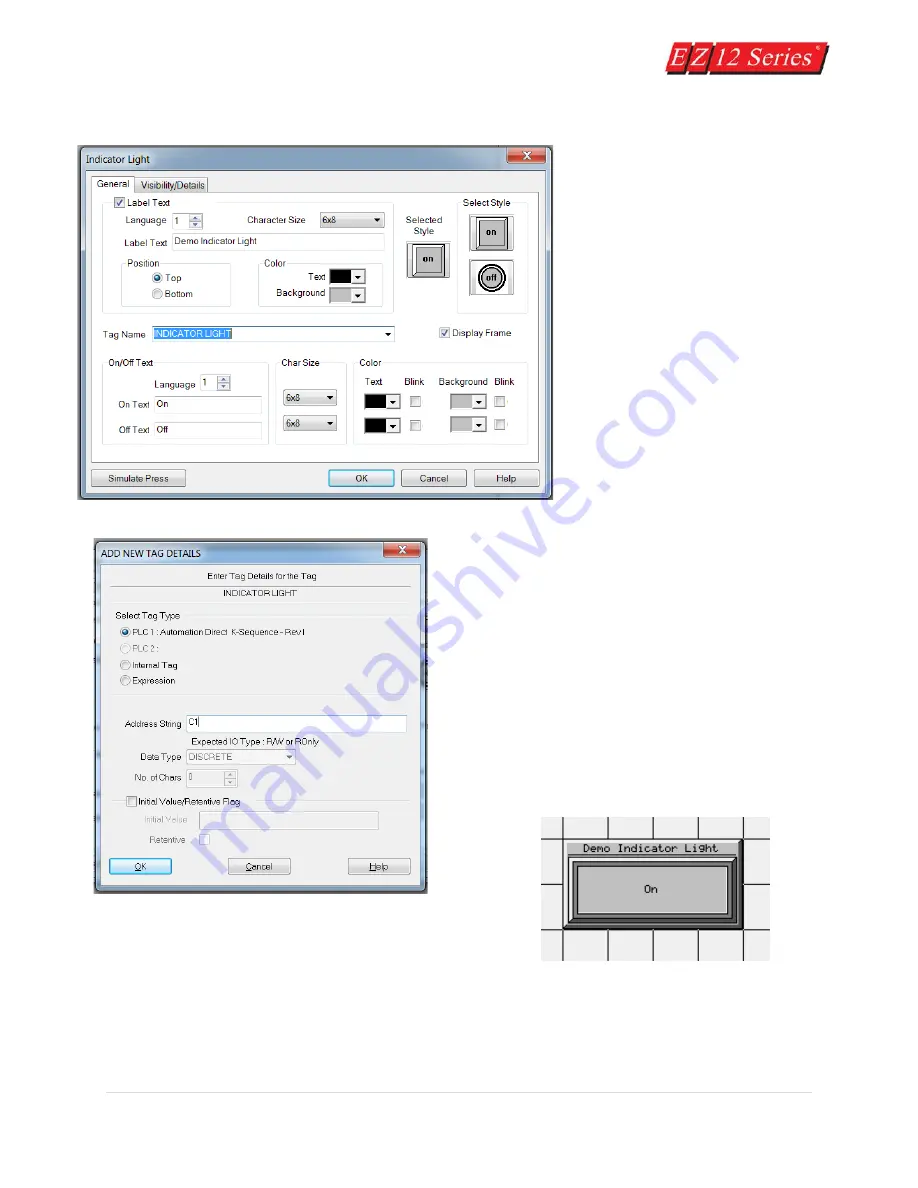
Click on the box in front of
Label Text to activate the object
label.
23.
In the field next to Label Text,
type in Demo Indicator Light as
shown above.
24.
Click in the field next to Tag
Name and type in INDICATOR
LIGHT. Press Enter. The following
screen will appear.
25.
In the field next to Address String, type in C1, as
shown above. The Data Type should remain as
DISCRETE. Click OK.
26.
A crosshair cursor will appear on the
programming screen. Position the crosshair where you
want the object to appear (under the Numeric Display
object), and click once.
27.
Grab the object by a handle and drag to resize it
until the label displays in its entirety, as shown below.
28.
Click on File > Save Project.
You’ve just completed Step 2, Design Your Screens! Now we will transfer Demo Project 1 to the EZ12
unit.
Содержание EZ 10 Series
Страница 1: ......
Страница 2: ...i P a g e Getting Started EZ12 EZTouch Editor 2 0...
Страница 3: ...ii P a g e Manual EZ12 USER M...
Страница 13: ...7 P a g e EZ12 Dimensions Units inches millimeters...
Страница 26: ...20 P a g e EZ12 Models...


