35
10.1 PLAYER CONTROL (continued)
Auto Download: Click “Send” to execute the auto download function immediately.
Note: The “FTP Auto Download” function must be turned on and completed set.
Stop Auto Download: Click “Send” to stop the auto download function immediately.
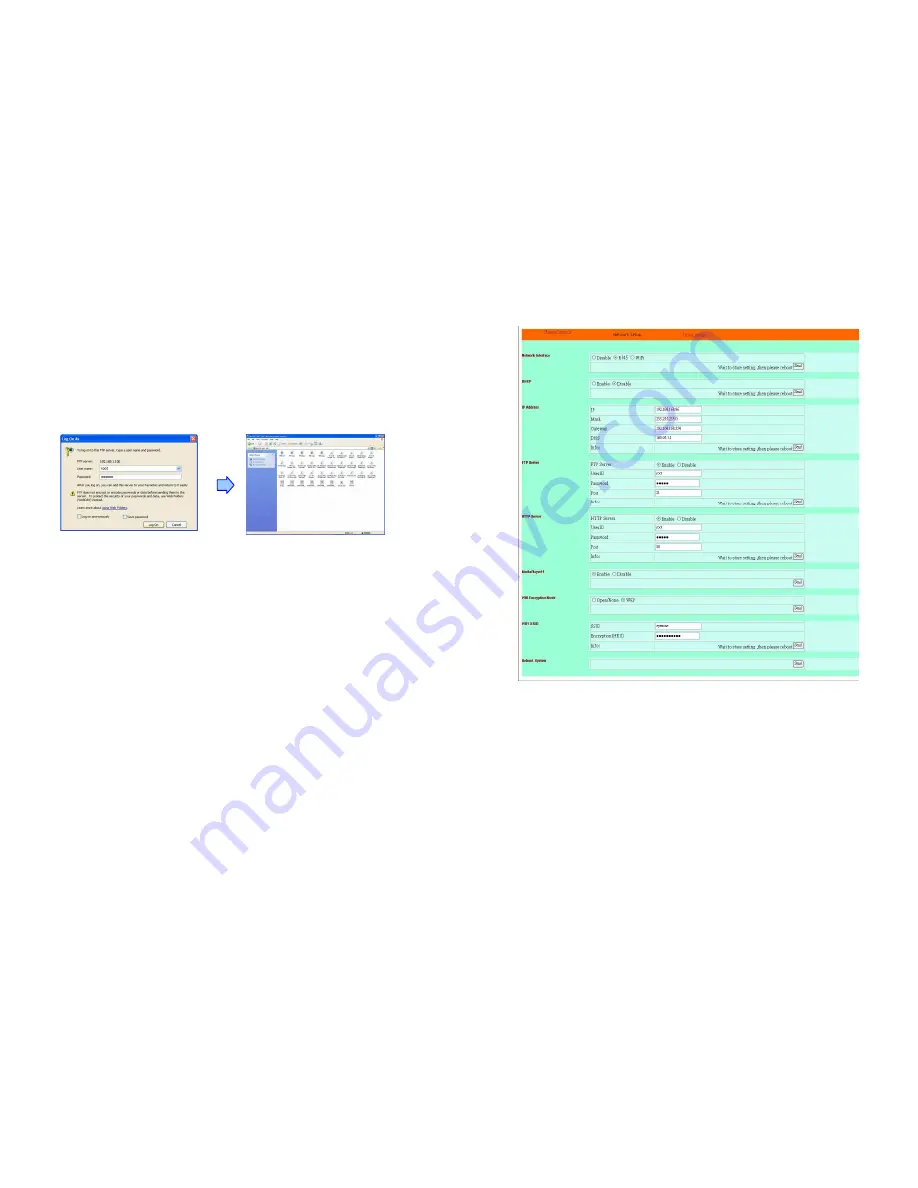
Connect FTP Server: Click the FTP server address to connect to the B1080P-5, and enter the
user name and password (Default User Name: root, Default Password: admin) to log on. After
logging on all the media files in the CF card on the Eyezone B1080P-5 will be listed. You can
download and upload the media files between CF card and your PC.
Volume Control: Enter the value for volume (0-30).
Auto Play: Select the auto play mode (Movies/ Pictures/ MultiLayer/ off).
Log Control: Enable/ disable the log function.
Format CF Memory Card: Directly format the CF card.
Reboot System: Click “Send” to reboot the B1080P-5 immediately.
36
10.2 NETWORK SETUP
Network Interface: Select your network connection Disable/ RJ45 (Wi-Fi function only for
B1080PW).
DHCP: Enable/ Disable the DHCP function.
IP Address: Enter the fixed IP address, Mask, Gateway and DNS for the Eyezone B1080P-5.
FTP Server: Enable/ Disable the FTP Server function. You can also change the User ID,
Password and port of the FTP Server.
HTTP Server: Enable/ Disable the HTTP Server function. You can also change the User ID,
Password and port of the HTTP Server.
Media Player 11: Enable/ disable the Media Player 11 server.
The “WiFi Encryption Mode” and “WiFi SSID” items only for B1080PW.
Reboot System: After setting, click “Send” to reboot the B1080P-5.


