


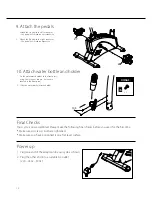


cycle features explained
Adjusting the handlebars
The handlebars can be adjusted to match your individual
requirements;
1. Loosen the T - handle
2. tilt the handlebars into your desired position
3. tighten the T - handle
1. Loosen the hand wheel
2. Slide the seat backwards or forwards to your desired position
3. Re-tighten the hand wheel
Adjusting the seat reach
To help you level the cycle on uneven surfaces, 2 height adjusters are
included on the front stabilisers. Simply twist these around to adjust
the height of the cycle.
Levelling your cycle
Adjusting the resistance
This cycle features a speed independent braking (resistance) system.
The resistance is controlled by a magnet, which is moved closer
or further away from the flywheel – the closer the magnet is to
the flywheel the higher the resistance. The magnet is computer
controlled, to adjust simply scroll the wheel on the console. The
resistance levels go from 1 = easy to 16 = hard
15
do not pull the seat out too far – the maximum is
indicated with a piece of tape on the seat post
!
Adjusting the seat height
1. Loosen the hand wheel and pull the plunger
2. adjust the seat up or down to your required height – to line it up
correctly, make sure the number and line is visible at the top of
the seat post mounting tube
3. let go of the plunger and re-tighten the hand wheel – make sure
it is screwed tightly
4. The basic rule for getting the seat height right is that as the pedal
reaches its lowest point, the leg is almost straight
Содержание AchieveHRC
Страница 1: ...owner s manual 01 03 2008...
Страница 18: ...exploded diagram 18...
Страница 19: ...19...
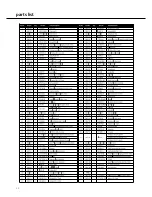
Страница 20: ...parts list 20...


