28
Component Identification and Explanation
Explanation of Functions and Welding Terms
tion would result. If set with a long Down
-
Slope, and 4T is used, the
switch can be toggled to abort the downslope cycle and return to
welding amps. Once the current has declined though, the next
“
click
”
of the torch switch will terminate the arc.
End Amps. This is the current value set for the end of the weld cy-
cle. When 2T or 4T with the torch switch, this is the final current set
used to taper off and fill the crater at the end of the weld. For foot
pedal use, this value should be kept at minimum for proper tail off.
High Frequency Start. Depicted as HF start on the panel, this is a
touchless type of start. When HF start is selected, the user positions
the torch
1/8”
or less above the weld area and either presses the foot
pedal or the torch switch and the arc will jump. This start is created
AC. Alternating current. Used for Aluminum and Magnesium only.
AC Frequency. AC frequency is the number of times per second that
the AC completely cycles between positive and negative polarity. The
number of cycles per second is referred to as Hertz (Hz) or frequen-
cy. Standard transformer welders typically have a fixed frequency of
60 Hz (North American market, other markets may be only 50 Hz).
This is because of the standard input frequency from the power com-
pany is only 60hz(50Hz other regions). Transformer welders only
have the ability to transform voltage, not the frequency. Whatever
frequency is fed into the transformer, will be the frequency that is
output at the torch. However, inverters welders have the ability to
change AC frequency on the output side, despite the input frequency.
This unit has the ability to control AC frequency from 20 to 250Hz.
When operating at lower AC output frequency, the arc is wide and
lazy, but puts more heat into the weld. Operating at higher frequency
focuses the arc, and pinpoints the heat into a narrower area. Higher
frequencies allow the arc to be better directed, but may slow forward
travel speed.
Arc Force. The arc force function only works in Stick mode. Arc
force is used to offset the loss of overall wattage (VxA=W) as arc
length is shortened and voltage begins to drop while stick welding. It
offsets the drop in voltage by injecting extra amps into the weld when
voltage drops below 20V. This enables the amperage to react aggres-
sively or mildly, depending upon settings, to prevent arc outages,
and allowing the user to hold a tight arc and maintain better control.
DC. Direct Current. Used to weld Steel, Stainless Steel (Inox),
Chrome Moly, Titanium, and more. Not used with Aluminum and
Magnesium.
Down Slope. This is a function to be used with 2T/4T remote opera-
tion, not with the foot pedal. This timer controls the decrease of the
amperage and provides a window to fill the crater as the puddle be-
gins to cool before the arc terminates. This is not to be used with
the foot pedal, or a delay, or sudden increase in amps at arc termina-
What Does AC Frequency Control Do?
By increasing or decreasing frequency, the AC Frequency controls
arc cone width, overall heat input, travel speed, and directability of
the arc while welding in AC mode. See the illustration below for how
AC frequency affects the weld. An initial setting of 100Hz to 120Hz is
a good starting point for most general applications.
200 Hz
60 Hz
What Is The Blue Spark and Noise?
You may notice a blue light coming through the front vents of your
welder and may also hear a buzzing sound inside your welder when
you try to start an arc. Don
’
t worry. Both are completely normal. This
is your HF trying to start the arc. During start up, you may also ob-
serve this since the HF cycles briefly as the unit goes through its
start up
“
check
”.
The blue spark you see through the front vents
indicates the location of the HF control board and points. If the blue
arc is present at start, then the HF is working. If you can
’
t see the
spark, or hear the noise when you are trying to start your arc
and
your arc doesn
’
t want to start, then this is when you should contact
Everlast Tech Support. CAUTION! Don
’
t continue try to make the arc
start without somewhere for the HF to travel, ie to the work piece.
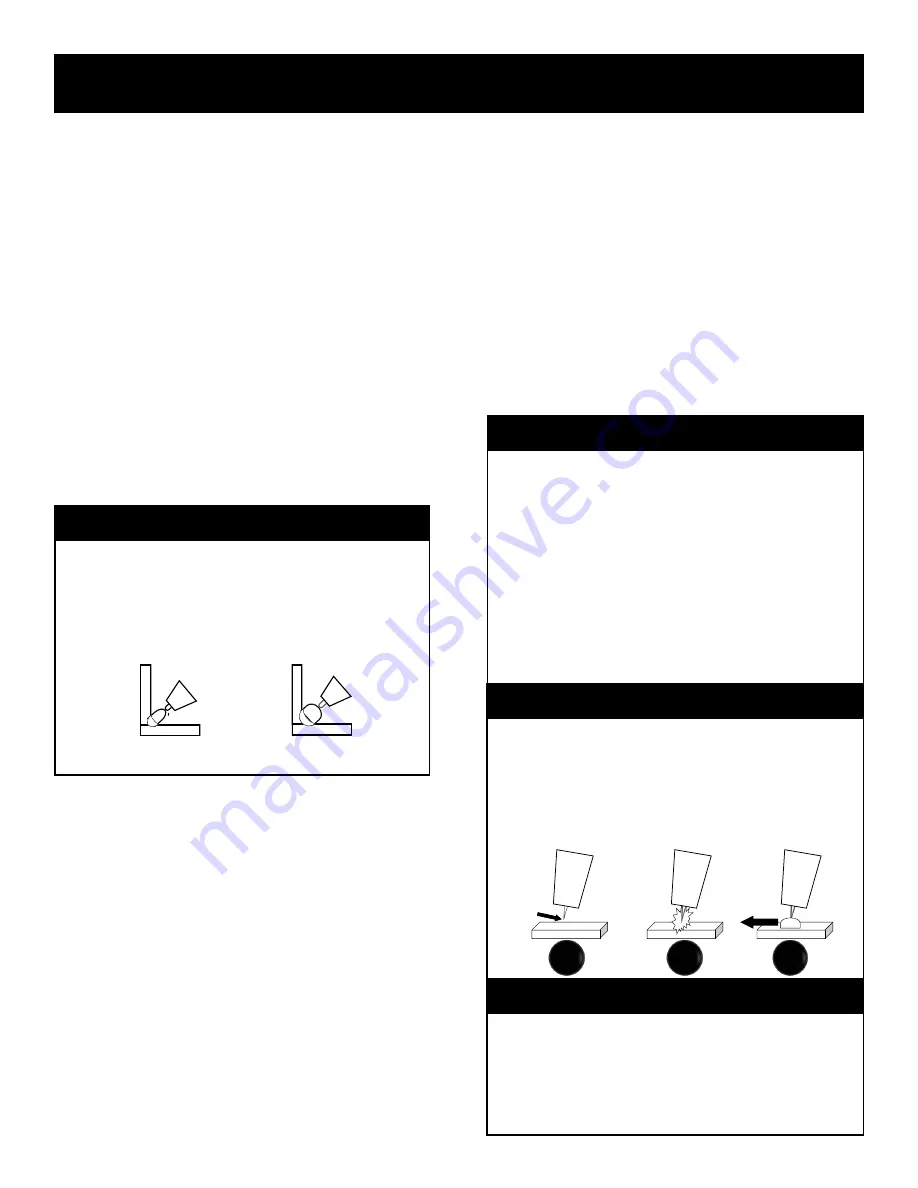
How Do I Perform an HF Start?
Place the point of the tungsten
1/8”
or less over the work piece.
Press the torch trigger or foot pedal, whichever is connected,
and the HF spark will be emitted. It may appear as small sparks
or lighting if the arc doesn
’
t start immediately.
Once continuity establishes, the welding arc will begin. You
may begin to advanced the torch when a puddle forms. Maintain
1/8”
height or less while welding.
2
≤
1/8”
Gap
1
3
NOTICE:
The HF on an inverter is not continuous. Formerly the term
“
HF
”
was
synonymous with AC welding as it was required continuously to help
stabilize the arc on a transformer welder since switching time in AC
was so slow. The two terms were often confused used interchangea-
bly. Inverter switching frequencies are so rapid that the need for
continuous HF overlay is eliminated. HF now refers to the arc start.
Содержание PowerPro 164Si
Страница 46: ...46...


