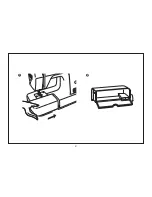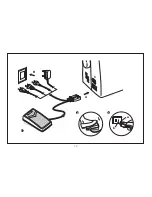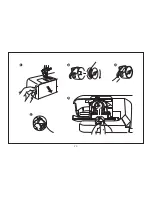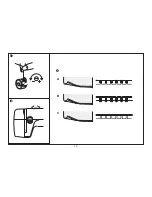
Place an empty bobbin on the bobbin winder
spindle.
Take the thread from the spool through the
bobbin winder tension disc. (1/2)
Wind the thread a few times by hand around
the empty bobbin in a clockwise direction. Push
the bobbin to the right towards the bobbin
winding position. (3)
Press the foot control gently. The bobbin will
stop winding when it is full. Push the bobbin to
the left to "sewing position" and remove it.
Please Note:
When the bobbin winder spindle is in "bobbin
winding" position, the machine will not sew-the
hand wheel will not turn. To start sewing, push
the bobbin winder spindle to the left (sewing
position).
1. Placer une bobine de fil sur la broche porte-
bobine et la retenir avec l'étrier.
2. Amener le fil vers la gauche et le passer à
travers le guide et la tension du bobineur.
Ramener le fil vers la droite. (1/2)
3. Passer le fil dans un trou du dessus de la
canette par l'intérieur et enrouler à la main
le fil de quelques tours sur la canette. (3)
4. Placer la canette vide sur la broche du
bobineur. (3)
5. Pousser la canette, vers la droite, contre
l'arrêt du bobineur. La couture s'interrompt
automatiquement. (3)
6. Retenir l'extrémité du fil et appuyer sur la
commande au pied pour bobiner. Après
quelques tours de bobinage, arrêter la
machine et couper le fil près du trou.
7. Remettre la machine en marche. Dès que
la canette est pleine, l e p r o c e s s u s d e
bobinage est automatiquement interrompu.
8. Retirer la canette et couper le fil.
Poner la canilla vacia en el eje de la
devanadera.
Tirar el hilo de la bobina y hacerlo pasar por
las guias. (1/2)
Envolver el hilo a mano en la canilla en el
sentido contrario de las agujas del reloj. Poner
en marcha el motor pisando el pedal.
Cuando la canilla está llena el embobinado se
para automáticamente. Cortar el hilo y sacar la
canilla llena. (3)
Winding the bobbin
Embobinado del hilo inferior
Remplir la canette
GB
E
F
19
Содержание 8260
Страница 7: ...2 ...
Страница 9: ...22 23 15 16 18 19 20 14 17 21 4 ...
Страница 11: ...6 c a b d g e f h j i k l m n ...
Страница 13: ...8 1 2 ...
Страница 15: ...10 A B 2 3 1 a b C ...
Страница 17: ...12 C A B 1 2 ...
Страница 19: ...14 A 1 2 ...
Страница 21: ...16 b a 1 g 4 e a e b d c f 2 e 3 ...
Страница 23: ...18 1 2 3 ...
Страница 25: ...20 1 3 4 2 5 ...
Страница 27: ...22 A C D A B C 1 2 B ...
Страница 29: ...6 24 1 3 4 2 5 ...
Страница 31: ...A B D C A C B D 1 A 2 26 ...
Страница 33: ...A B C 4 28 1 3 2 ...
Страница 35: ...30 1 2 ...
Страница 37: ...32 2 A 1 3 4 B ...
Страница 42: ...37 ...
Страница 43: ...1 2 3 a b 38 4 ...
Страница 45: ...4 3 2 1 0 5 0 1 2 3 4 40 1 2 ...
Страница 47: ...a c b 0 1 2 3 4 42 1 2 5mm 3 ...
Страница 49: ...0 1 2 3 4 44 1 3 2 ...
Страница 51: ...d a b c e 0 1 2 3 4 46 ...
Страница 53: ...0 1 2 3 4 48 1 2 ...
Страница 55: ...0 1 2 3 4 50 ...
Страница 57: ...0 1 2 3 4 52 ...
Страница 59: ...54 0 1 2 3 4 ...
Страница 61: ...0 1 2 3 4 56 ...
Страница 63: ...0 1 2 3 4 58 1 2 ...
Страница 65: ...60 1 2 3 4 ...
Страница 67: ...b c d e a 62 1 2 3 ...
Страница 75: ...021V860101 Nov 03 EURO PRO 8260 ...

