


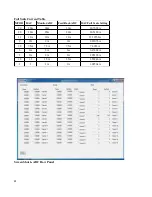
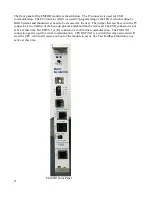


connector) which would indicate a fault on the MCOR module(s).
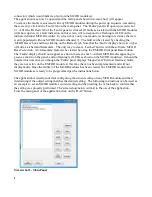
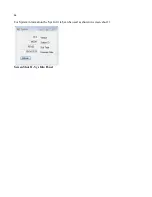
The application may now be opened and the main panel shown in screen shot 1 will appear.
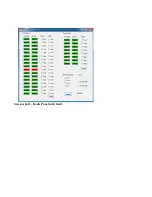
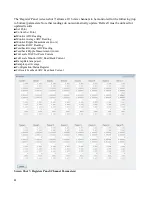
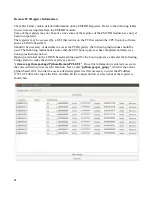
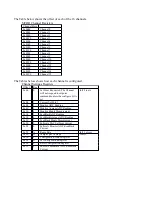
To remove the fault(s) associated with any MCOR modules during the power up sequence, (assuming
there are any) click on the 'Faults' tab on the main panel. The 'Faults' panel will open up (screen shot
2). After the 'Refresh' tab of the 'Faults' panel is clicked, all faults associated with the MCOR modules
will show up in red ( a fault indication on this screen will correspond to a flashing red LED on the
indicated channel MCOR module). In screen shot 2 only one module is showing in red since the crate
is only populated with one MCOR module (channel 7). The fault can be cleared by checking the
'MCOR Reset' box and then clicking on the 'Refresh' tab. Note that the 'Faults' display shows two types
of faults, Latched and Immediate. The only way to clear a 'Latched' fault is with the software 'MCOR
Reset' selection. An 'Immediate' fault can be cleared by using the EMCOR front panel Reset button.
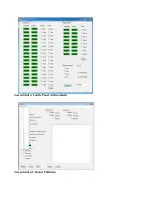
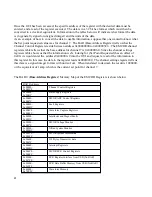
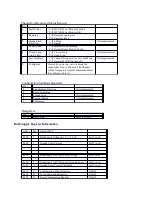
The 'Faults' display should now appear as shown in screen shot 3, with all MCOR faults appearing in
green as shown on the panel, and no flashing red LEDs as shown on the MCOR module(s). It should be
noted at this time that even though the 'Faults' panel displays 'Magnet' and 'External Interlock' faults,
they are not active on the EMCOR module at this time (have not been implemented) and will not
display faults. Once the fault(s) of the MCOR modules has been cleared, the EMCOR module and
MCOR modules are ready to be programmed per the instructions below.
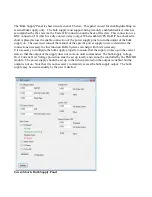
The application is ideally suited for configuring the current setting on any MCOR module and then
determining if the output setting matches the desired setting. The following instructions can be used as
an example to set an MCOR module's current setting and then reading the value back to confirm that
the setting was properly performed. The screen shots below will aid in the use of the application.
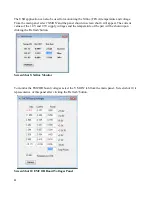
From the main panel of the application click on the 'DAC' button.
Screen shot 1- Main Panel
8


