43
Video Memory Select
Video Setup
Audio1 A2 V1
Video2
Language General
SETUP
Move
Exit
ENTER
Select
Background
Video Adjust
Still Picture
On Screen Display
Angle Indicator
Gray
Start
Auto
On
On
PureCinema
Auto1
Auto2 On Off
DISPLAY
Move
Check
ENTER
Select
Prog.Motion
PureCinema
YNR
CNR
MNR
BNR
Sharpness High
Sharpness Mid
Memory
Detail
White Level
Black Level
Black Setup
Gamma
Hue
Chroma Level
Chroma Delay
Memory
Page 1/2
Page 2/2
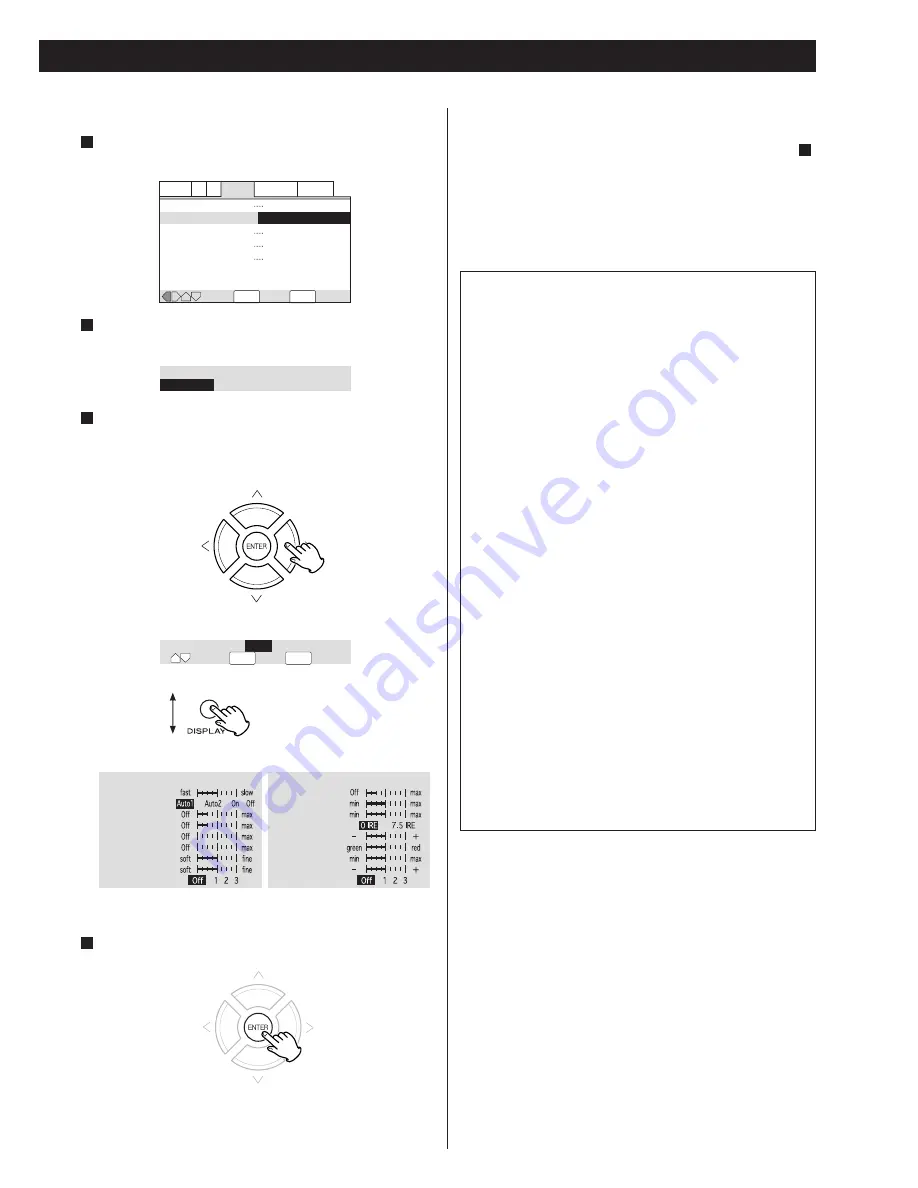
Press the DISPLAY button
to list the parameters.
Creating your own setting
Select “Start” by pressing the DIRECTION buttons, and
press the ENTER button.
1
Select “Video Setup” by pressing the DIRECTION
buttons, and press the ENTER button.
2
Select a parameter by pressing the UP/DOWN buttons,
and change the value by pressing the RIGHT/LEFT
buttons.
Repeat this step to set other parameters.
3
Press the ENTER button to save the change and exit.
4
PureCinema
Video on a DVD discs may be either video material (originally
shot on video) or film material (originally shot on film). Video
material has a frame rate of 30 frames/sec.(NTSC), compared
with 24 frames/sec. for film. This player converts film material to
60 frames/sec. (in progressive scan mode). PureCinema adjusts
the picture so that it matches more closely the picture quality of
a cinema screen.
You can see whether video on a DVD disc is film or video
material by displaying the video transmission rate (see page 30).
Prog.Motion:
When using progressive scan, this adjusts the
motion and still picture quality.
PureCinema:
When watching DVD movies, PureCinema
optimizes the picture quality. The default
setting is Auto1, but if the picture appears
unnatural, set to Auto2, On or Off.
YNR:
Adjusts the amount of noise reduction (NR)
applied to the Y (brightness) component.
CNR:
Adjusts the amount of noise reduction (NR)
applied to the C (color) component.
MNR (Mosquito Noise Reduction) : Adjusts the amount of
noise reduction applied to the mosquito noise
(video artifacts on the edge of the image
resulting from MPEG compression).
BNR (Block Noise Reduction) : Adjusts the amount of noise
reduction applied to the block noise.
Sharpness High: Adjusts the sharpness of the high-frequency
(finely detailed) elements in the picture.
Sharpness Mid: Adjusts the sharpness of the mid-frequency
(less detailed) elements in the picture.
Detail:
Adjusts how sharp edges appear in the
picture.
White Level:
Adjusts the intensity of white in the picture.
Black Level:
Adjusts the intensity of black in the picture.
Black Setup:
For correction of floating black color.
Gamma:
Adjusts the brightness of the darker images in
the picture.
Hue:
Adjusts the overall color balance between red
and green.
Chroma Level: Adjusts how saturated colors appear.
Chroma Delay: Compensates for misalignment of the Y
(brightness) and the C (color) components.
If you want to save your setting in Memory 1, 2 or 3:
1. When all the video adjustment has been finished in step ,
select “Memory” by pressing the UP/DOWN buttons, and
select 1, 2 or 3 by pressing the RIGHT/LEFT buttons.
<
The older setting will be overwritten.
2. Press the ENTER button to save and exit.
Your setting is stored in the selected memory.
3
家电维修技术论坛
http://www.bjjdwx.com/forum.php
79
网络
http://www.79wl.com


