15
Getting Started (Setup Navigator) 1
<
Also turn on your TV and set its input to the correct position
for DVD viewing (VIDEO, etc.).
<
If a disc is set, press the OPEN/CLOSE button and remove the
disc.
Audio1 A2 Video1 V2 Language
General
SETUP
Setup Navigator
Move
Select
Exit
Setup using the Setup Navigator
Setup Navigator
Start
Auto Start Off
Audio1 A2 Video1 V2 Language
General
SETUP
Setup Navigator
Move
Select
Exit
Select the On Screen Language
OSD Language
Language
English
français
Deutsch
Italiano
Español
The language for audio and subtitle is also set to the
language you selected here. If you want to select other
language for audio and subtitle, see 44 page later.
<
If you don’t want to use the Setup Navigator, select “Auto
Start Off” by pressing the DOWN button and the ENTER
button.
<
If you want to return to the previous screen, press the LEFT
button.
The Setup Navigator appears on the screen.
<
Buttons which can be used in the OSD menu are shown at
the bottom of the screen.
The Setup Navigator will help you to make the basic
settings.
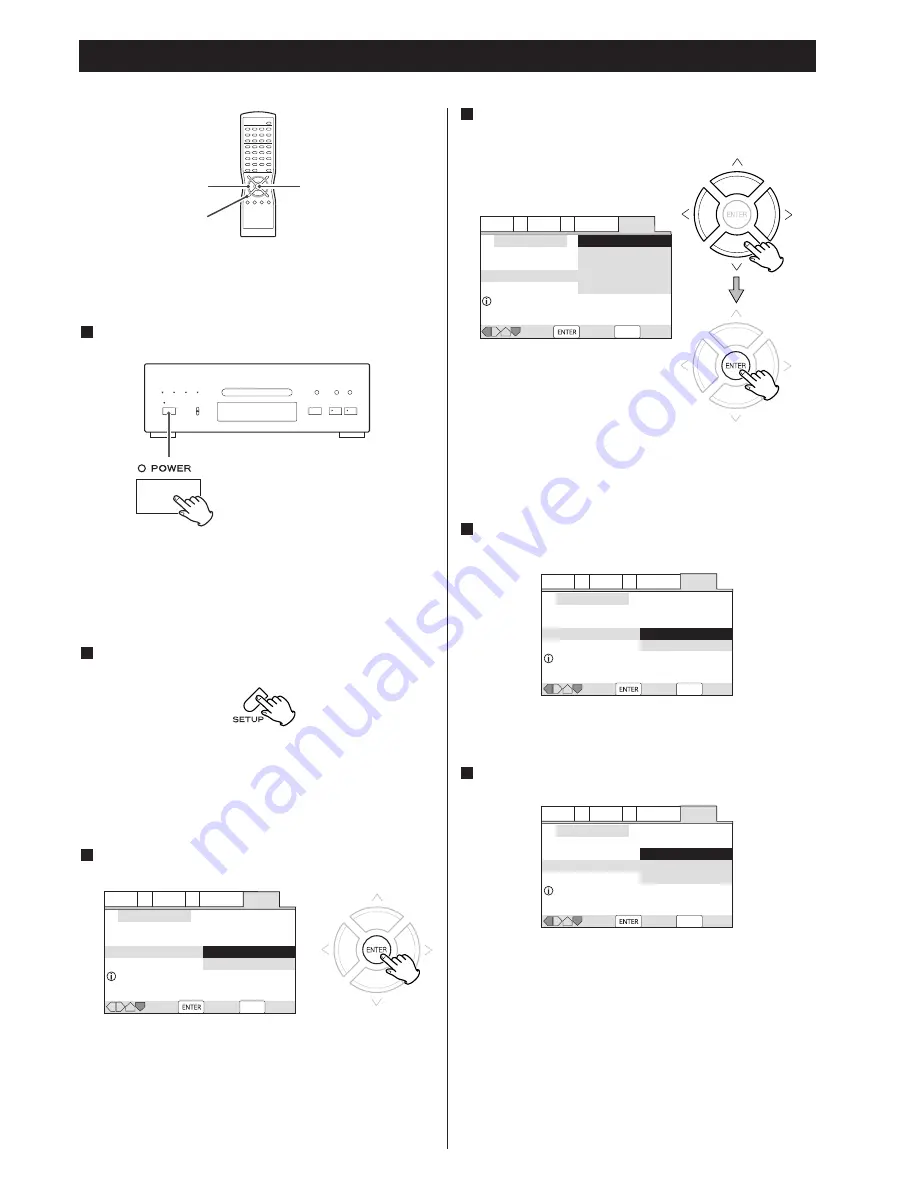
Press the POWER switch to turn the unit on.
1
Press the SETUP button.
2
Press the ENTER button to start the Setup Navigator.
3
Select a language for OSD (On Screen Display) by
pressing the UP/DOWN buttons, and press the ENTER
button.
4
Select 16:9 when a wide-screen TV is connected. Otherwise
select 4:3.
Audio1 A2 Video1 V2 Language
General
SETUP
Setup Navigator
TV Connection
Move
Select
Exit
Widescreen TV
16:9 aspect ratio
TV Type
Widescreen (16:9)
Standard (4:3)
Audio1 A2 Video1 V2 Language
General
SETUP
Setup Navigator
Amp Connection
Move
Select
Exit
2 channel jacks for L/R
Analog Jacks
2 Channel
5.1 Channel
Not Connected
2 Channel:
Select this when the amplifier is connected via the 2CH
AUDIO OUT jack.
5.1 Channel:
Select this when the amplifier is connected via the 5.1CH
AUDIO OUT jack.
Not Connected:
Select this when you don’t use analog audio output.
Select the type of TV by pressing the UP/DOWN buttons
and the ENTER button.
5
Select the type of analog audio connections.
6
DIRECTION
SETUP
ENTER
家电维修技术论坛
http://www.bjjdwx.com/forum.php
79
网络
http://www.79wl.com