


2
In making weld beads previously described, it was probably noted that depositing weld metal on one side of the plate,
caused it to curl up towards the weld; this is called distortion and will almost always be found when heat is applied locally
to a metal plate. Similarly in making a butt weld, distortion will cause the edges of the plate to draw together ahead of the
electrode travel. This is caused by the contraction of the deposited weld metal on cooling. This may be overcome by spread-
ing the edges of the joint apart on a taper of about 1/8” per foot.
Another procedure to avoid metal movement caused by weld heat is to make short welds, tying the two pieces together at
spaced intervals. This is known as tack welding and holds the metal in position for welding.
In making welds in a butt joint, preparation of the edges may be necessary to insure good results. In shielded metal-arc weld-
ing it is a common practice to weld thin materials up to 3/16” thick without any special preparation using the square groove
butt joint. For thicknesses of 3/16” and over, either the single or double V groove is employed. Generally the single V groove
will be satisfactory on thicknesses up to 3/”, regardless of thickness, where one can work on the weld from one side only.
One method for beveling steel for V groove welding is by means of using an oxyacetylene cutting torch. The work may be
done with a hand guided torch or special oxyacetylene cutting machine. However, in performing this cutting, a scale will
develop on the plates. This must be removed by grinding or chipping before welding as it is likely to become entrapped in
the weld bead and produce an unsound weld. Where oxyacetylene cutting equipment is not available, grinding will prob-
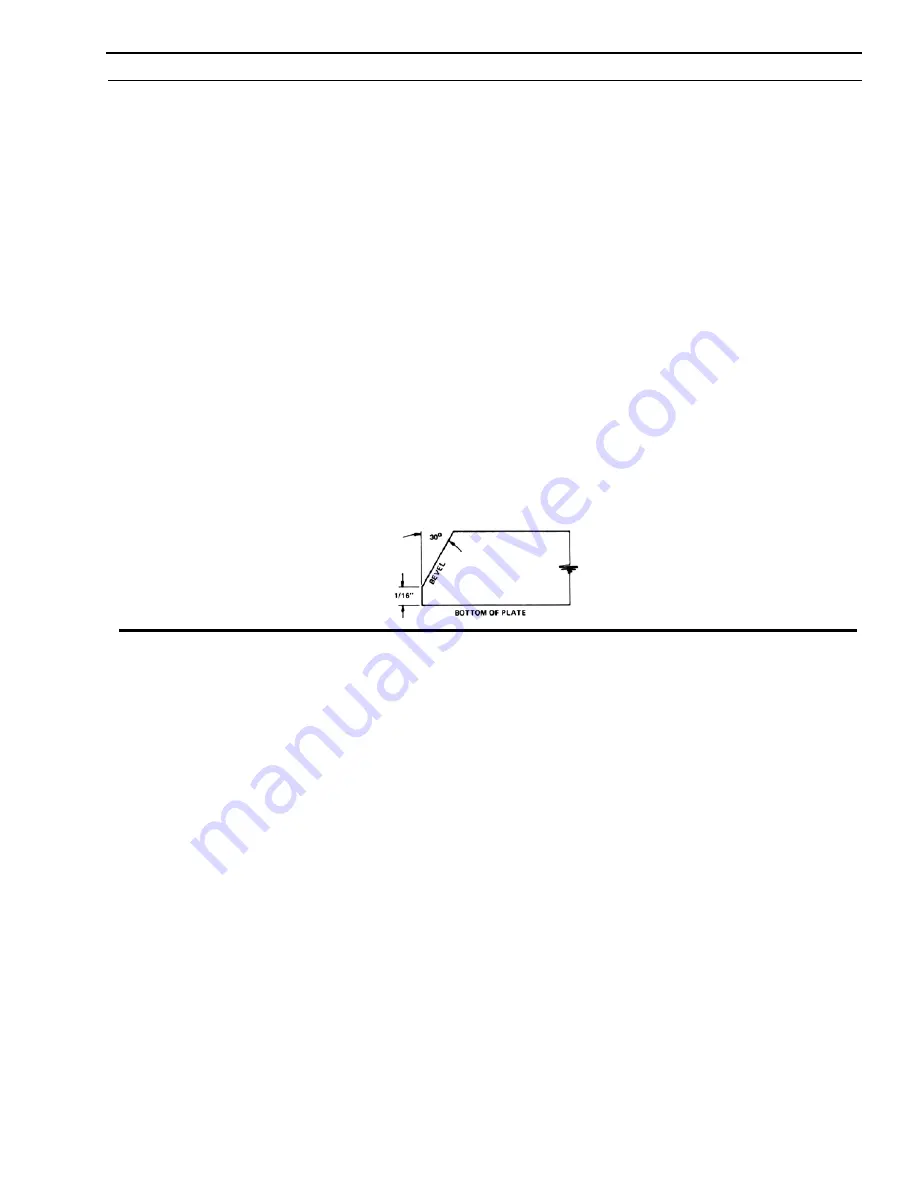
ably be the best means of preparing bevels. The angles of these bevels should be about 30 degrees and the bottom edge
may be left square for a distance of about 1/16”. See Figure 3.18.
Figure 3.18 Single Bevel
Practice making butt welds starting on thin material about 1/8” thick (avoid very thin material, around 1/16” thick, in the
beginning as this requires a fair degree of skill). Separate the squared edges of the 1/8” material about 1/16” and make a
butt weld all the way through with a 1/8” electrode. Probably the first attempt will either fail to penetrate the sheet or burn
through it. Keep trying, adjusting the current within the recommended range; also vary the electrode travel speed to give
the desired weld. Having mastered 1/8” thick metal, proceed to a similar exercise on 1/” thick metal. This time, however,
deposit a bead on each side of the joint and try to fuse one to the other. Since the weld from one side is in effect an 1/8”
thickness, no bevel is needed.
Next make a single V groove on 1/” plate beveled 30 degrees. Start with a 1/8” electrode at the bottom of the groove and
finish over that with a /32” electrode. Be sure to penetrate about 1/32” beyond the bottom of the V (called the root). When
skill has been acquired on the 1/” material, proceed to 3/8” and then to 1/2” thick metal. On these, particularly the 1/2”, also
make the double V groove butt joints. Generally speaking, it will be necessary to deposit a bead or layer for each 1/8” thick-
ness. On the heavier plates, weaving the top layers may be necessary to fill the groove completely.
SECTION 3
OPERATION
Содержание Miniarc 150
Страница 1: ...Miniarc 150 F15 725 02 2006 Instruction Manual...
Страница 4: ...TABLE OF CONTENTS...
Страница 12: ...12 SECTION 1 DESCRIPTION...
Страница 34: ...34 SECTION 3 OPERATION...
Страница 36: ...36 SECTION 4 MAINTENANCE...
Страница 38: ...38...
Страница 44: ...Notes...
Страница 45: ...Notes...
Страница 46: ...Notes...