


Manual 0-5618 5-5
MIG (GMAW) WELDING
EasyWeld / HandyWeld 130
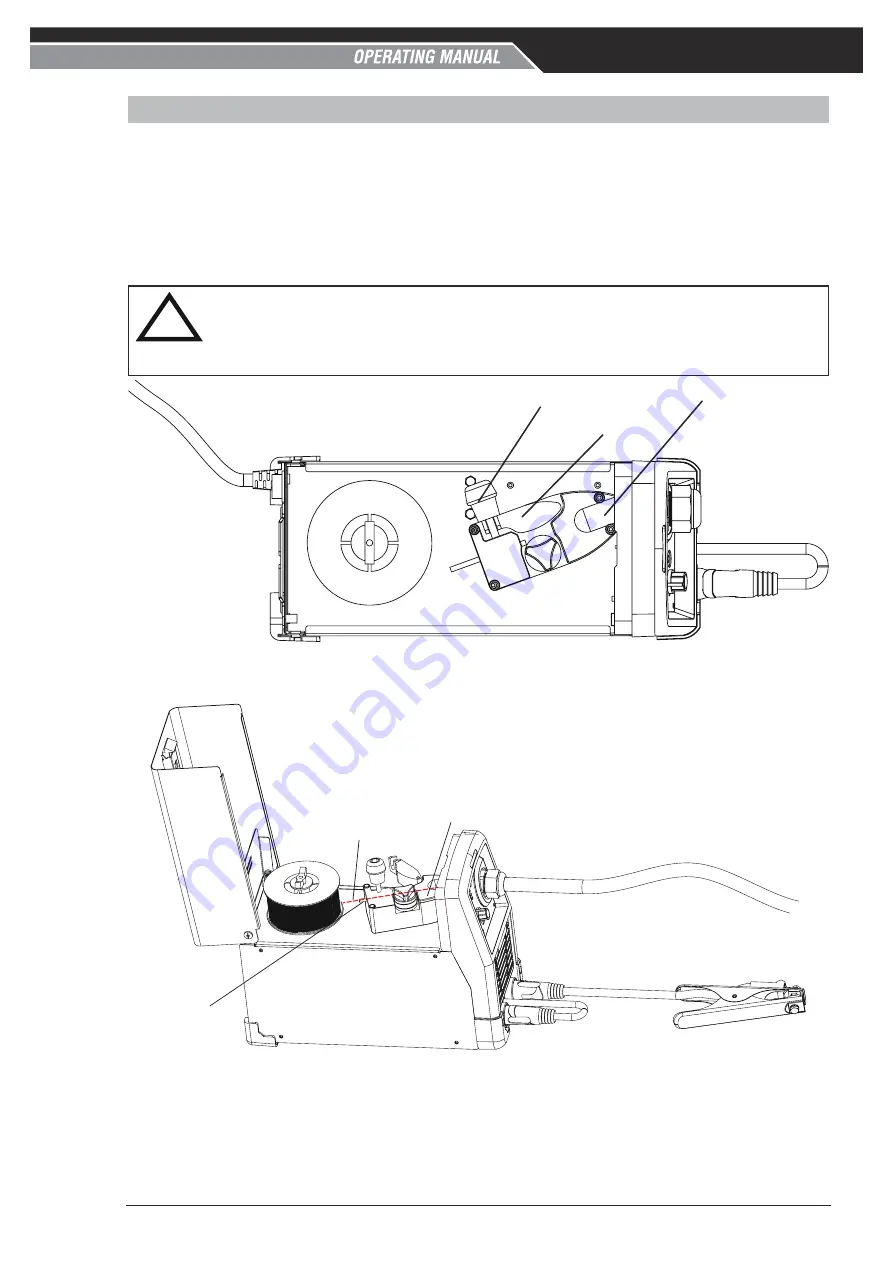
5.03 Inserting Wire into the Wire Feed Mechanism
Release the tension from the pressure roller by turning the adjustable wire drive tension screw in an anti-
clockwise direction. Then to release the pressure roller arm, lift the pressure roller arm tension screw upward
to release the pressure roller arm (Figure 5-5). With the MIG welding wire feeding from the side of the spool
(Figure 5-6) pass the wire through the inlet guide, between the rollers, through the outlet guide and into the
MIG Gun. Re-secure the pressure roller arm and wire drive tension screw and adjust the pressure accordingly
(Figure 5-5). Remove the contact tip from the MIG Gun. With the MIG Gun lead reasonably straight, feed the
wire through the Gun by depressing the trigger switch. Fit the appropriate contact tip.
!!
WARNING
Keep hands clear of the contact tip holder while feeding wire through to the gun. The wire can easily pierce you skin
resulting in injury.
Keep MIG Gun away from eyes and face.
Art # A-14854
Wire Drive Tension Screw
Pressure Roller Arm
Outlet Guide
Figure 5-5: Wire Drive Assembly Components
Art # A-14855
MIG Welding Wire
Inlet Guide
Outlet Guide
Figure 5-6: MIG Welding Wire - Installation
Содержание CIGWELD EasyWeld 130
Страница 8: ...This Page Intentionally Blank...
Страница 14: ...EasyWeld HandyWeld 130 GENERAL INFORMATION 1 6 0 5618 This Page Intentionally Blank...
Страница 26: ...EasyWeld HandyWeld 130 INSTALLATION 3 4 0 5618 This Page Intentionally Blank...
Страница 32: ...EasyWeld HandyWeld 130 OPERATION 4 6 0 5618 This Page Intentionally Blank...
Страница 62: ...EasyWeld HandyWeld 130 APPENDIX A 2 0 5618 This Page Intentionally Blank...
Страница 65: ...EasyWeld HandyWeld 130 This Page Intentionally Blank...