13
ROUTINE MAINTENANCE
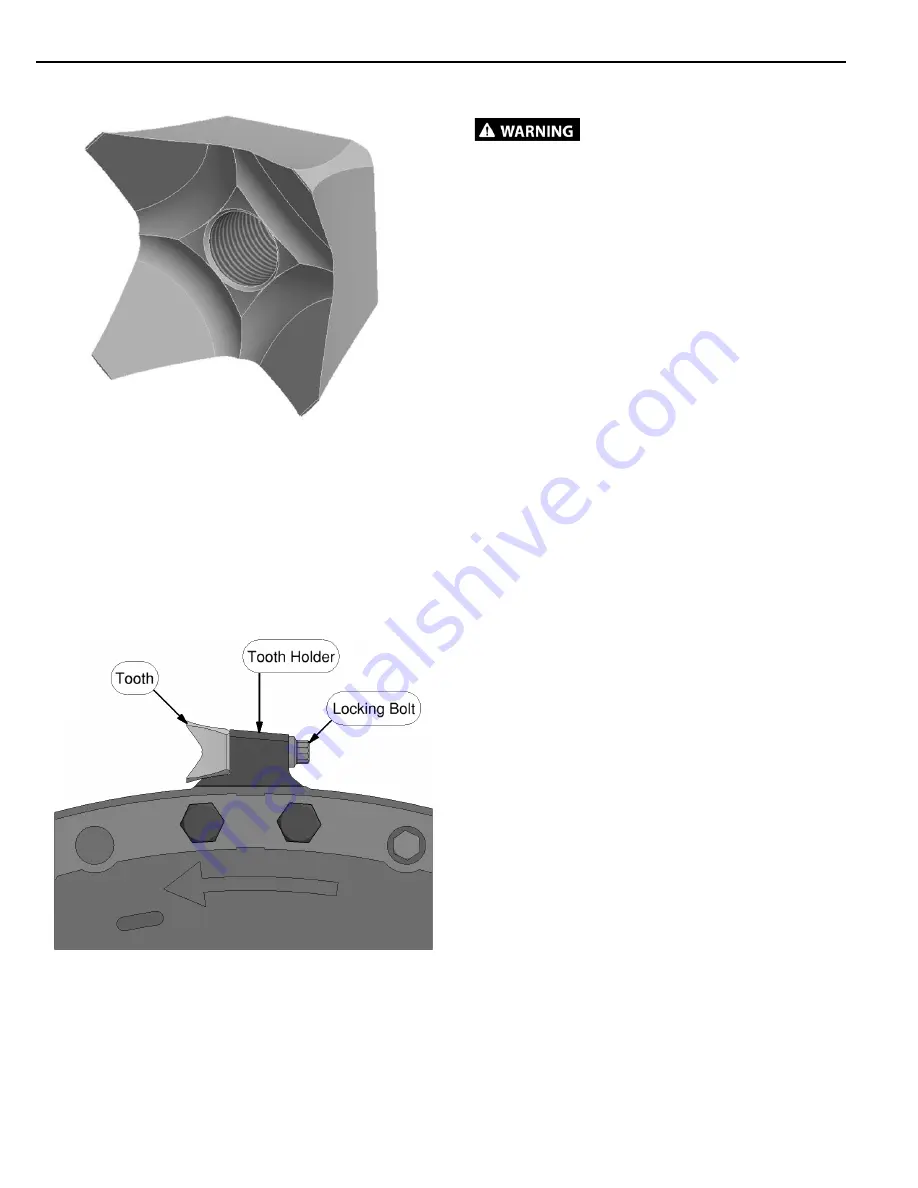
Four-point tooth
Four-Point Tooth Removal
New and used teeth can be sharp.
Wear gloves to protect your hands.
1. Make sure lead hoses are disconnected from
loader before working on attachment. Connect
the attachment hydraulic couplers together if you
want to turn the disc by hand.
2. Remove the tooth locking bolt and tooth, and
set aside.
NOTE:
Tooth may fall from the holder when
removing the tooth locking bolt. Always support
the tooth while removing the bolt.
3. Continue to do this in a directional manner until all
the teeth are removed from the disc.
4. Once all the teeth are removed from the disc,
inspect the disc and holders for excessive wear or
cracking.
NOTE:
Check that the disc can turn freely. Also
check teeth, mounting hardware, and disc for
wear, cracking, or breakage, which can cause
excessive vibrations. Replace if damaged.
Four-Point Tooth Installation
1. If replacing teeth, always use a new bolt during
assembly.
2. Apply anti-seize compound to the bolt threads.
3. Insert tooth locking bolt through tooth holder, and
thread into tooth. Make sure to install the teeth on
the front side of the tooth holders to ensure proper
operation.
4. Tighten the bolt to 350 ft. lbs. (475 Nm) of torque.
5. Repeat procedure until all teeth have been
replaced.
NOTE:
If a few of the teeth are damaged and a
small vibration occurs, it is sometimes possible to
rearrange the teeth to reduce the vibration. This
is done by putting equal amounts of broken teeth
on opposite sides of the disc. A small amount of
vibration is acceptable and normal.
Always use
genuine Erskine
replacement teeth.


