Once RANGE, LEVEL, and THRESHOLD settings are done, push the encoder A/DATA (REC) to
start recording. Record timer will indicate the sampling time and level bar will give visual
feedback on audio input level.
You may want to monitor the recording. In order to do so, push the encoder C, and MON menu
will become active.
To stop recording push the encoder A/DATA again. As soon recording is stopped, the module
Will advance to the sample trim and save mode.
SAMPLE DRUM
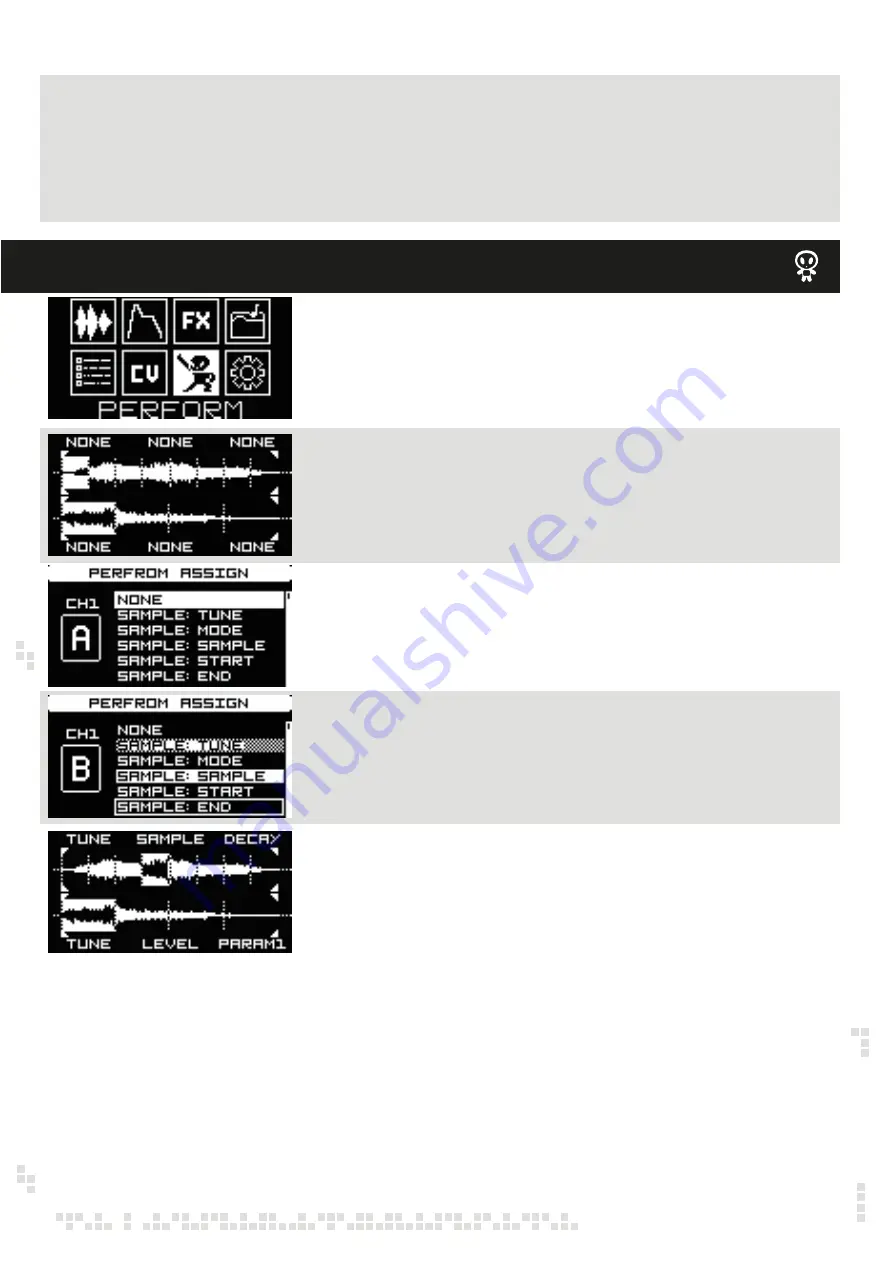
Use the encoder A/DATA to navigate to the PERFORM menu and push to confirm.
The PERFORMANCE mode is dedicated interface to use the Sample Drum in live performances.
Once you have completed sample management (adjusting start/loop/end points or slicing), CV
assign and applied FXes on both channels, in the Performance screen you will see both samples
associated with the project with slices applied and also CV mappings for both channels are active.
In the performance mode you can operate both manual trigger (TRG1 and TRG2) buttons to
play back the samples depending on the mode set in the sample slicing mode.
In the Performance mode you also can assign Sample Drum parameters to the six encoders,
so you can instantly tweak the parameters during live performance. Encoders A/DATA, B and
C are dedicated to the channel 1, encoders D/BACK, E and F are dedicated to the channel 2.
Push the encoder A/DATA and the encoder assign menu will appear. Rotate the encoder
A/DATA to select the encoder (indicated by the letter A in the example on the left) and rotate
the encoder C to select the parameter. Push the encoder C to confirm.
This is complete performance screen, where two different samples are loaded in channel 1 and
channel 2, the sample in the channel 1 is split in 8 slices, the sample in the channel 2 is split in 4 slices.
For the first channel the encoder A controls TUNE, the encoder B selects the SAMPLE and the encoder
C controls DECAY time.
For the second channel the encoder D controls TUNE, the encoder E – LEVEL (or volume) and the
encoder F – PARAMETER 1 of the FX assigned to the channel 2.
After active tweaking of parameters you may want to return to the original settings that are saved with
the Project. To do so simply push the encoder C (channel1) or the encoder F (channel2).
Now use the encoder A/DATA to navigate to the next encoder (B in the example on the left) and
rotate the encoder C to assign a parameter to the encoder B, and so on. Parameters assigned
to other encoders of the relevant channel (1 or 2) are not available.
PERFORMANCE MENU – LIVE PERFORMANCE INTERFACE
0 to +10V - voltage range usually outputted from envelope generators
1V/Oct - voltage range used by most sequencers (no depth setting on this one)
NB! When set to 1V/Oct and SMP: SAMPLE - 64 samples are selected with 64 notes
starting from C-0
When set to 1V/Oct and SLICE: INDEX - 32 slices are selected with 32 notes starting
from C-0


