ROUTER
0
1
2
3
4
5
6
7
1
2
11
12
13
Loos
en
Tighten
0
1
2
3
4
5
6
7
1
2
11
12
13
Tighten
Loos
en
router back to its original position. The depth of
cut is now set, see “Starting the router” section
for final operation.
Before proceeding carry out test cut on waste
timber.
Method 2: Using the scale method
Fit the router bit, loosen the depth stop bar fixing
screw and release the plunge lock lever.
Lower the router down until it contacts the
workpiece, lock into this position with the plunge
lock lever. The scale on the depth bar now shows
the starting position. Note the starting position
will vary depending on the bit used.
Next add the required depth of the cut to the
starting position, i.e.: if the scale shows 20mm
and you require a cut of 10mm, then the correct
adjustment on the scale is 20+10=30mm, if the
scale shows 38mm and the required cut is 6mm
in depth, the adjustment on the scale will be
38+6=44mm.
Now move the depth stop bar to the calculated
number, and lock bar with the fixing screw.
Release the clamp lock lever, the router will return
to its original position.
Start Router as described in “Starting the router”
section below.
Before proceeding carry out test cut on waste
timber.
4. MAKING FINE ADJUSTMENT TO CUT
DEPTH
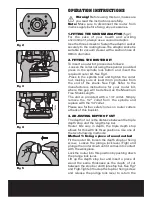
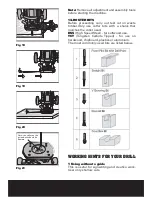
To make fine adjustments, turn the triple depth
stop by loosening the centre screw, lift the stop
and turn to a suitable length screw, release stop
and tighten centre screw.(Fig9)
Turn the appropriate screw with a screwdriver to
obtain fine adjustment (Fig10).
Note all three screws can be adjusted, enabling
you to make different depth cuts on the same
workpiece.
If you wish to make a deep cut it is best to do this
in 2 or 3 stages. Do not cut more than 10mm depth
at a time i.e. If cutting 30mm make 3 separate
10mm cuts. The triple depth stop, can be used for
this purpose by making small variations in the 3
positions available.
If you want to make some accurate adjustment,
micro- adjustment can be made by turning the
micro depth adjustment knob (Fig11). A full turn
is equal to 1mm.
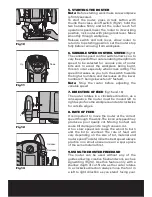
Fig 6
Fig 8
Fig 9
Loosen
Tighten
Fig 7
Содержание ERB210C
Страница 1: ...ROUTER ERB210C WARRANTY YEARS ...
Страница 2: ......
Страница 18: ......
Страница 19: ...ROUTER ...
Страница 20: ......


