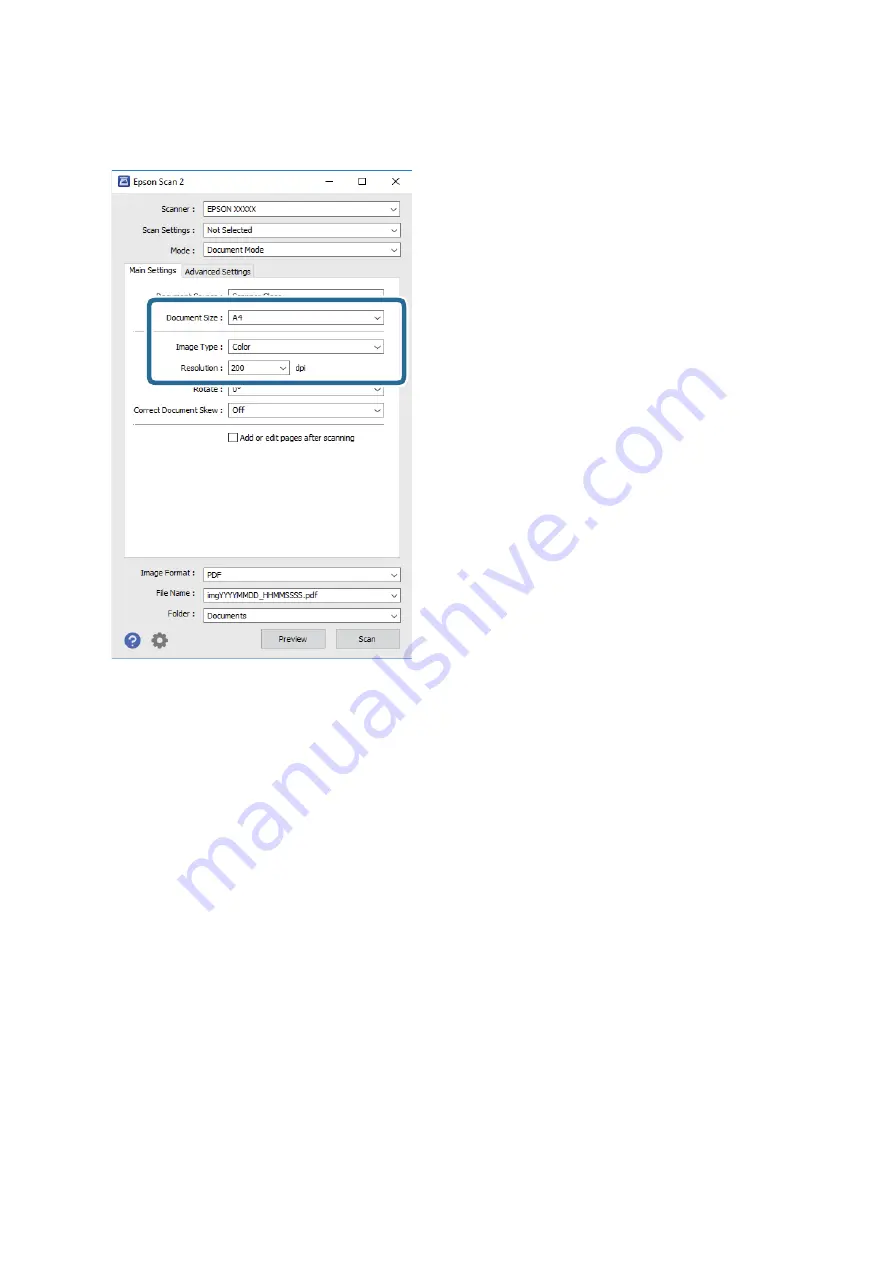
4.
Make the following settings on the
Main Settings
tab.
❏
Document Size
: Select the size of the original you placed.
❏
Image Type
: Select the color for saving the scanned image.
❏
Resolution
: Select the resolution.
Note:
❏
The
Document Source
setting is fixed as
Scanner Glass
. You cannot change this setting.
❏
If you set
Add or edit pages after scanning
, you can scan additional originals after scanning the original. In
addition, if you set the
Image Format
as PDF or Multi-TIFF, you can save the scanned images as one file.
5.
Make other scan settings if necessary.
❏
You can preview the scanned image by clicking the
Preview
button. The preview window opens, and the
previewed image is displayed.
❏
On the
Advanced Settings
tab, you can make detailed image adjustment settings that are suitable for text
documents, such as the following.
❏
Unsharp Mask
: You can enhance and sharpen the outlines of the image.
❏
Descreening
: You can remove moiré patterns (web-like shadows) that appear when scanning printed
papers such as a magazine.
❏
Text Enhancement
: You can make blurred letters in the original clear and sharp.
❏
Auto Area Segmentation
: You can make letters clear and images smooth when performing black and
white scanning for a document that contains images.
User's Guide
Scanning
130


