


Selecting Double-sided Printing Settings - Mac OS X 10.5/10.6/10.7
Selecting Double-sided Printing Settings - Mac OS X 10.4
Placing Originals in the Automatic Document Feeder
Scanning in Office Mode
Scanning in Professional Mode
Selecting Wireless Network Settings From the Control Panel
You can select or change wireless network settings using your product control panel.
To install your product on a wireless network, follow the instructions on the
Start Here
sheet and install
the necessary software from the product CD. The installer program guides you through network setup.
Note:
Breakdown or repair of this product may cause loss of fax and network data and settings. Epson is
not responsible for backing up or recovering data and settings during or after the warranty period. We
recommend that you make your own backup or print out your fax and network data and settings.
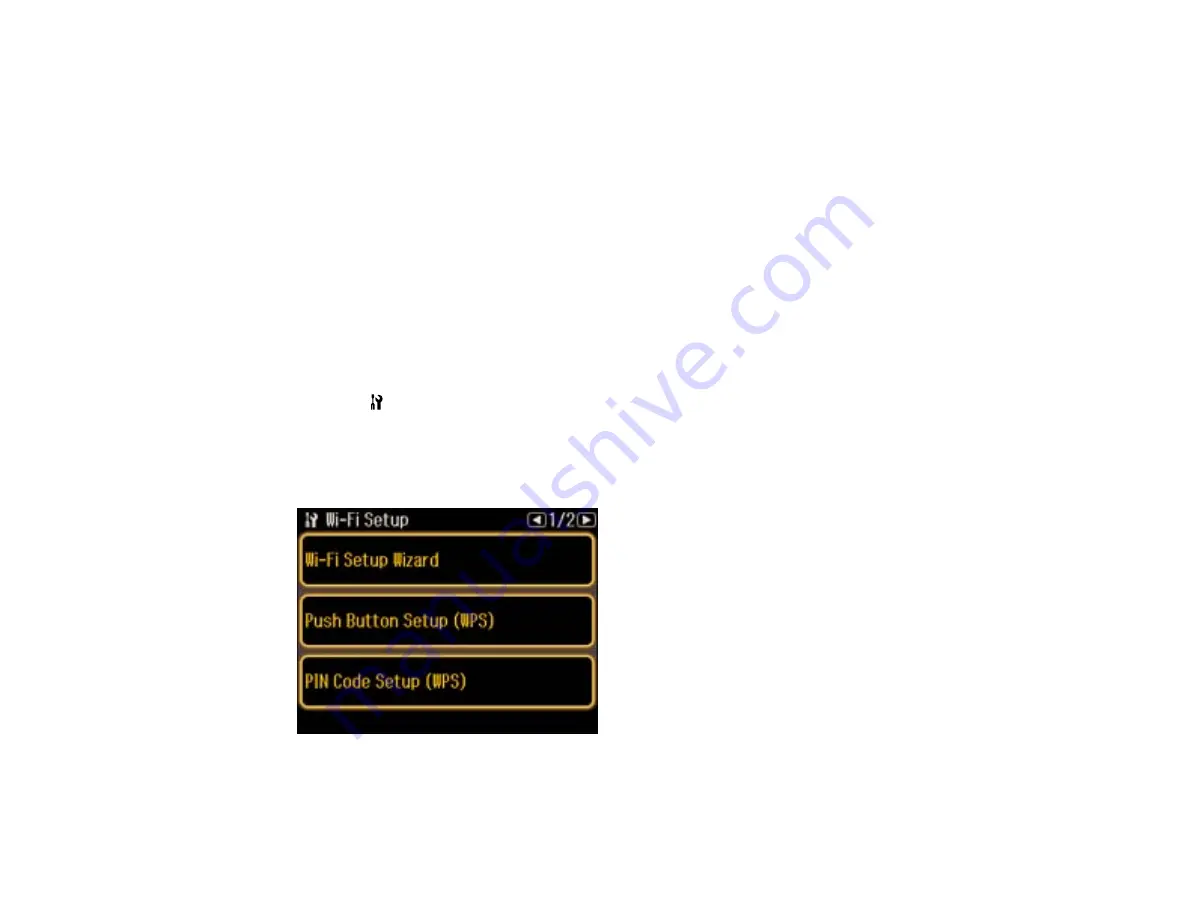
1.
Press the
Setup
button.
2.
Select
Wi-Fi/Network Settings
.
3.
Select
Wi-Fi Setup
.
You see this screen:
22
Содержание WorkForce Pro WP-4540
Страница 1: ...WorkForce Pro WP 4540 User s Guide ...
Страница 2: ......
Страница 12: ......
Страница 13: ...WorkForce Pro WP 4540 User s Guide Welcome to the WorkForce Pro WP 4540 User s Guide 13 ...
Страница 27: ...4 Load a stack of paper printable side down in the cassette as shown 27 ...
Страница 31: ...2 Pull up the rear MP tray 3 Flip the feeder guard forward then slide the edge guides outward 31 ...
Страница 34: ...2 Pull up the rear MP tray 3 Flip the feeder guard forward then slide the edge guides outward 34 ...
Страница 48: ...Parent topic Placing Originals on the Product 48 ...
Страница 49: ...Related topics Copying Scanning Faxing 49 ...
Страница 110: ... Normal preview Click the Auto Locate icon to create a marquee dotted line on the preview image 110 ...
Страница 114: ...3 Adjust the scan area as necessary 114 ...
Страница 121: ...121 ...
Страница 129: ...3 Adjust the scan area as necessary 129 ...
Страница 175: ...5 Select Fax Settings for Printer You see this window 175 ...
Страница 176: ...6 Select your product 7 Select Speed Dial Group Dial List You see this window 176 ...
Страница 215: ...215 ...
Страница 220: ...220 ...
Страница 241: ...5 Carefully follow all paper loading instructions when you load new paper 6 Replace the paper cassette 241 ...
Страница 245: ...3 Remove any jammed pages 245 ...
Страница 247: ...6 Lower the document cover 7 Raise the ADF input tray 247 ...
Страница 248: ...8 Carefully remove the jammed pages 248 ...


