110
4.
Click
Start
to begin the cleaning cycle.
You see a message on the computer screen during the cleaning cycle.
Caution:
Never turn off the product during a cleaning cycle or you may damage it.
5.
When the cleaning cycle is finished, you can check to see if the nozzles are clean; click
Print Nozzle
Check Pattern
and click
.
6.
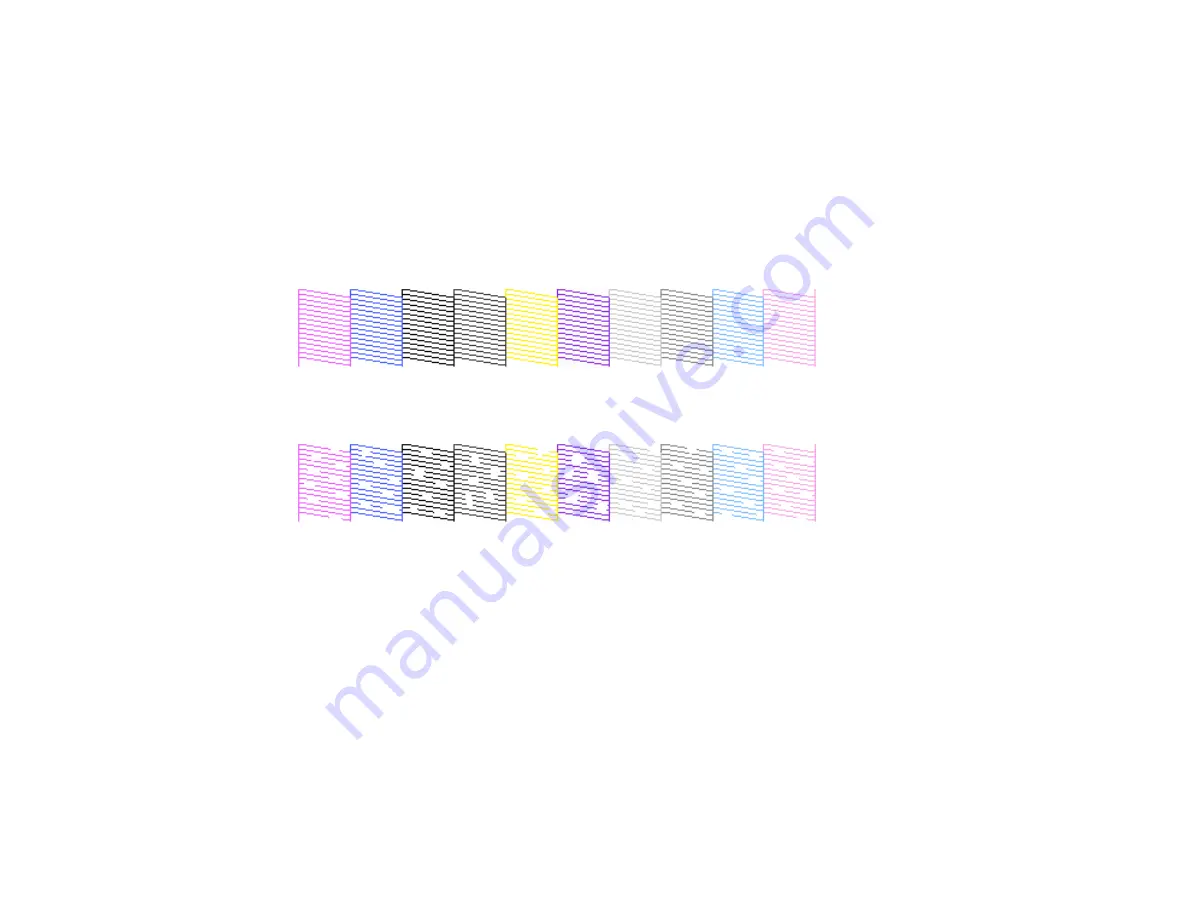
Check the printed pattern to see if there are gaps in the lines.
Print head is clean
Print head needs cleaning
• If there are no gaps, click
Finish
.
• If there are gaps or the pattern is faint, click
Clean
to clean the print head again.
If you don’t see any improvement after cleaning the print head up to 3 times, turn off the product and wait
at least six hours. Then try cleaning the print head again. If quality still does not improve, run a Power
Cleaning. If there is still no improvement, contact Epson support.
Parent topic:
Running a Power Cleaning Using the Product Control Panel
If print head nozzles are still clogged after cleaning the print head several times, run the
Power
Cleaning
utility from the product control panel. This process consumes a lot of ink to clean the clogged
nozzles.
1.
Load a few sheets of plain paper in the rear paper feeder.
Содержание SureColor P700
Страница 1: ...Epson SureColor P700 P900 User s Guide ...
Страница 2: ......
Страница 38: ...38 3 Open the front cover 4 Load paper glossy or printable side up and short edge first ...
Страница 68: ...68 You can also place the same print data multiple times as shown here ...
Страница 69: ...69 You can place print data in different sizes and orientations to maximize media usage as shown here ...
Страница 81: ...81 You see this window ...
Страница 88: ...88 Parent topic Printing with Windows ...
Страница 100: ...100 6 Gently shake the new ink cartridge about 15 times 7 Remove the new ink cartridge from the package ...
Страница 106: ...106 3 Select Print Head Nozzle Check You see a window like this 4 Click Print ...


