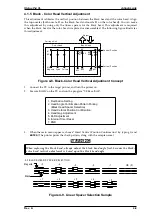
7.
Turn the printer power off now.
8.
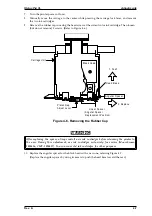
Manually move the carriage to the center while pressing the carriage lock lever, and remove
the two ink cartridges.
9.
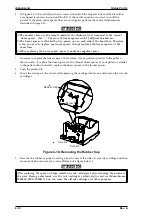
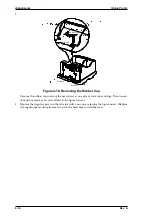
Remove the rubber cap covering the head screw at the side of color ink cartridge. Then loosen
(but do not remove) 3 screws. (Refer to Figure 4-6.)
WARNING
After replacing the spacer, always install new ink cartridges before returning the printer to
the user. During this adjustment, use ink cartridges exclusively for service (Monochrome:
1020626, CMY: 1020627). You can reuse old ink cartridges for other purposes.
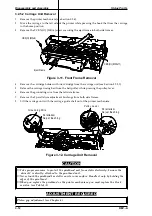
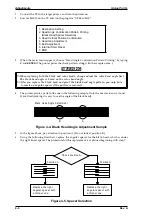
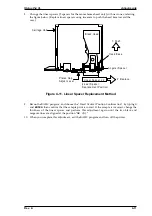
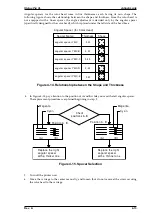
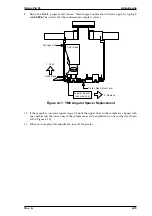
10. Replace the angular spacer for the black head with a new one, referring Figure 4-7.
(Replace the angular spacer by using tweezers to push the head base toward the rear.)
1: Push
Carriage Unit
Pla ten Gap
Adjust Lever
Linear Spacer
Black Head
He ad Ba se
Angular Spacer
2: Replace
(Angular Spacer
Replacement Position)
Figure 4-6. Removing the Rubber Cap
Stylus Pro XL
Adjustments
Rev. A
4-7
Содержание Stylus Pro XL
Страница 1: ...EPSON COLOR INKJET PRINTER Stylus Pro XL SERVICE MANUAL EPSON 4004677 ...
Страница 93: ...Rev A 5 i ...
Страница 127: ...EPSON ...

