EPSON Perfection 4490 Photo
Revision B
Disassembly / Assembly
Disassembly Procedure
54
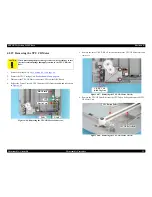
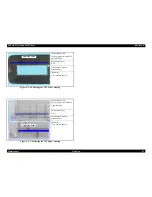
5. Remove the Lamp from the two tabs on each end of the TPU Carriage Unit.
Figure 4-44. Removing the Lamp
Tabs
Lamp
When installing the SUB_C Board and SUB_D Board, match
the notches and tabs as shown in
Figure 4-42
.
When installing the TPU Lamp Cover, match the positioning
holes and the guide pins as shown in the figure below.
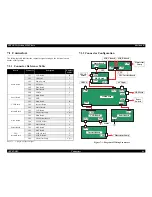
Route the Lamp cables as shown in the figure below.
Figure 4-45. Routing the Lamp Cables
Positioning Hole and Guide Pin
Lamp Cables
Содержание Perfection 4490 Photo
Страница 1: ...EPSON Perfection4490Photo AutomaticDocumentFeeder Color Image Scanner Service Manual SESC05004 ...
Страница 8: ...C H A P T E R 1 PRODUCTDESCRIPTION ...
Страница 18: ...C H A P T E R 2 OPERATINGPRINCIPLES ...
Страница 25: ...C H A P T E R 3 TROUBLESHOOTING ...
Страница 29: ...C H A P T E R 4 DISASSEMBLY ASSEMBLY ...
Страница 57: ...C H A P T E R 5 ADJUSTMENT ...
Страница 59: ...C H A P T E R 6 MAINTENANCE ...
Страница 63: ...C H A P T E R 7 APPENDIX ...
Страница 66: ...Model GT X750 Perfection 4490 Photo Board Main Board Rev A Sheet 1 1 ...
Страница 68: ...Model GT X750 Perfection 4490 Photo Board DRV Board Assy Rev A Sheet 1 1 ...
Страница 69: ...Model GT X750 Perfection 4490 Photo Board Image Sensor Board Rev B Sheet 1 1 ...
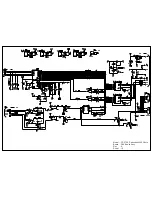
Страница 70: ...Model GT X750 Perfection 4490 Photo Board SUB Board Rev A Sheet 1 1 ...
Страница 71: ...Model GT X750 Perfection 4490 Photo Board SUB C Board Rev A Sheet 1 1 ...
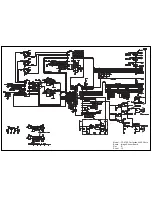
Страница 72: ...Model GT X750 Perfection 4490 Photo Board SUB D Board Rev A Sheet 1 1 ...
Страница 74: ...GT X750 Perfection 4490 Photo NO 1 Rev 02 B176 ACCE 0012 10 20 30 40 400 401 ...
Страница 76: ...R ev 01 B176 CAS E 002 GT X750 Perfection 4490 Photo NO 3 110 111 101 102 ...


