Selecting a Destination Device and Media Size
Read the following for details on selecting which device
to send the scanned image file to, and see page 6-6 for
information on selecting what size to reproduce the scanned
image file at.
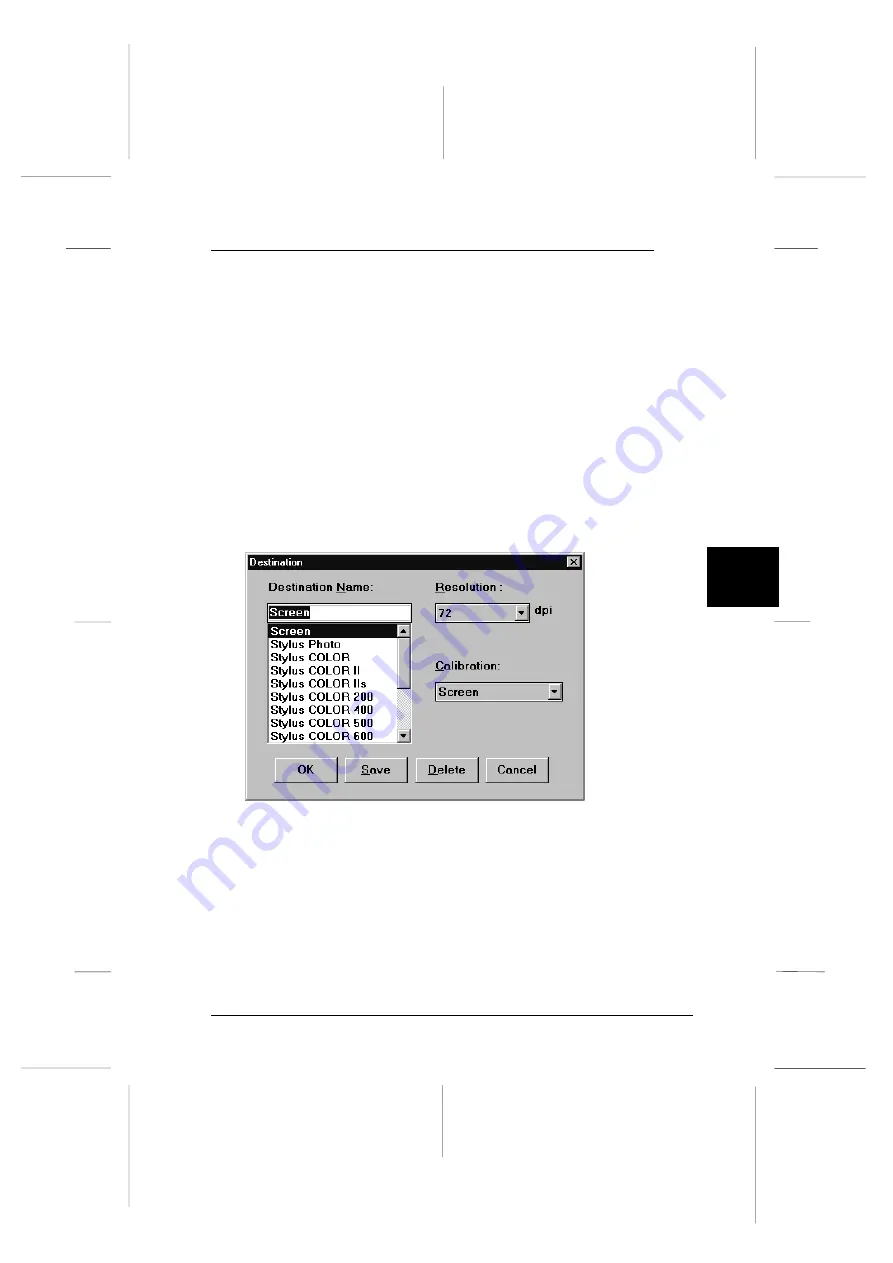
Adding Destination settings
Use the Destination dialog box to add new destination devices
or to change the resolution and calibration settings for existing
devices. To access this dialog box, click the
Destination
button
in the EPSON TWAIN window. The Destination dialog box
appears as shown below.
To add a new destination (output) device, enter the name of the
new device in the Destination Name box by highlighting and
then overwriting the name that is already displayed in the box.
To make the Resolution and Calibration settings, select a
predefined setting or highlight the setting that is displayed and
overwrite it with your custom setting. Then click
Save
.
destina
6
R
Onion Ref. Guide
Rev.c
A5 size
Chapter 6
02-07-97
DR, pass 0
Getting to Know More About EPSON TWAIN
6-3
Содержание FILMSCAN 200
Страница 1: ......
Страница 8: ...L Onion Ref Guide Rev c A5 size Front 02 07 97 DR pass 1 vi ...
Страница 21: ...L Onion Ref Guide Rev c A5 size Chapter 1 02 07 97 DR pass 0 1 10 Getting Started ...
Страница 47: ...L Onion Ref Guide Rev c A5 size Chapter 3 02 07 97 DR pass 1 3 14 Setting Up the Scanner Software ...
Страница 69: ...L Onion Ref Guide Rev c A5 size Chapter 4 02 07 97 DR pass 1 4 22 Scanning 35 mm Film Images ...
Страница 89: ...L Onion Ref Guide Rev c A5 size Chapter 5 02 07 97 DR pass 1 5 20 Scanning Images From Your Film Cartridge ...
Страница 107: ...L Onion Ref Guide Rev c A5 size Chapter 6 02 07 97 DR pass 0 6 18 Gettingto KnowMore AboutEPSONTWAIN ...
Страница 145: ...L Onion Ref Guide Rev c A5 size Glossary 02 07 97 DR pass 1 4 Glossary ...
Страница 151: ......


