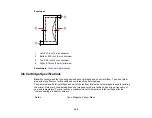
Line of Dots Appears in All Scanned Images
If a line of dots appears in all your scanned images, clean the scanner glass with a soft, dry, lint-free
cloth or use a small amount of glass cleaner on the cloth, if necessary. Paper towels are not
recommended.
Caution:
Do not spray glass cleaner directly on the scanner glass.
Parent topic:
Solving Scanned Image Quality Problems
Related tasks
Straight Lines in an Image Appear Crooked
If straight lines in an original appear crooked in a scanned image, make sure to place your original
straight when you scan it.
Parent topic:
Solving Scanned Image Quality Problems
Related tasks
Placing Originals on the Scanner Glass
Image is Distorted or Blurry
If a scanned image appears distorted or blurry, try these solutions:
• Make sure your original is not wrinkled or warped. This may prevent the original from laying flat on the
scanner glass.
• Do not move your original or your product during scanning.
• Your product will not operate properly while tilted at an angle. Place it on a flat, stable surface that
extends beyond the base of the product in all directions.
• Adjust these Epson Scan settings (if available) and try scanning again:
• Select the
Unsharp Mask
setting.
• Adjust the
Auto Exposure
setting.
• Increase the
Resolution
setting.
Parent topic:
Solving Scanned Image Quality Problems
Related topics
197
Содержание Epson Stylus NX330
Страница 1: ...Epson Stylus NX330 User s Guide ...
Страница 2: ......
Страница 10: ...Default Delay Times for Power Management for Epson Products 221 Copyright Attribution 221 10 ...
Страница 11: ...Epson Stylus NX330 User s Guide Welcome to the Epson Stylus NX330 User s Guide 11 ...
Страница 17: ...Product Parts Top 1 Sheet feeder 2 Paper support 3 Output tray 4 Paper stopper 5 Feeder guard 6 Edge guide 17 ...
Страница 20: ...Product Parts Back 1 AC inlet 2 USB port Parent topic Product Parts Locations 20 ...
Страница 25: ...3 Pull out the output tray and open the paper stopper on the end 4 Slide the edge guide left 25 ...
Страница 28: ...3 Pull out the output tray and open the paper stopper on the end 4 Slide the edge guide left 28 ...
Страница 87: ...87 ...
Страница 93: ... Normal preview Click the Auto Locate icon to create a marquee dotted line on the preview image 93 ...
Страница 97: ...3 Adjust the scan area as necessary 97 ...
Страница 104: ...104 ...
Страница 112: ...3 Adjust the scan area as necessary 112 ...
Страница 144: ...144 ...
Страница 157: ...157 ...
Страница 163: ...163 ...

