


3.
Press the
OK
button.
4.
Press the arrow buttons to select a language and press the
OK
button.
5.
Press the
home button to exit.
Parent topic:
Selecting Wireless Network Settings From the Control Panel
You can select or change wireless network settings using your product control panel.
To install your product on a wireless network, follow the instructions on the
Start Here
sheet and install
the necessary software from the product CD. The installer program guides you through network setup.
Note:
Breakdown or repair of this product may cause loss of network data and settings. Epson is not
responsible for backing up or recovering data and settings during or after the warranty period. We
recommend that you make your own backup or print out your network data and settings.
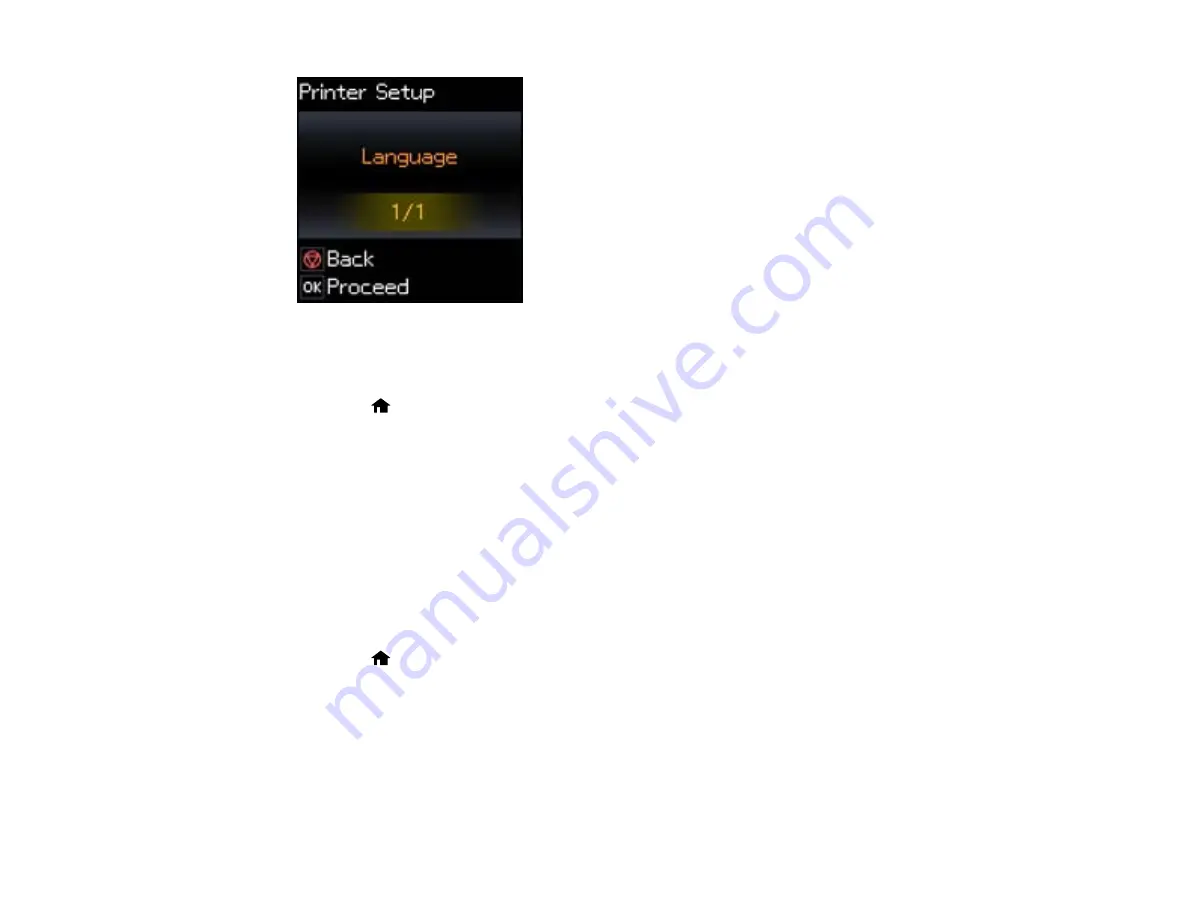
1.
Press the
home button.
2.
Press the arrow buttons to select
Setup
and press the
OK
button.
3.
Press the arrow buttons to select
Wi-Fi Settings
and press the
OK
button.
4.
Press the arrow buttons to select
Wi-Fi Setup
and press the
OK
button.
You see this screen:
14
Содержание Epson Stylus NX330
Страница 1: ...Epson Stylus NX330 User s Guide ...
Страница 2: ......
Страница 10: ...Default Delay Times for Power Management for Epson Products 221 Copyright Attribution 221 10 ...
Страница 11: ...Epson Stylus NX330 User s Guide Welcome to the Epson Stylus NX330 User s Guide 11 ...
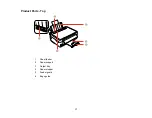
Страница 17: ...Product Parts Top 1 Sheet feeder 2 Paper support 3 Output tray 4 Paper stopper 5 Feeder guard 6 Edge guide 17 ...
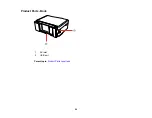
Страница 20: ...Product Parts Back 1 AC inlet 2 USB port Parent topic Product Parts Locations 20 ...
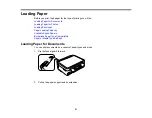
Страница 25: ...3 Pull out the output tray and open the paper stopper on the end 4 Slide the edge guide left 25 ...
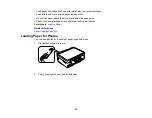
Страница 28: ...3 Pull out the output tray and open the paper stopper on the end 4 Slide the edge guide left 28 ...
Страница 87: ...87 ...
Страница 93: ... Normal preview Click the Auto Locate icon to create a marquee dotted line on the preview image 93 ...
Страница 97: ...3 Adjust the scan area as necessary 97 ...
Страница 104: ...104 ...
Страница 112: ...3 Adjust the scan area as necessary 112 ...
Страница 144: ...144 ...
Страница 157: ...157 ...
Страница 163: ...163 ...


