


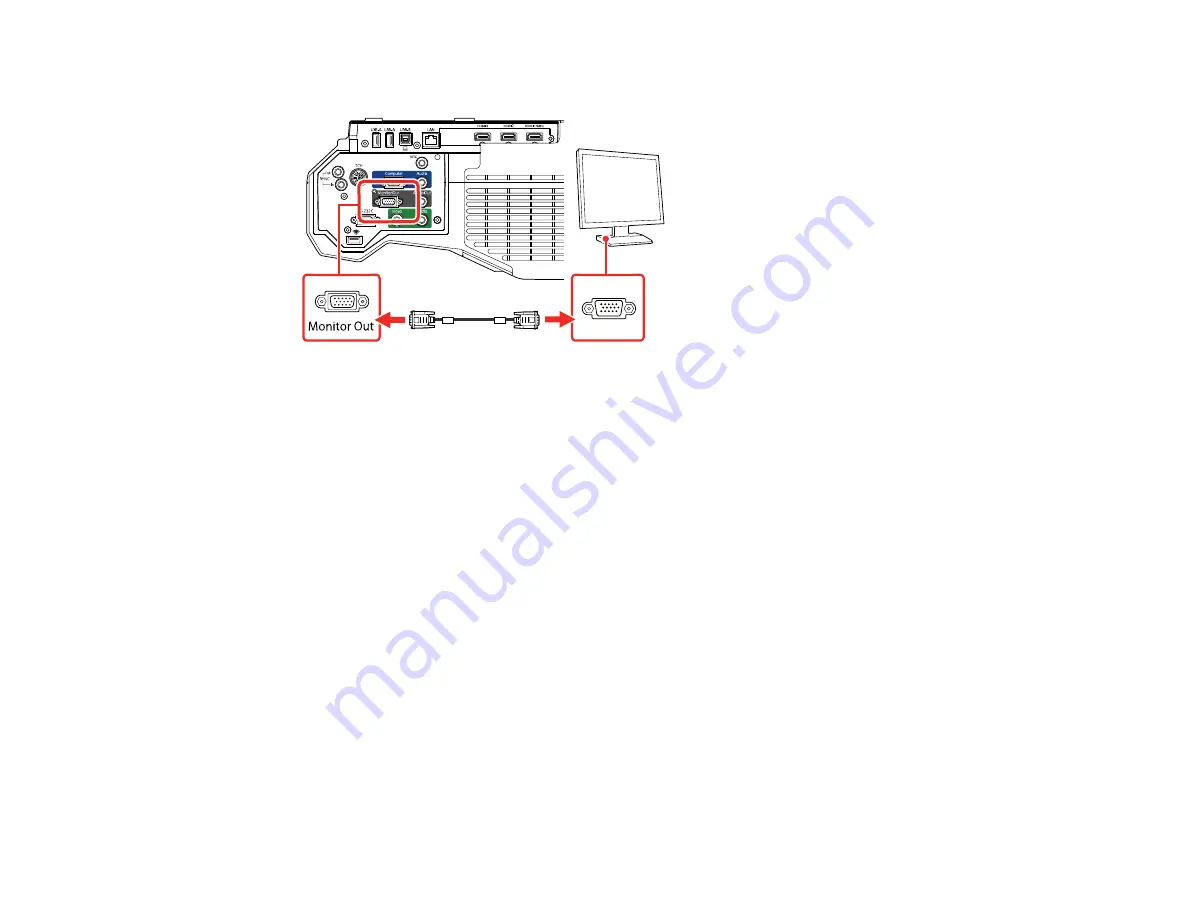
49
2.
Connect the external monitor's cable to your projector's
Monitor Out
port.
Note:
Content you draw using the built-in interactive features is not displayed on an external monitor
unless you draw it using Easy Interactive Tools software.
Parent topic:
Connecting External Output Devices
Connecting to External Speakers
To enhance the sound from your presentation, you can connect the projector to external self-powered
speakers. You can control the volume using the projector's remote control.
You can also connect the projector to an amplifier with speakers.
If you want to output audio from the external speakers when the projector is turned off, you need to
select
Always On
as the
A/V Output
setting in the projector's Extended menu.
Note:
The projector's built-in speaker system is disabled when you connect external speakers.
1.
Make sure your computer or video source is connected to the projector with both audio and video
cables as necessary.
2.
Locate the appropriate cable to connect your external speakers, such as a stereo mini-jack-to-pin-
jack cable, or another type of cable or adapter.
3.
Connect one end of the cable to your external speakers as necessary.
Содержание BrightLink 710Ui
Страница 1: ...BrightLink 710Ui User s Guide ...
Страница 2: ......
Страница 28: ...28 Projector Parts Remote Control ...
Страница 33: ...33 Rear 1 Laser diffusion ports 2 Installation magnets Parent topic Projector Part Locations ...
Страница 57: ...57 1 Remove the battery cover 2 Insert the batteries with the and ends facing as shown ...
Страница 66: ...66 2 Unscrew and remove the cable cover if it is attached screwdriver not included ...
Страница 143: ...143 2 Select the Extended menu and press Enter 3 Select the Multi Projection setting and press Enter ...
Страница 177: ...177 2 Select the Easy Interactive Function setting and press Enter 3 Select Auto Calibration and press Enter ...
Страница 186: ...186 3 Select Touch Unit Setup and press Enter 4 Select Touch Calibration and press Enter ...
Страница 251: ...251 2 Slide the air filter cover latch and open the air filter cover ...
Страница 255: ...255 1 Twist off the tip of the pen to remove it ...
Страница 257: ...257 1 Twist off the tip of the pen to remove it 2 Remove the soft tip ...
Страница 258: ...258 3 Insert the new tip 4 Twist on the pen tip Parent topic Maintaining and Transporting the Projector ...
Страница 296: ...296 Side ...
Страница 309: ...309 Copyright Attribution 2017 Epson America Inc 10 17 CPD 54271 Parent topic Copyright Notice ...


