


5.
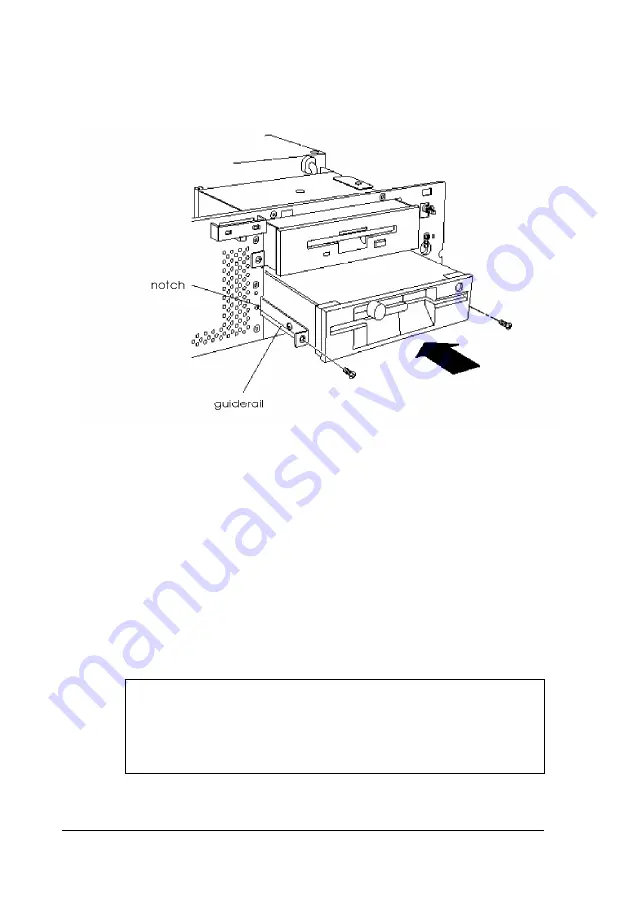
Align the guiderails on each side of the drive with the
notches on each side of the drive bay, as shown below.
6.
Slide the drive into the bay as far as it will go.
7. Secure the guiderails to the computer case with the two
screws you saved in step 4.
Connecting the Power Cables
Follow these steps to connect the IDE drive ribbon cable and
power cable to the drive:
1. Locate the connector at the end of the IDE drive ribbon cable.
Note
Make sure you connect a CD-ROM drive to the
secondary IDE interface; do not use the same cable for a
hard disk drive and a CD-ROM drive.
5-16
Installing and Removing Drives
Содержание ActionPC 2600
Страница 1: ......
Страница 26: ...1 10 Setting Up Your System ...
Страница 66: ...CPU type jumper settings 4 8 Installing and Removing Options ...
Страница 120: ...Physical Characteristics Environmental Requirements Specifications A 7 ...
Страница 123: ...IDE hard disk drive jumper settings DMA Assignments A 10 Specifications ...
Страница 124: ...Hardware Interrupts System Memory Map Specifications A 11 ...
Страница 125: ...System I O Address Map A 12 Specifications ...
Страница 137: ...10 Glossary ...
Страница 147: ...10 Index ...


