background image

Page 37

EPS Stromversorgung GmbH

Alter Postweg 101 • 86159 Augsburg

Germany

Fon: +49 821 / 570451-0

Fax: +49 821 / 570451-25

www.eps-germany.de

[email protected]

ELR 9000 Series

3.3 

Alarm conditions

This section only gives an overview about device alarms. What to do in case your device indi-

cates an alarm condition is described in section „3.6. Alarms and monitoring“.

As a basic principle, all alarm conditions are signalled optically (text + message in the display), acoustically (if 

activated) and as a readable status and alarm counter via the digital interface. In addition, the alarms OT and 

OVP are reported as signals on the analogue interface. For later acquisition, an alarm counter can be read from 

the display or via digital interface.

3.3.1  Power Fail 

Power Fail (PF) indicates an alarm condition which may have various causes:

• 

AC input voltage too low (mains undervoltage, mains failure)

• 

Defect in the input circuit (PFC)

• 

Not all required AC input phases are connected (see 

„2.3.4. Mains connection (AC)“

 for requirements)

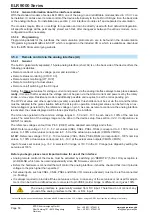
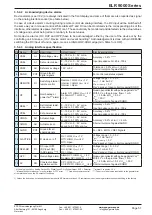
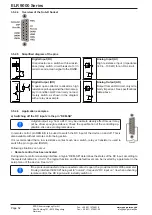
As soon as a power fail occurs, the device will stop to sink power and switch off the DC input. In case the power fail 

was an undervoltage and is gone later on, the alarm will vanish from display and doesn’t require to be acknowledged.
The condition of the DC input after a gone PF alarm can be determined in the MENU. See 

3.4.3.

Switching off the device with the mains switch can not be distinguished from a mains blackout 

and thus the device will signalise a PF alarm every time the device is switched off. This can 

be ignored.

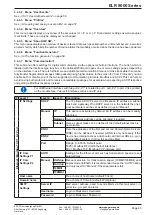
3.3.2  Overtemperature

An overtemperature alarm (OT) can occur if an excess temperature inside the device and causes it to stop sink-

ing power temporarily. This can occur due to a defect of the internal fan regulation or due to excessive ambient 

temperature. Though the device recovers most of the consumed energy with a high efficiency, it requires cooling.

After cooling down, the device will automatically continue to work, while the condition of the DC input remains and 

the alarm doesn’t require to be acknowledged. 

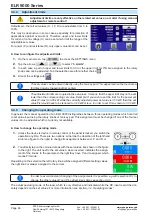
3.3.3  Overvoltage

An overvoltage alarm (OVP) will switch off the DC input and can occur if:

• 

the connected voltage source provides a higher voltage to the DC input than set in the overvoltage alarm limits 

(OVP, 0...110% U

NOM

)

This function serves to warn the user of the electronic load acoustically or optically that the connected voltage 

source has generated an excessive voltage and thereby could damage or even destroy the input circuit and other 

parts of the device.

The device is not fitted with protection from external overvoltage.

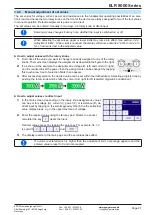
3.3.4  Overcurrent

An overcurrent alarm (OCP) will switch off the DC input and can occur if:

• 

The input current in the DC input exceeds the adjusted OCP limit.

This function serves to protect the voltage and current source so that this is not overloaded and possibly damaged, 

rather than offering protection to the electronic load.

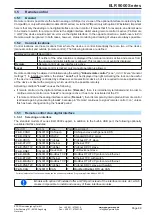
3.3.5  Overpower

An overpower alarm (OPP) will switch off the DC input and can occur if:

• 

the product of the input voltage and input current in the DC input exceeds the adjusted OPP limit.

This function serves to protect the voltage and current source so that this is not overloaded and possibly damaged, 

rather than offering protection to the electronic load.
Содержание 33 200 401

Страница 1: ...oad with Energy Recovery Operating Manual Attention This document is only valid for devices with firmwares KE 2 11 HMI 2 03 and DR 1 6 3 or higher For availability of updates for your device check our website or contact us Doc ID ELR9TEN Revision 03 Date 10 2015 ...

Страница 2: ......

Страница 3: ...ion to DC sources 30 2 3 6 Grounding of the DC input 31 2 3 7 Connection of remote sensing 31 2 3 8 Connecting the Share bus 32 2 3 9 Installation of an AnyBus interface module 32 2 3 10 Connecting the analog interface 33 2 3 11 Connecting the USB port rear side 33 2 3 12 Initial commission 34 2 3 13 Commission after a firmware update or a long period of non use 34 3 OPERATIONANDAPPLICATION 3 1 Pe...

Страница 4: ...ction generator 68 3 10 Other applications 69 3 10 1 Series connection 69 3 10 2 Parallel operation in master slave MS 69 3 10 3 Two quadrants operation 2QO 73 4 SERVICINGAND MAINTENANCE 4 1 Maintenance cleaning 75 4 2 Fault finding diagnosis repair 75 4 2 1 Replacing a defect mains fuse 75 4 3 Firmware updates 76 4 3 1 Update of the control panel unit HMI 76 4 3 2 Update of the interface unit KE ...

Страница 5: ... 33 200 405 ELR 9080 510 33 200 410 Changes and modifications for special models will be listed in a separate document 1 1 4 Symbols and warnings Warning and safety notices as well as general notices in this document are shown in a box with a symbol as follows Symbol for a life threatening danger Symbol for general safety notices instructions and damage protection bans Symbol for general notices 1...

Страница 6: ...evice in Ampere Maximum voltage of the device in Volt Series 8 Series 8000 or 800 9 Series 9000 etc Type identification PS Power Supply usually programmable PSI Power Supply Intelligent always programmable EL Electronic Load always programmable ELR Electronic Load with Recovery BC Battery Charger not programmable BCI Battery Charger Intelligent programmable Special models are always derived from s...

Страница 7: ...equipment under power sparking may occur which can cause burns as well as damage to the equipment and to the source ESD regulations must be applied when plugging interface cards or modules into the relative slot Interface cards or modules may only be attached or removed after the device is switched off It is not necessary to open the device Do not connect external power sources with reversed polar...

Страница 8: ...nsibilities for operation maintenance and cleaning of the equipment ensure that all employees who use the equipment have read and understood the manual Furthermore the users are to be regularly schooled in working with the equipment and the possible dangers provide all personnel who work with the equipment with the designated and recommended safety equipment Furthermore the operator is responsible...

Страница 9: ... The device and or the load could be damaged Signal OCP OverCurrent Shutdown of the DC input due to excess of the preset limit Non critical protects the source from excessive current drain Signal OPP OverPower Shutdown of the DC input due to excess of the preset limit Non critical protects the source from excessive power drain Signal PF Power Fail DC input shutdown due to AC undervoltage or defect...

Страница 10: ... 22 A Overvoltage protection range 0 1 1 UMax 0 1 1 UMax 0 1 1 UMax 0 1 1 UMax Overcurrent protection range 0 1 1 IMax 0 1 1 IMax 0 1 1 IMax 0 1 1 IMax Overpower protection range 0 1 1 PMax 0 1 1 PMax 0 1 1 PMax 0 1 1 PMax Max allowed input voltage 100 V 300 V 600 V 850 V Min input voltage for IMax 0 73 V 2 3 V 4 6 V 6 8 V Temperature coefficient for set values Δ K Voltage current 100 ppm Voltage ...

Страница 11: ...perature 20 70 C Digital interfaces Featured 1x USB B for communication 1x USB A for functions and HMI firmware updates 1x Master slave bus 1x GPIB optional Slot for AnyBus modules 2 CANopen Profibus Profinet RS232 Devicenet Ethernet ModBus Galvanic isolation to the device max 1500 V DC Terminals Rear side Share Bus DC input AC input output remote sensing analog interface USB B master slave bus An...

Страница 12: ... Overvoltage protection range 0 1 1 UMax 0 1 1 UMax 0 1 1 UMax 0 1 1 UMax 0 1 1 UMax Overcurrent protection range 0 1 1 IMax 0 1 1 IMax 0 1 1 IMax 0 1 1 IMax 0 1 1 IMax Overpower protection range 0 1 1 PMax 0 1 1 PMax 0 1 1 PMax 0 1 1 PMax 0 1 1 PMax Max allowed input voltage 100 V 300 V 600 V 850 V 1200 V Min input voltage for IMax 0 73 V 2 3 V 4 6 V 6 9 V 9 2 V Temperature coefficient for set va...

Страница 13: ...erature 20 70 C Digital interfaces Featured 1x USB B for communication 1x USB A for functions and HMI firmware updates 1x Master slave bus 1x GPIB optional Slot for AnyBus modules 2 CANopen Profibus Profinet RS232 Devicenet Ethernet ModBus Galvanic isolation to the device max 1500 V DC Terminals Rear side Share Bus DC input AC input output remote sensing analog interface USB B master slave bus Any...

Страница 14: ...66 A 30 A Overvoltage protection range 0 1 1 UMax 0 1 1 UMax 0 1 1 UMax 0 1 1 UMax 0 1 1 UMax Overcurrent protection range 0 1 1 IMax 0 1 1 IMax 0 1 1 IMax 0 1 1 IMax 0 1 1 IMax Overpower protection range 0 1 1 PMax 0 1 1 PMax 0 1 1 PMax 0 1 1 PMax 0 1 1 PMax Max allowed input voltage 100 V 300 V 600 V 850 V 1750 V Min input voltage for IMax 0 73 V 2 3 V 4 6 V 6 9 V 9 2 V Temperature coefficient f...

Страница 15: ...perature 20 70 C Digital interfaces Featured 1x USB B for communication 1x USB A for functions and HMI firmware updates 1x Master slave bus 1x GPIB optional Slot for AnyBus modules 2 CANopen Profibus Profinet RS232 Devicenet Ethernet ModBus Galvanic isolation to the device max 1500 V DC Terminals Rear side Share Bus DC input AC input output remote sensing analog interface USB B master slave bus An...

Страница 16: ...21 570451 25 www eps germany de info eps germany de A Mains switch D Share Bus and remote sensing connection G Master Slave ports B Control panel E DC input view shows terminal type 1 C Control interfaces digital analog F AC input output connection Figure 1 Front side Figure 2 Back side of standard version 1 8 4 Views ...

Страница 17: ...EPS Stromversorgung GmbH Alter Postweg 101 86159Augsburg Germany Fon 49 821 570451 0 Fax 49 821 570451 25 www eps germany de info eps germany de ELR 9000 Series Figure 3 Left hand side Figure 4 Right hand side ...

Страница 18: ...Page 18 EPS Stromversorgung GmbH Alter Postweg 101 86159Augsburg Germany ELR 9000 Series Fon 49 821 570451 0 Fax 49 821 570451 25 www eps germany de info eps germany de Figure 5 View from above ...

Страница 19: ...resistance set values or setting the parameter values in the menu Left knob push selection of the decimal position to be changed cursor in the current value selection Right knob turn adjusting the current set value or setting parameter values in the menu Right knob push selection of the decimal position to be changed cursor in the current value selection 3 On Off Button for DC input Used to toggle...

Страница 20: ...guration if at all necessary is simple Thus the loads may for example be oper ated with other loads or even other types of equipment or controlled by a PC or PLC all using the digital interfaces In addition the devices offer the possibility to connect to compatible power supplies via a Shared Bus in order to create a so called two quadrants system This operation mode uses the source sink principle...

Страница 21: ...ncluded with the device or as PDF download on the EPS Stromversorgung website Automatic Isolation Unit ENS2 External automatic isolation unit AIU former german term ENS with contactors for one ELR 9000 up to 10 5 kW resp without contactors bigger system where contactors are installed by the user which might be required to be installed for the operation of an energy recovering device which is conne...

Страница 22: ... only displayed by active resistance mode When the DC input is switched on the actual regulation mode CV CC CP or CR is displayed next to the cor responding actual values as show in the figure above The set values can be adjusted with the rotary knobs next to the display screen or can be entered directly via the touchscreen When adjusting with the knobs pushing the knob will select the digit to be...

Страница 23: ...These can be changed by tapping this area as long as it s not locked The display changes to The physical units on the depiction of the knobs show the current assign ment With an electronic load the right hand knob is always assigned to the current I while the left knob can be switched by tapping the depiction The area will then show the assignment U I P I R I Left rotary knob voltage Right rotary ...

Страница 24: ...the device will lie within percentage tolerances as shown in the technical data sheets These will influence the actual values 1 9 6 5 USB Port Front side The frontal USB port located to the right of the rotary knobs is intended for the connection of standard USB flash drives flash drive This can be used for Up or down loading from sequences for the arbitrary and UI IU function generator Updating H...

Страница 25: ...g options are available date 10 15 2015 Article number Name Description 35400100 IF AB CANO CANopen 1x Sub D 9pole male 35400101 IF AB RS232 RS 232 1x Sub D 9pole male null modem 35400103 IF AB PBUS Profibus DP V1 Slave 1x Sub D 9pole female 35400104 IF AB ETH1P Ethernet 1x RJ45 35400105 IF AB PNET1P ProfiNET IO 1x RJ45 35400106 IF AB DNET Devicenet 1x Wago plug 5 pole 35400107 IF AB MBUS1P ModBus...

Страница 26: ...nsate for voltage drops along the DC cables from the source the Sense input can be connected to the source The maximum possible compensation is given in the technical data 1 9 12 Master Slave bus A further port is provided on the back side of the device comprising two RJ45 sockets which enables multiple devices of the same model to be connected via a digital bus RS485 to create a master slave syst...

Страница 27: ...internal through humidity 2 2 Unpacking and visual check After every transport with or without packaging or before commissioning the equipment should be visually inspected for damage and completeness using the delivery note and or parts list see section 1 9 3 Scope of delivery An obviously damaged device e g loose parts inside damage outside must under no circumstances be put in operation 2 3 Inst...

Страница 28: ...ich depends on cable length and heating To compensate for these the cable cross section should be increased and the cable length reduced 2 3 3 Installing the device Select the location for the device so that the connection to the source is as short as possible Leave sufficient space behind the equipment minimum 30 cm for ventilation of warm air that will be exhausted even with devices which feed b...

Страница 29: ...nnector Supply type 3500 W L2 N PE Single phase wall etc L1 L2 L3 N PE Three phase 7000 W L1 L3 N PE Three phase L1 L2 L3 N PE Three phase 10500 W L1 L2 L3 N PE Three phase L1 L2 L3 N PE Three phase 10500 W L1 L2 L3 N PE Three phase L1 L2 L3 N PE Three phase The N conductor is imperative and must always be wired If using an automatic isolation unit AIU all phases of a three phase supply are requir...

Страница 30: ...gle cables of for example 70 mm may be replaced by 2x35 mm etc If the cables are long then the cross section must be increased to avoid voltage loss and overheating 2 3 5 1 DC terminal types The table below shows an overview of the various DC terminals It is recommended that connection of load cables always utilizes flexible cables with ring lugs Type 1 Models up to 250 V nominal voltage Type 2 Mo...

Страница 31: ...support an input voltage higher than 400 V grounding of the DC plus pole is not allowed Do not ground the DC plus pole on any model with 400 V nominal voltage If grounding one of the input poles ensure that no output pole of the source e g power supply is grounded This could lead to a short circuit 2 3 7 Connection of remote sensing Both pins NC on the Sense terminal must not be connected The cros...

Страница 32: ...9000 standard version models with Anybus slot can be retrofitted by the user and are exchangeable with each other The settings for the currently installed module vary and need to be checked and if necessary corrected on initial installation and after module exchange Common ESD protection procedures apply when inserting or exchanging a module The device must be switched off before insertion or remo...

Страница 33: ...ion while Windows 8 and 10 refuse to install it For these Windows 8 you should get the updated INF file from our website or upon request For Windows 10 users this Windows version installs a default driver for CDC devices see above which then are all listed as USB Serial Port and not as ELR 9000 Series in the Windows Device Manager In order to prevent that you can install the driver inf or installe...

Страница 34: ...ion are suitable for your intended application of the device and adjust them if required as described in the manual In case of remote control via PC read the additional documentation for interfaces and software In case of remote control via the analog interface read the section in this manual concerning analog interfaces 2 3 13 Commission after a firmware update or a long period of non use In case...

Страница 35: ... can be read via digital interface 3 2 1 1 Speed of the voltage controller The internal voltage controller can be switched between Slow and Fast see 3 4 3 1 Menu General Settings Factory default value is Slow Which setting to select depends on the actual situation in which the device is going to be operated but primarily it depends of the type of voltage source An active regulated source such as a...

Страница 36: ... lower input voltages higher current can flow and vice versa in order to maintain constant power within the range PN see diagram to the right While the DC input is switched on and constant power operation is active the con dition CP mode active will be shown on the graphic display by the abbreviation CP as well it will be stored as internal status which can be read via digital interface Constant p...

Страница 37: ...ed 3 3 2 Overtemperature An overtemperature alarm OT can occur if an excess temperature inside the device and causes it to stop sink ing power temporarily This can occur due to a defect of the internal fan regulation or due to excessive ambient temperature Though the device recovers most of the consumed energy with a high efficiency it requires cooling After cooling down the device will automatica...

Страница 38: ... off All set values are also restored 3 4 2 Switching the device off On switch off the last input condition and the most recent set values and input status as well as activated master slave operation are saved Furthermore a PF alarm power failure will be reported but has to be ignored here The DC input is immediately switched off and after a short while fans will shut down and after another few se...

Страница 39: ...SLAVE Event U Event I Event P UVD 0V Unom Action NO SIGNAL WARNING ALARM OVD 0V Unom Action NO SIGNAL WARNING ALARM UCD 0A Inom Action NO SIGNAL WARNING ALARM OCD 0A Inom Action NO SIGNAL WARNING ALARM OPD 0W Pnom Action NO SIGNAL WARNING ALARM Default Profile User Profile 1 User Profile 2 User Profile 3 User Profile 4 User Profile 5 Device address 1 15 Page 4 DC input after PF alarm OFF AUTO Rest...

Страница 40: ...t 0V Umax Uend 0V Umax Seq time 0 1ms 36000s Sequence 1 Sequence 2 Sequence 3 Sequence 4 Sequence 5 DIN Repetition Seq cycles 0 999 Time t1 0 1ms 36000s Us AC 0V Umax Ue AC 0V Umax fs 1 T 0Hz 1000Hz fe 1 T 0Hz 1000Hz Angle 0 359 Us DC 0V Umax Ue DC 0V Umax Seq time 0 1ms 36000s Settings 1 Settings 2 01 100 Ustart 0V Umax Uend 0V Umax t1 0 1ms 36000s 1ms t2 0 1ms 36000s 1ms U I U I UI Table IU Tabl...

Страница 41: ... Series MENU Communication name Configure Backlight English Deutsch Русский 中文 Language Always on Off after 60 sec Brightness HMI Lock Lock all ON OFF possible Key Sound Sound on Sound off Alarm Sound Sound on Sound off HMI Update HMI Setup Com Timeout Com Protocols Timeout USB RS232 ms 5 65535 SCPI ModBus Timeout ETH s 5 65535 Enable PIN Change user PIN Start ...

Страница 42: ...tion prior to switch off Voltage controller settings 3 Selects the regulation speed of the internal voltage regulator between Slow and Fast See 3 2 1 1 Speed of the voltage controller DC input after PF alarm 4 Determines how the DC input shall react after a power fail PF alarm has occurred OFF DC input will be switched off and remain until user action Auto ON DC input will switch on again after th...

Страница 43: ... response and getting a ModBus response instead For all Ethernet interfaces with two ports P1 is related to port 1 and P2 to port 2 like printed on the module face Two port interfaces will use one IP only IF Level 1 Level 2 Level 3 Description Ethernet ModBus TCP 1 2 Port IP Settings DHCP The IF allows a DHCP server to allocate an IP address a subnet mask and a gateway If no DHCP server is in the ...

Страница 44: ...efined if the default subnet mask is not suitable DNS 1 Here the addresses of the first and second Domain Name Servers DNS can be defined if needed A DNS is only necessary if the device has Internet access and should call Internet URLs e g an internal eMail system in order to send an eMail DNS 2 Port Range 0 65535 Default ports 5025 Modbus RTU for Modbus SCPI Host name Free choice of host name def...

Страница 45: ...ted time it will close the socket connection Com Protocols Enables or disables SCPI or ModBus communication protocols for the device The change is immediately effective after submitting it with ENTER button Only one of both can be disabled 3 4 3 8 Menu HMI settings These settings refer exclusively to the control panel HMI Element Description Language Selection of the display language Currently dat...

Страница 46: ...lue P max to 3 00 kW while the currently adjusted power set value is 3 50 kW then the set value first would have to be reduced to 3 00 kW or less in order to set P max down to 3 00 kW 3 4 5 Changing the operating mode In general the manual operation of an ELR 9000 distinguishes between three operating modes which are tied to set value input using the rotary knobs or ten key pad This assignment mus...

Страница 47: ...y knobs The main screen displays the assignment as depicted in the figure to the right 2 If as shown in the example the assignment is voltage U left and current I right and it is required to set the power then the assignments can be changed by tapping this touch area A set of selection fields then appears 3 After successful selection the desired value can be set within the defined limits Selecting...

Страница 48: ...ification in the display How to manually switch the DC input on or off 1 As long as the control panel HMI is not fully locked press the button ON OFF Otherwise you are asked to disable the HMI lock first 2 This button toggles between on and off as long as a change is not restricted by an alarm or the device is locked in Remote The condition is displayed as either Input ON or Input OFF How to remot...

Страница 49: ...evice is remotely controlled by software or some electronic device but it is required to make adjustments at the device or deal with emergency which would not be possible remotely Activating condition Local causes the following If remote control via the digital interface is active Remote then it is immediately terminated and in order to continue remote control once Local is no longer active it has...

Страница 50: ...adapted to the given situation before the AI is put in operation Analog set values can be fed in by an ex ternal voltage or generated by the reference voltage on pin 3 As soon as remote control via the analog interface is activated the values displayed will be those provided by the interface The AI can be operated in the common voltage ranges 0 5 V and 0 10 V in each case 0 100 of the nominal valu...

Страница 51: ...nder Open collector against DGND 6 OT DO Overheating or power fail alarm Alarm OT HIGH UHigh 4 V No Alarm OT LOW ULow 1 V Quasi open collector with pull up against Vcc With 5 V on the pin max flow 1 mA IMax 10 mA at UCE 0 3 V UMax 30 V Short circuit proof against DGND 7 RSEL 1 AI Set internal resist ance value 0 10 V or 0 5 V corre spond to 0 100 of RMax Accuracy 0 2 Input impedance Ri 40 k 100 k ...

Страница 52: ... input via the pin REM SB A digital output e g from a PLC may be unable to cleanly effect this as it may not be of low enough resistance Check the specification of the controlling ap plication Also see pin diagrams above In remote control pin REM SB is be used to switch the DC input of the device on and off This is also available without remote control being active It is recommended that a low res...

Страница 53: ...r off by pushbutton or digital command LOW inverted HIGH inverted DC input will be switched off and locked Later it can be switched on again by toggling the pin During lock pushbutton or digital command can delete the request to switch on by pin LOW normal b Remote control of current and power Requires remote control to be activated Pin Remote LOW The set values PSEL and CSEL are generated from fo...

Страница 54: ...a switching power supply or similar sources can be much higher than expected due to capacities on the source s output even if the source is current limited and might thus trigger the overcurrent shutdown OCP or the overcurrent event OCD of the electronic load in case these supervision thresholds are adjusted to too sensitive levels When switching off the DC input of the electronic load while a cur...

Страница 55: ... the power switch The DC input will be switched off Display digital IF OT OverTem perature Triggers an alarm if the internal temperature exceeds a certain limit The DC input will be switched off Display analog IF digital IF OTpre OverTem perature prewarning Triggers an event of type WARNING if the internal temperature reaches a certain limit lower than the one of OT This event is intended to warn ...

Страница 56: ...shold 0 W PNom These events should not be confused with alarms such as OT and OVP which are for device protection User defined events can however if set to action ALARM switch off the DC input and thus protect the source power supply battery How to configure user defined events 1 Tap the touch area on the main screen 2 On the right side tap the arrows to select 4 1 Event U or 4 2 Event I or 4 3 Ev...

Страница 57: ...ise the pop up will disappear and the HMI remains locked In case the additional PIN code lock has been activated in the menu HMI Lock another requester will pop up asking you to enter the PIN before it finally unlocks the HMI 3 8 Loading and saving a user profile The menu Profiles serves to select between a default profile and up to 5 user profiles A profile is a collection of all settings and set...

Страница 58: ... 3 9 2 1 Limitations The function generator is not accessible neither for manual access nor for remote control if master slave mode has been activated and the device was configured as slave resistance modes R I adjustment mode also called UIR mode is active 3 9 2 2 Resolution of X time and Y amplitude The function generator can set 4096 steps between 0 100 of any nominal value The intervals to cre...

Страница 59: ...or one function run the function generator will not accept the settings and pop up an error 5 Do not forget to adjust the overall limits of voltage current and power which you can access with touch area When entering function generator mode those global limits are reset to safe values which might prevent the function from working at all For example if you apply the selected function to the input c...

Страница 60: ...for a sine function Value Range Description I A U A 0 Nominal value Off von U I A Amplitude of the signal to be generated I Off U Off A Nominal value A von U I Off Offset based on the zero point of the mathematic sine curve may not be smaller than the amplitude f 1 t 1 10000 Hz Static frequency of the signal to be generated Schematic diagram Application and result Offset Amplitude t A f Amplitude ...

Страница 61: ...for a rectangular wave function Value Range Description I A U A 0 Nominal value Off of U I A Amplitude of the signal to be generated I Off U Off 0 Nominal value A of U I Off Offset based on the foot of the rectangular wave t1 0 1 ms 36000 s Time pulse width of the upper level amplitude t2 0 1 ms 36000 s Time pause width of the lower level offset Schematic diagram Application and result Offset t A ...

Страница 62: ... based on the curve defined in DIN 40839 EN ISO 7637 test impulse 4 and is only applicable to voltage It shall replicate the progress of automobile battery voltage during engine starting The curve is divided into 5 sequences see diagram below which each have the same parameters The standard values from the DIN are set already as default values for the five sequences The following parameters can be...

Страница 63: ...C Angle 0 359 1 100 Start angle of the sine wave part of the curve AC Is DC Is AC Nominal value Is AC of I 1 100 Start value of the DC part of the curve Ie DC Ie AC Nominal value Ie AC of I 1 100 End value of the DC part of the curve Seq time 0 1 ms 36000 s 1 100 Time for the selected sequence The sequence time seq time and the start and end frequency are related The minimum value for Δf s is 9 3 ...

Страница 64: ... from start to end DC and the amplitude also with each new half sine wave Additionally the first sine wave starts with a negative half wave be cause the angle is set at 180 The start angle can be shifted at will in 1 steps between 0 and 359 Start DC t A S t a r t A C f start f end Seq time End DC Example 4 Focussing 1 cycle of 1 sequence from 100 Similar to example 1 but with another end frequency...

Страница 65: ...ed as in example 3 is run As the settings demand that the end offset DC is higher than the start the second sequence run will revert to the same start level as the first regardless of the values achieved at the end of the first run This can produce a discontinuity in the total progression marked in red which may only be compensated with careful choice of settings t A Sequenz 1 Sequenz 2 Example 8 ...

Страница 66: ...headers like in Excel Column Parameter Range A AC Start 0 50 U or I B AC End 0 50 U or I C Frequency Start 0 10000 Hz D Frequency End 0 10000 Hz E Start angle AC 0 359 F DC Start 0 Nominal value of U or I AC Start G DC End 0 Nominal value of U or I AC End H Time in μs 100 36 000 000 000 36 billion μs For details about the parameter and the arbitrary function refer to 3 9 10 Arbitrary function Exam...

Страница 67: ...d I which define the start levels at the beginning of the ramp It is recommended that these values are set equal to those in A start unless the power source shall not be loaed before the start of the ramp In that case the static values should be set to zero 10h after reaching the ramp end the function will stop automatically i e I 0 A in case the ramp was assigned to the current unless it has been...

Страница 68: ... must not be bigger than 80 the adjustment limits of the device are not in effect here The files must be stored inside a folder called HMI_FILES with has to be in the root of the USB drive If the file naming path and file content specifications are not met the file is either not recognized at all or rejected So it is for example impossible to load a UI table file name starts with UI for the IU fun...

Страница 69: ...s dynamic as single unit operation Depending on the installed firmware version for the KE and HMI unit it can occur that not every value related to the current or power of the MS system is translated to match the nominal values during the master slave opera tion This applies for manual control but primarily for remote control when using the command language SCPI It means while you can set the curr...

Страница 70: ...gether with a network cable CAT3 or bet ter not included It doesn t matter which of the two master slave connection sockets RJ45 backside is connected to the next unit 2 Also connect all units at the DC side 3 The two units at the beginning and end of the chain should be terminated if long connection cables are used This is achieved using a 3 pole DIP switch which is positioned on the back side of...

Страница 71: ...ialisation and all set values are reset The master now displays the set and actual values of the total system Depending on the number of units the total current and power will multiply The following applies The master can be treated as a standalone unit The master shares the set values across the slaves and controls them The master is remotely controllable via the analog or digital interfaces All ...

Страница 72: ...down the power consumption and human interaction is required If one or more slave units are switched off on the AC side power switch supply undervoltage and come back later they re not automatically initialised and included again in the MS system Then the init has to be repeated If the DC input of the master unit is switched off due to a defect or overheating then the total master slave system can...

Страница 73: ...set to match the application s requirements This can be done manu ally or via any interface The power supply has to be operating in mode CV Only then it will control the input voltage of the load using the Share Bus Typical applications Fuel cells Capacitor tests Motor driven applications Electronic tests where a high dynamic discharge is required 3 10 3 2 Connecting devices to a 2QO There are a n...

Страница 74: ...4 V 400 Ah using the wiring example in configuration A Power supply PSI 9080 170 3U with ISet 50 A PSet 5000 W Electronic load ELR 9080 170 set to ISet max discharge current of the battery eg 100 A PSet 3500 W USet 24 V UVD 20 V with event type Alarm to stop discharging at a certain low voltage threshold Assumption the battery has a voltage of 26 V at test start DC inputs resp DC outputs on all un...

Страница 75: ...included if this is in any way connected to the problem a fault description in as much detail as possible is attached if shipping destination is abroad the necessary customs papers are attached 4 2 1 Replacing a defect mains fuse The device is protected by up to six 6 3x32 mm fusible cut outs T16A 500 V ceramic inside the device To replace these the device must first be disconnected from AC supply...

Страница 76: ... updated 5 Switch the equipment off wait until it is completely off fan not running anymore then switch back on 4 3 2 Update of the interface unit KE Firmware updates should only be installed when they can eliminate existing bugs in the firm ware in the device or contain new features The firmware of the KE component if necessary is updated via the rear side USB port For this the software EA Power ...

Страница 77: ...hen re adjusting the current If the current is also going to be calibrated a suitable DC current shunt ideally specified for at least 1 25 times the max input current of the ELR and with a max error that is half or less than the max current error of the ELR device Normal ambient temperature of approx 20 25 C An adjustable voltage current source which is capable of providing at least 102 of the max...

Страница 78: ...creen select Current calibration The load will switch on the DC input and start to measure I mon 4 The next screen requests you to enter the input current Measured data measured with the shunt Enter it using the keypad assure yourself the value is correct and submit with ENTER 5 Repeat step 4 for the next three steps total of four steps If the externally measured value happens to be too different ...

Страница 79: ...y EPS Stromversorgung For this the equipment must generally be returned to the manufacturer No RMA number is needed It is sufficient to package the equipment adequately and send it together with a detailed description of the fault and if still under guarantee a copy of the invoice to the following address 6 2 Contact options Questions or problems with operation of the device use of optional compon...

Страница 80: ......

Страница 81: ......

Страница 82: ......

Отзывы: