


Installation
EP-3WXA/4/4Y
Page 3-9
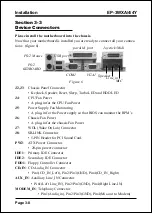
Device Connectors
(continued)
J2
Speaker -
Connect to the system's speaker for beeping
1. Speaker
3. GND
2. N/C
4. GND
Reset -
Closed to restart system.
Power LED -
Power LED connector
1. Power LED(+)
4. KeyLock
2. N/C
5. GND
3. GND
1
1
1
(This is connected to the power button on the case. Using the Soft-
Off by Pwr-BTTN feature, you can choose either Instant Off (turns
system off immediatly), or 4 sec delay (you need to hold the button
down for 4 seconds before the system turns off). When the system is
in 4 sec delay mode, there is a special feature to make the system to
go into suspend mode when the button is pressed momentarily.)
Turbo LED indicator -
LED ON when higher speed is selected
IDE LED indicator -
LED ON when Onboard PCI IDE Hard disks
is activate
J3
1
+
+
IR Connector
1. VCC
4. GND
2. NC
5. IRTX
3. IRRX
1
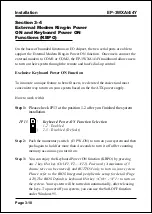
Power On/Off
Содержание EP-3WXA
Страница 6: ...EP 3WXA 4 4Y Page Left Blank ...
Страница 14: ...Introduction EP 3WXA 4 4Y Page 1 8 Figure 5 System Block Diagram System Block Diagram ...
Страница 17: ...Installation EP 3WXA 4 4Y Page 3 1 Section 3 INSTALLATION ...
Страница 18: ...Installation EP 3WXA 4 4Y Page 3 2 Figure 1 EP 3WXA 4 4Y Detailed Layout ...
Страница 28: ...Installation EP 3WXA 4 4Y Page 3 12 Page Left Blank ...
Страница 54: ...BIOS EP 3WXA 4 4Y Page 4 26 Page Left Blank ...
Страница 56: ...Drivers Installation EP 3WXA 4 4Y Page 5 2 Page Left Blank ...
Страница 68: ...Appendix EP 3WXA 4 4Y A 12 Page Left Blank ...
Страница 70: ...Appendix EP 3WXA 4 4Y A 14 Page Left Blank ...