background image

POWERED BY

73

SERIES

SERIES


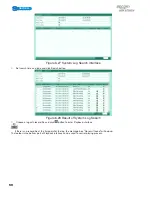
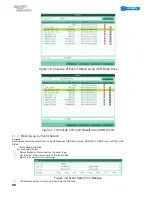
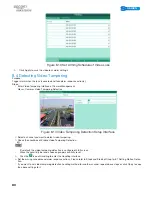
At least one channel shall be selected.

Figure 7.19 Normal Video Search 

2. 

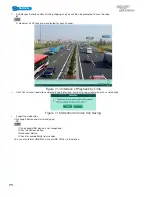
Select record files you want to back up.

Click Export button to enter Export interface.


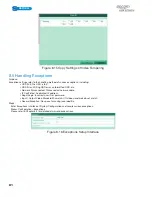
At least one record file shall be selected.

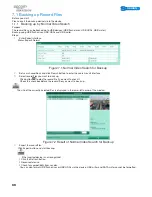
Figure 7.20 Result of Normal Video Search for Backup

3. 

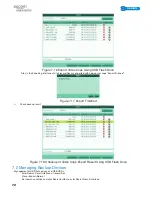
Backup device management.

Click New Folder button if you want to create a new folder in the backup device.
Select a record file or folder in the backup device and click button 

 if you want to delete it.

Select a record file in the backup device and click button 

 to play it.

Click Format button to format the backup device.


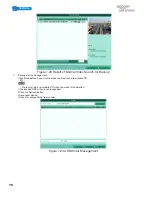
 If the inserted USB device is not recognized:

• 

Click the Refresh button.

• 

Reconnect device.

• 

Check for compatibility from vendor.

Содержание S04 S Series

Страница 1: ...POWERED BY SERIES SERIES User Manual POWERED BY...

Страница 2: ...ct dealer This manual is applicable to S04 S08 S16 This manual may contain several technically incorrect places or printing errors and the content is subject to change without notice The updates will...

Страница 3: ...eceived including interference that may cause undesired operation EU Conformity Statement This product and if applicable the supplied accessories too are marked with CE and comply therefore with the a...

Страница 4: ...rly secured to a rack or shelf Major shocks or jolts to the unit as a result of dropping it may cause damage to the sensitive electronics within the unit Use the device in conjunction with an UPS if p...

Страница 5: ...cording schedule configuration Normal and event video encoding parameters Multiple recording types manual normal motion alarm motion alarm and motion alarm 8 recording time periods with separated reco...

Страница 6: ...t of device parameters Remote viewing of the device status system logs and alarm status Remote locking and unlocking of control panel and mouse Remote HDD formatting and program upgrading Remote syste...

Страница 7: ...2 4 Quick Setting Toolbar in Live View Mode 27 3 3 Adjusting Live View Settings30 3 4 Channel zero Encoding 32 3 5 User Logout33 C H A P T E R 4 34 PTZ Controls 34 C H A P T E R 5 43 Record Settings...

Страница 8: ...guring Advanced Settings 111 9 2 1 Configuring PPPoE Settings 111 9 2 2 Configuring DDNS 111 9 2 3 Configuring NTP Server 114 9 2 4 Configuring UPnP 115 9 2 5 Configuring Remote Alarm Host 117 9 2 6 C...

Страница 9: ...2 12 2 Searching Exporting Log Files143 12 3 Importing Exporting Configuration Files 145 12 4 Upgrading System 147 12 4 1 Upgrading by Local Backup Device 147 12 4 2 Upgrading by FTP 147 12 5 Restorin...

Страница 10: ...POWERED BY 10 SERIES SERIES CHAPTER 1 Introduction...

Страница 11: ...ase that the mouse is not detected the possible reason may be that the two devices are not compatible please refer to the recommended device list from your provider The operation of the mouse Table 1...

Страница 12: ...Enter Exit English input method 1 4 Rear Panel S Series The rear panel of S08 is shown below Figure 1 4 Rear Panel of S08 Table 1 5 Description of Rear Panel No Item Description 1 VIDEO IN BNC connect...

Страница 13: ...13 SERIES SERIES 7 LAN Interface RJ45 10M 100M Ethernet interface 8 USB Inter face Connects USB mouse or USB flash memory devices 9 12V 12VDC power supply 10 GND Ground needs to be connected when DVR...

Страница 14: ...ended that an Uninterruptible Power Supply UPS be used in conjunction with the device For the S Series DVR insert the power supply plug into the power connector on the rear panel and the device will s...

Страница 15: ...POWERED BY 15 SERIES SERIES Rebooting the device In the Shutdown menu Figure 1 7 you can also click Reboot to reboot the device...

Страница 16: ...POWERED BY 16 SERIES SERIES CHAPTER 2 Getting Started...

Страница 17: ...language settings are configured Check the checkbox to enable Setup Wizard when device starts Click Next to continue the setup wizard You can also click Cancel to exit the Setup Wizard or use the Set...

Страница 18: ...at system date and system time Figure 2 4 Date and Time Settings 4 Click Next button which takes you back to the Network Setup Wizard window as shown in Figure 2 5 Set the network parameters including...

Страница 19: ...he data saved in the HDD Figure 2 6 HDD Management 6 Click Next button to enter the Record Settings window as shown in Figure 2 7 1 Select the camera to configure 2 Check the checkbox to enable Start...

Страница 20: ...tering the local operation interface of the device the main menu bar will be displayed on the top of the screen You can click the icons to enter the corresponding submenus and perform the operations F...

Страница 21: ...POWERED BY 21 SERIES SERIES CHAPTER 3 Live View...

Страница 22: ...you to the Live View mode Live View Icons In the live view mode there are icons at the right top of the screen for each channel showing the status of the record and alarm in the channel so that you ca...

Страница 23: ...s allowed for the main output 3 2 1 Using the Mouse in Live View In the live view mode right click on the screen or move the mouse to the bottom of the screen the main menu button and the live view to...

Страница 24: ...he main output Steps 1 Use the mouse wheel to double click on the HDMI VGA output screen and the following message box pops up Figure 3 2 Switch Main and Aux Output 2 Use the mouse wheel to double cli...

Страница 25: ...ependent image parameters so as to satisfy different light conditions e g dayli ght and night time Two periods can be configured When you have configured Period 1 the Period 2 is remained as the Other...

Страница 26: ...1 If you want to copy the image parameters of the current camera to other camera s click the Copy button to enter the Copy to interface Figure 3 6 Copy Image Settings to Other Camera s 2 Select the ca...

Страница 27: ...or the selected video output When the HDMI VGA output interface is used as the main video output and the Audio Output for the HDMI VGA output interface is enabled the VGA audio and AUDIO OUT can be us...

Страница 28: ...select a channel in the left region Thus the selected chan nel will be displayed in the corresponding screen 4 You can click to start live view of all channels and click to stop live view of all chan...

Страница 29: ...uality channel zero encoding is suppor ted as an option for you Steps 1 Enter the Live View Settings interface Menu Configuration Live View 2 Select the Channel Zero Encoding tab Figure 3 9 Live View...

Страница 30: ...e and if you want to do some operation you need to enter user name and password to log in again Steps 1 Enter the menu Menu Shutdown or Figure 3 10 Shutdown 2 Click Logout After you have logged out th...

Страница 31: ...POWERED BY 31 SERIES SERIES CHAPTER 4 PTZ Controls...

Страница 32: ...POWERED BY 32 SERIES SERIES CHAPTER 5 Record Settings...

Страница 33: ...Chapter 10 2 Configuring Quota Mode Figure 5 2 HDD Advanced Steps 1 Enter the Record settings interface to configure the encoding parameters Menu Record Encoding Menu Record Encoding Figure 5 3 Encod...

Страница 34: ...ut sound Enable 960 Mode Enable the encoding at WD1 PAL 960 576 NTSC 960 480 resolution You can also uncheck the checkbox to disable it 5 If you want to copy the current main stream settings to other...

Страница 35: ...le all day recording 4 Set the Type in the dropdown list Different recording types are available for different models S Series Normal and Motion To enable Motion triggered recording you must configure...

Страница 36: ...Click OK to save setting and back to upper level menu Task 2 Draw the Schedule Steps 1 Click the icon on the right to select a record type Set the Type in the dropdown list Different recording types...

Страница 37: ...set schedule for other channels If the settings can also be used to other channels click Copy to enter the Copy Camera interface and then choose the channel to which you want to copy Figure 5 11 Copy...

Страница 38: ...an follow the steps to schedule a record which triggered by the detected motion Steps 1 Enter the Motion Detection interface Menu Camera Motion Figure 5 12 Motion Detection 2 Configure Motion Detectio...

Страница 39: ...d Schedule Record Schedule Figure 5 15 Record Schedule 1 Check the checkbox after the Enable Schedule item 2 Click Edit 3 In the message box you can choose the day to which you want to set schedule 4...

Страница 40: ...d to manually cancel the record The manual recording is prior to the scheduled recording Steps 1 Enter the Manual settings interface Menu Manual Figure 5 24 Manual Record 2 Enable recording for camera...

Страница 41: ...figure the record schedule on holiday Steps 1 Enter the Record setting interface Menu Record 2 Choose Holiday on the left bar Figure 5 26 Holiday Settings 3 Enable Edit Holiday schedule 1 Click to ent...

Страница 42: ...you need all day recording check the All Day checkbox Otherwise leave it blank 7 Set start end time for holiday schedule Up to 8 periods can be configured for each day And the time periods can t be o...

Страница 43: ...layback 2 Select the channels by checking the checkbox to 3 Configure the record type file type and start end time 4 Click Search to show the results Figure 5 30 Playback Search Result 5 Protect the r...

Страница 44: ...POWERED BY 44 SERIES SERIES Figure 5 31 Unlocking Attention...

Страница 45: ...POWERED BY 45 SERIES SERIES CHAPTER 6 Playback...

Страница 46: ...in the quick setting toolbar Only record files recorded during the last five minutes on this channel will be played back Figure 6 1 Instant Playback Interface All day Playback by channel 1 Enter the A...

Страница 47: ...progress as shown in Figure 6 4 The channel and time selection menu displays by moving the mouse to the right of the playback interface Click the channel s if you want to switch playback to another ch...

Страница 48: ...n time bar Playback progress bar use the mouse to click any point of the progress bar or drag the progress bar to locate special frames About video type bar represents normal recording manual or sched...

Страница 49: ...the Playback button to enter Playback interface Set search conditions and click the Playback button to enter Playback interface Figure 6 6 Video Search by Time In the Playback interface The toolbar in...

Страница 50: ...ar represents normal recording manual or schedule represents event recording motion repre sents smart search recording 6 1 3 Playing Back by Normal Video Search Purpose Play back video files searched...

Страница 51: ...corded file selected in step 2 is the main channel during multi channel playback and it is displayed at the upper left corner Figure 6 11 Select Channels for Synchronous Playback 4 Synchronous Playbac...

Страница 52: ...Event Search Purpose Play back record files on one or several channels searched out by restricting event type motion detection or alarm input Channel switch is supported Steps 1 Enter the playback int...

Страница 53: ...nd click Details to view detailed information of the record file e g start time end time file size etc Figure 6 16 Event Details 8 Or you can directly click the button of each file item to enter its p...

Страница 54: ...playback interface Figure 6 18 Interface of Playback by Event 2 Figure 6 19 Toolbar of Playback by Event Table 6 4 Detailed Explanation of Playback by event Toolbar Button Operation Button Operation...

Страница 55: ...s event recording motion repre sents smart search recording 6 1 5 Playing Back by Tag Purpose Video tag allows you to record related information like people and location of a certain time point during...

Страница 56: ...ch to enter Search Result interface Two tag types are selectable All and Tag Keyword Input keyword if you choose Tag Keyword Figure 6 22 Video Search by Tag 2 Set playback conditions and tag managemen...

Страница 57: ...f Video Search by Tag 3 Playback by tag Choose a tag and click button to play back the related record file Figure 6 24 Interface of Playback by Tag The hidden list of tags will be displayed by moving...

Страница 58: ...w forward Pause reverse play Re verse play Single frame reverse play Pause play Play Sin gle frame play Stop Fast forward Video search Exit Hide Progress bar Video type bar Playback progress bar use t...

Страница 59: ...tton Figure 6 28 Result of System Log Search 3 Choose a log with record file and click button to enter Playback interface If there is no record file at the time point of the log the message box No res...

Страница 60: ...POWERED BY 60 SERIES SERIES Figure 6 29 Interface of Playback by Log...

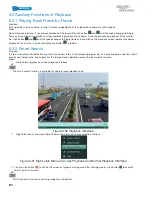
Страница 61: ...to use button in toolbar 6 2 2 Smart Search Purpose In order to locate motion detection event easily and accurately in the playback progress bar you are allowed to analyze a certain area scene dynami...

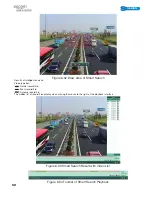
Страница 62: ...ligent analysis Video type bar Normal record file Event record file Dynamic record file The hidden list of record files display when moving the mouse to the right of the playback interface Figure 6 33...

Страница 63: ...xit Hide Progress bar Video type bar Playback progress bar use the mouse to click any point of the progress bar or drag the progress bar to locate special frames About video type bar represents normal...

Страница 64: ...m one playback interface to another Table 6 7 Detailed Explanation of Right click Menu under Playback Button Function Return to Playback interface Enter Digital Zoom interface Smart Search against a s...

Страница 65: ...POWERED BY 65 SERIES SERIES CHAPTER 7 Backup...

Страница 66: ...tton to enter the search result interface 3 Select record files you want to back up Click button to play the record file if you want to check it Check the checkbox before the record files you want to...

Страница 67: ...e Figure 7 4 Export by Normal Video Search using USB Writer Stay in the Exporting interface until all record files are exported with pop up message box Export finished Figure 7 5 Export Finished 5 Che...

Страница 68: ...k up event related record files using USB devices USB flash drives USB HDDs USB writer or SATA writer Steps 1 Enter Export interface Menu Export Event 2 Select Motion or Alarm Input as the event type...

Страница 69: ...the record file e g start time end time file size etc The size of the currently selected files is displayed in the lower left corner of the window 2 Select record file s from the list and click Export...

Страница 70: ...record file in Export interface and click button to check it Figure 7 13 Checkup of Event Export Result Using USB Flash Drive 1 1 3 Backing up Video Clips Purpose You may also select video clips to e...

Страница 71: ...ck by Time 4 Click Yes to save video clips and enter Export interface or click No to quit and do not save video clips Figure 7 15 Attention to Video Clip Saving 5 Export the video clips Click Export b...

Страница 72: ...message Export finished Figure 7 17 Export Finished 6 Check backup result Figure 7 18 Checkup of Video Clips Export Result Using USB Flash Drive 7 2 Managing Backup Devices Management of USB flash dri...

Страница 73: ...eo Search for Backup 3 Backup device management Click New Folder button if you want to create a new folder in the backup device Select a record file or folder in the backup device and click button if...

Страница 74: ...of record files Menu Export Normal Set search condition and click Search button to enter Search Result interface At least one channel shall be selected Figure 7 22 Normal Video Search for Backup 2 Sel...

Страница 75: ...anagement Click Erase button if you want to erase the files from a re writable CD There must be a re writable CD when you make this operation If the inserted USB writer is not recognized Click the Ref...

Страница 76: ...POWERED BY 76 SERIES SERIES CHAPTER 8 Alarm Settings...

Страница 77: ...he sensitivity bar to set sensitivity 2 Click the icon of Handling to set alarm response actions Figure 8 2 Set Detection Area and Sensitivity 3 Click Trigger Channel tab and select one or more channe...

Страница 78: ...larm please refer to Chapter 8 5 Figure 8 5 Set Alarm Response Actions of Motion Detection 6 Click OK to complete the motion detection settings of the channel 7 If you want to set up motion detection...

Страница 79: ...ter Video Loss interface of Camera Management Menu Camera Video Loss Figure 8 12 Video Loss Setup Interface 2 Select a channel you want to detect 3 Check the checkbox of Enable Video Loss Alarm 4 Clic...

Страница 80: ...ace 2 Select a channel you want to detect video tampering 3 Check the checkbox of Enable Video Tampering Detection By default the video tampering detection is configured in full screen 4 Move the sens...

Страница 81: ...ork Disconnected Disconnected network cable IP Con icted Duplicated IP address Illegal Login Incorrect user ID or password Input Output Video Standard Mismatch I O video standards do not match Record...

Страница 82: ...Channel Audible Warning Trigger an audible beep when an alarm is detected Notify Surveillance Center Sends an exception or alarm signal to remote alarm host when an event occurs The alarm host refers...

Страница 83: ...f Alarm Output 8 7 Triggering or Clearing Alarm Output Manually Purpose Sensor alarm can be triggered or cleared manually If Manually Clear is selected in the dropdown list of dwell time of an alarm o...

Страница 84: ...POWERED BY 84 SERIES SERIES Figure 8 20 Clear or Trigger Alarm Output Manually...

Страница 85: ...POWERED BY 85 SERIES SERIES CHAPTER 9 Network Settings...

Страница 86: ...ttings Interface 2 Select the General tab 3 In the General Settings interface You can configure the following settings NIC Type IPv4 Address IPv4 Gateway MTU and DNS Server If the DHCP server is avail...

Страница 87: ...o enable the new settings and the PPPoE dial up is automatically connected after reboot You can go to Menu Maintenance System Info Network interface to view the status of PPPoE connection Please refer...

Страница 88: ...ccount information in the corresponding fields Refer to the DynDNS settings 1 Enter Server Address for NO IP 2 In the Device Domain Name text field enter the domain obtained from the NO IP website www...

Страница 89: ...nagement System interface click the Device Management tab on the left menu bar and then click to register the device Figure 9 11 Register the Device Only lower case English alphabet numeric and can be...

Страница 90: ...munications etc If you want to use the UPnP function to enable the fast connection of the device to the WAN via a router you should configure the UPnP parameters of the device Before you start If you...

Страница 91: ...s triggered The remote alarm host must have the CMS Client Management System software installed Steps 1 Enter the Network Settings interface Menu Configuration Network 2 Select the More Settings tab t...

Страница 92: ...en adding a device to the CMS Client Management System software the multicast address must be the same as the device s multicast IP Figure 9 18 Configure Multicast 4 Click the Apply button to save and...

Страница 93: ...65535 and it is used for remote client software access The HTTP port is used for remote IE access 9 2 9 Configuring Email Purpose The system can be configured to send an Email notification to all des...

Страница 94: ...SSL if required by the SMTP server Sender The name of sender Sender s Address The Email address of sender Select Receivers Select the receiver Up to 3 receivers can be configured Receiver The name of...

Страница 95: ...ime information of device such as linking status MTU sending receiving rate etc Steps 1 Enter the Network Traffic interface Menu Maintenance Net Detect Figure 9 25 Network Traffic Interface 2 You can...

Страница 96: ...he testing is failed the error message box will pop up as well Figure 9 27 Testing Result of Network Delay and Packet Loss 9 4 2 Exporting Network Packet Purpose By connecting the device to network th...

Страница 97: ...97 SERIES SERIES 4 Click the Export button to start exporting 5 After the exporting is complete click OK to finish the packet export Figure 9 29 Packet Export Attention Up to 1M data can be exported...

Страница 98: ...ace Steps Click Status on the right bottom of the page Figure 9 30 Checking Network Status If the network is normal the following message box pops out Figure 9 31 Network Status Checking Result If the...

Страница 99: ...information of the device Steps 1 Enter the Network Statistics interface Menu Maintenance Net Detect 2 Click the Network Stat tab to enter the Network Statistics menu Figure 9 33 Network Stat Interfa...

Страница 100: ...POWERED BY 100 SERIES SERIES CHAPTER 10 HDD Management 1 1...

Страница 101: ...n Interface 2 Select the HDD to be initialized 3 Click the Init button Figure 10 2 Confirm Initialization 4 Select the OK button to start initialization 5 After the HDD has been initialized the status...

Страница 102: ...ld of Max Record Capacity GB Figure 10 5 Configure Record Quota 4 You can copy the quota settings of the current camera to other cameras if required Click the Copy button to enter the Copy Camera menu...

Страница 103: ...yed on the list Check the status of each HDD which is displayed on the list Figure 10 7 View HDD Status 1 If the status of HDD is Normal or Sleeping it works normally If the status is Uninitialized or...

Страница 104: ...R T Settings interface Menu HDD HDD Detect S M A R T Settings 2 Select the HDD to view its S M A R T information list If you want to use the HDD even when the S M A R T checking is failed you can chec...

Страница 105: ...immediate measures to repair it Steps 1 Enter the Bad Sector Detection interface Menu HDD HDD Detect Bad Sector Detection Figure 10 10 Bad Sector Detection 2 Click Detect to start detecting Figure 10...

Страница 106: ...e Menu Configuration Exceptions 2 Select the Exception Type to HDD Error from the dropdown list 3 Click the checkbox s below to select the HDD error alarm type s The alarm type can be selected to Audi...

Страница 107: ...POWERED BY 107 SERIES SERIES CHAPTER 11 Camera Settings 1 1...

Страница 108: ...Camera Settings 1 If you want to copy the OSD settings of the current camera to other cameras click the Copy button to enter the Copy Camera interface Figure 11 2 Copy Settings to Other Cameras 2 Sele...

Страница 109: ...or click Clear All to clear all zones Figure 11 4 Set Privacy Mask Area 6 You can click the Copy button to copy the privacy mask settings of the current camera to other cameras Please refer to step 7...

Страница 110: ...ness contrast saturation hue sharpness and denoising level by moving the sliding bar or increasing decreasing the value When you select different mode corresponding default parameters are available Yo...

Страница 111: ...POWERED BY 111 SERIES SERIES CHAPTER 12 Device Management and Maintenance 1 1...

Страница 112: ...Enter the System Information interface Menu Maintenance System Info 2 Click the Camera tab to enter the Camera Information menu to view the status of each camera Figure 12 2 Camera Information Interf...

Страница 113: ...er the System Information interface Menu Maintenance System Info 2 Click the Network tab to enter the Network Information menu to view the network information Figure 12 5 Network Information Interface...

Страница 114: ...POWERED BY 114 SERIES SERIES Figure 12 6 HDD Information Interface 1 2...

Страница 115: ...Interface 2 Set the log search conditions to refine your search including the Start Time End Time Major Type and Minor Type 3 Click the Search button to start searching log files 4 The matched log fil...

Страница 116: ...nance Log Information Log Export Figure 12 10 Log Export Interface 2 Check checkbox to select the HDD and click Export to enter the export interface Figure 12 11 Export Log Files 7 Select the backup d...

Страница 117: ...evice can be imported to multiple device devices if they are to be configured with the same parameters Steps 1 Enter the Import Export Configuration File interface Menu Maintenance Import Export Figur...

Страница 118: ...omplete reboot the device to activate the new firmware Upgrading by FTP Before you start Ensure the network connection of the PC running FTP server and the device is valid and correct Run the FTP serv...

Страница 119: ...ce Menu Maintenance Default Figure 12 15 Restore Factory Default 2 Click the OK button to restore the default settings Except the network parameters including IP address subnet mask gateway MTU and se...

Страница 120: ...POWERED BY 120 SERIES SERIES CHAPTER 13 Others 1 1...

Страница 121: ...the CVBS output standard to NTSC or PAL which must be the same with the video input standard Resolution Select the HDMI VGA output resolution which must be the same with the resolution of the monitor...

Страница 122: ...General Settings interface Menu Configuration General 2 Choose DST Settings tab Figure 13 2 DST Settings Interface You can check the checkbox before the Auto DST Adjustment item Or you can manually ch...

Страница 123: ...s Operation Timeout Set timeout time for menu inactivity E g when the timeout time is set to 5 Minutes the sys tem will exit from the current operation menu to live view screen after 5 minutes of menu...

Страница 124: ...ser levels have different operating permission Operator The Operator user level has permission of Local Log Search in Local Configuration Remote Log Search and Two way Audio in Remote Configuration an...

Страница 125: ...ay Audio Realizing two way radio between the remote client and the device Remote Alarm Control Remotely arming notify alarm and exception message to the remote client Remote Advanced Operation Remotel...

Страница 126: ...e the selected user Editing a User Steps 1 Enter the User Management interface Menu Configuration User 2 Select the user to be edited from the list Figure 13 9 Edit a User 3 Click the icon to enter th...

Страница 127: ...ent menu Steps 1 Enter the User Management interface Menu Configuration User Figure 13 11 Change Password 2 Select the admin user and click to change the password Figure 13 12 Change Password 3 Enter...

Страница 128: ...u Shutdown Figure 13 13 Shutdown Menu 2 Click the Logout button to log out or Click the Shutdown button to shut down the device or Click the Reboot button to reboot the device After you have logged ou...

Страница 129: ...POWERED BY 129 SERIES SERIES CHAPTER 14 Appendix...

Страница 130: ...inly with ADSL services where individual users connect to the ADSL transceiver modem over Ethernet and in plain Metro Ethernet networks DDNS Dynamic DNS is a method protocol or network service that pr...

Страница 131: ...set up correctly by following the steps listed in Chapter 5 2 Configuring Record Schedule b The motion detection area is configured correctly See Chapter 5 3 Configuring Motion Detection Record c The...

Страница 132: ...SERIES SERIES POWERED BY...

Отзывы: