07-02185A EB280
6
Legend Brands
BEFORE MOVING UNIT AFTER USE
To reduce the possibility of drips when moving the
unit, follow these additional steps to ensure that all
water is removed from the unit.
NOTICE: To ensure all water is removed from the
dehumidifier, the unit will complete the defrost cycle
even if the unit is turned off. If the unit is unplugged
during the defrost cycle, excessive water may
accumulate in the unit and may drip out when you move
the unit.
NOTICE: To ensure the condensate tank empties
completely while purging, make sure the unit is placed
upright on a horizontal surface.
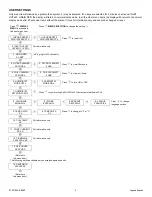
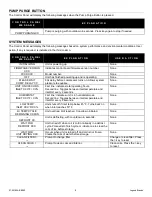
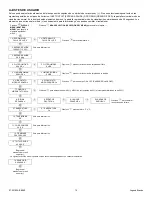
1. If the unit is in a defrost cycle, wait until the unit
has returned to normal operating mode before
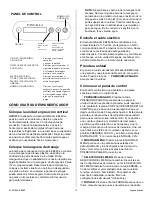
proceeding. To check, review the control panel. The
control panel will show one of the following:
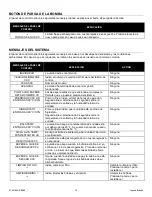
Defrost in progress:
HUMIDISTAT
DEFROST XX
Display mode when unit is in defrost mode. XX indicates
the seconds remaining on the defrost cycle.
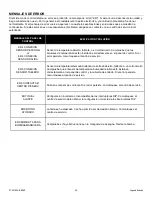
Shutdown sequence
WAIT FOR
DEFROST XX
Display mode when unit in defrost and unit is powered
down (shut off by user). Unit will complete the defrost
cycle to remove any built-up ice then purge the pump.
XX indicates the seconds remaining on the defrost cycle.
Drying sequence
WAIT FOR
UNIT DRYING XX
Display mode when unit not in defrost and unit is
powered down (shut off by user). Unit will complete the 5
minute drying cycle then purge the pump. XX indicates
the seconds remaining on the drying cycle.
Normal display:
HUMIDISTAT
INLET XX° C
Wait until the control shows the normal display before
proceeding.
2. Gently rock the machine to ensure any water
remaining on interior surfaces falls into the sump
area.
3. Press the
PURGE key. When the purge cycle is
complete, turn the unit off.
4. Disconnect the external drain hose, drain it
carefully, coil it and secure it in the pocket or the
strap provided with your unit.
MAINTENANCE
WARNING! ELECTRIC SHOCK HAZARD.
Unplug the
dehumidifier before performing any maintenance.
Before each use
Inspect the electrical cord for damage.
Look for
fraying, cuts, etc. Do not use the unit if you find any
damage. Call Legend Brands for the nearest Service
Center at 800-932-3030.
Inspect and vacuum filter as needed.
Keep a clean filter in the unit at all times to protect
internal components from dust and other particulate
build-up. Replace filter before each job. Replace only
with a new filter. For parts and service call your local
distributor or contact the Legend Brands Service
Department at 800-932-3030.
CAUTION:
Dust can cause the unit to overheat and
shut down. Do not operate when excessive dust or
airborne particles are present, such as during
sanding or spray-painting. Inspect and clean air filter
elements and coils frequently.
Monthly
Check coils
. Dirty coils can cause the unit to overheat.
Clean when visibly dirty.
Check heat exchange block.
Clean out with
compressed air only. Take care not to damage the block.
Inspect and clean the pump.
To remove the
condensate pump unit:
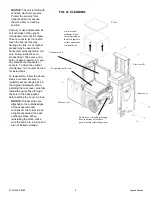
SERVICING THE PUMP AND DRAIN PAN
To maintain proper operation, the pump and drain pan
assembly should be periodically removed and cleaned.
Follow these steps to clean the pump and drain pan
assembly:
Tools Needed
Philips screwdriver
Flat blade screwdriver
⅜ in. and
15
∕
16
in. sockets and driver
Cleaning cloths
DISASSEMBLY AND CLEANING
1. Unplug unit, then remove the power cord from the
socket at the base of the unit. Remove pump hose at
quick-connect.
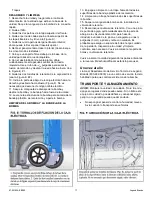
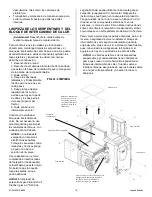
2. Remove filter.
3. Remove the two bolts from the upper front cover.
4. Remove one bolt each from the upper back corner of
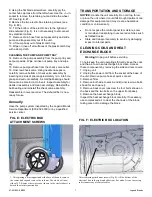
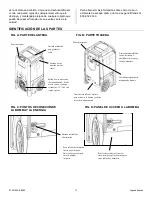
side covers A and B (see Fig. A)
5. Remove four bolts from the lower back panel. The
back/top panel may now be removed.
6. Remove lower back metal panel (unscrew the five
attachment screws).
7. Place a firm support under the base of the unit so that
the left wheel may be removed.


