background image


12 


MR/ZR GETTING STARTED GUIDE 

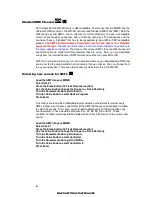
Disk functions 

This is obviously an important area to know about  on the MR/ZR. Reviewing this section will 
show you how to save your creations to a floppy disk. You will also be shown how to retrieve 
your files to play them back. Following is a quick lesson on file types as well. 

 
There has been a means of organization that was put into the MR/ZR to help you stay on 
top of what you are saving. When you save data to a floppy disk there are multiple file 
types. If you are saving one sequence, that is known as a MIDI File. If you save a 
collection of sequences, that is known as an All Seqs file type. If you save a set of sounds, 
that is known as an All Sounds file type. There are several types. Take time to become 
familiar with the possible file types. 


Format a floppy disk 


Formatting a disk means that the MR/ZR will now make the disk usable or "mark" the disk 
with its own identification information. Disks formatted by one MR/ZR are compatible with 
other MR-61/76's and ZR-76's. ALL file types and files are compatible between MR's and 
ZR's. 


Insert a DS/HD (Double Sided / High Density) 3.5" floppy disk into the drive 
Press the Utilities button 
Press Enter 
System will read the disk and display a message that says  
"Erase and Format disk?" 
Press Enter


*Floppy disks that were preformatted for DOS, Windows or disks that were formatted by a 
Windows computer are ready to use, and do not need to be formatted by the MR/ZR. 
  

Save to a floppy disk 


Insert a formatted floppy into the disk drive 
Press the Save button 
Turn the Parameter knob to select the file type you want to save 
Turn the Value knob to change characters to select a name 

Saving continued: 

Use the arrow buttons to move the cursor for naming 
When you have the desired name, press Enter 


Load from a floppy disk 


Press the Load button 
Turn the Parameter knob to select the file type you want to load


Turn the Value knob to select the specific file to load 

(There may be several files that have the same file type, you can go through them with the 
Value knob) 

Once you have found the file you want to load, press Enter


Содержание ZR-76

Страница 1: ...MR ZR Getting Started Guide Written by Eric Montgomery 2000...

Страница 2: ...If there is ever a power surge there is the possibility that you can hurt yourself or your equipment can sustain damage It is safer for the both of you Audio Connections You can listen to the MR ZR i...

Страница 3: ...ing Page 4 5 Standard MIDI Files and Page 6 Using the Drum Machine Page 7 8 External Sequencer s MIDI and the MR ZR Page 9 MIDI control over MR ZR Insert Effects Page 10 MR ZR Auxiliary Outputs Page 1...

Страница 4: ...reen like DRUM KIT If you want to then demo the entire set of drum kits in the unit simply turn the value knob Take some time and become familiar with the sounds Don t forget to use the mod wheel as y...

Страница 5: ...g Press Stop when finished recording To record yourself playing along with the first track Press the Track 2 button The screen will display the Selected track number in the upper left of the screen TK...

Страница 6: ...Hip Hop R B use 1 16T Triplet Remember that Michael Jackson tune The way you make me feel Remember Sting s Brand New Day They were both quantized at a rate of 1 8T Another thing about grooves and fee...

Страница 7: ...e sound selection of instruments that was chosen You can change them to any sound you like There are a few necessary steps to do this in the MR ZR Selecting new sounds for SMF s Load the SMF into your...

Страница 8: ...t a rhythm style Turn the Value knob to select a rhythm within that style Press the Start Stop button Selecting a Rhythm Variation or Fill Press the Select Rhythm button Turn the Parameter knob to sel...

Страница 9: ...al sequencer The MR ZR series does not have the ability to have a dual MIDI status per track Each track is either going to play internally or externally We will have to use the MIDI OUT instrument to...

Страница 10: ...at each track has its own MIDI Channel Track 1 MIDI ch 1 Track 2 MIDI Ch 2 etc and a sound selected Be sure that each track is going to use the MIDI IN and MIDI Out of your MIDI Interface In the MR ZR...

Страница 11: ...Channel 2 Track 2 Channel 3 Track3 etc Go into Record mode on your external sequencer Press Play on the MR ZR You WILL NOT HEAR any sound as the transfer is happening The MR ZR does not have the abili...

Страница 12: ...d to aux output R Very useful and very easy to do The MR ZR uses the effect processor s bussing to route tracks to different outputs You will need to decide which effect bus will use the aux outputs I...

Страница 13: ...y one MR ZR are compatible with other MR 61 76 s and ZR 76 s ALL file types and files are compatible between MR s and ZR s Insert a DS HD Double Sided High Density 3 5 floppy disk into the drive Press...

Страница 14: ...ould use is Track 10 MR Rhythm Builder After you have created 8 four bar sequences create 8 one bar sequences These will be your fills Each sequence like the other 8 you created need to have ALL of th...

Страница 15: ...AUX outs A You are better off assigning the Insert effect bus to use the AUX outs The drums will use the main outs and the other instrument s can use the aux outs To assign the drums to use the AUX o...

Страница 16: ...A Yes Load the SMF into your MR ZR Select track 1 Press the Erase button 16 Track Recorder section Use the Value knob to change the Scope to Track Data Only Turn the Parameter knob to get to Event Tur...

Страница 17: ...orm sequencing solution Emagic Telephone 530 477 1051 MO FR 10 00 AM 4 00 PM Fax 530 477 1052 E mail support emagicusa com Logic is a cross platform sequencing solution Sounddiver is a cross platform...

Отзывы: