22
DiSEqC 1.
1: 16 select 1 switch ( Require the user device
support DiSEqC1 .0 protocol) Equipment needs support
DiSEqC 1.1 protocol, Most control 16 LNB. Press
to
select LNB1~LBN16/None.
LNB 1-LNB 16:
Corresponding to a satellite, After select-
ing the corresponding list will appear in the satellite list.
Motor:
Control of multi-satellite polar (Require the user
device support DiSEqC1.2 or DiSEqC1.3 protocol), Left
and right buttons to select DiSEqC1.2/ DiSEqC1.3/None.
DiSEqC1.2: DiSEqC1.2 Protocol selection
DiSEqC1.3: DiSEqC1.3 Protocol selection
For Mot
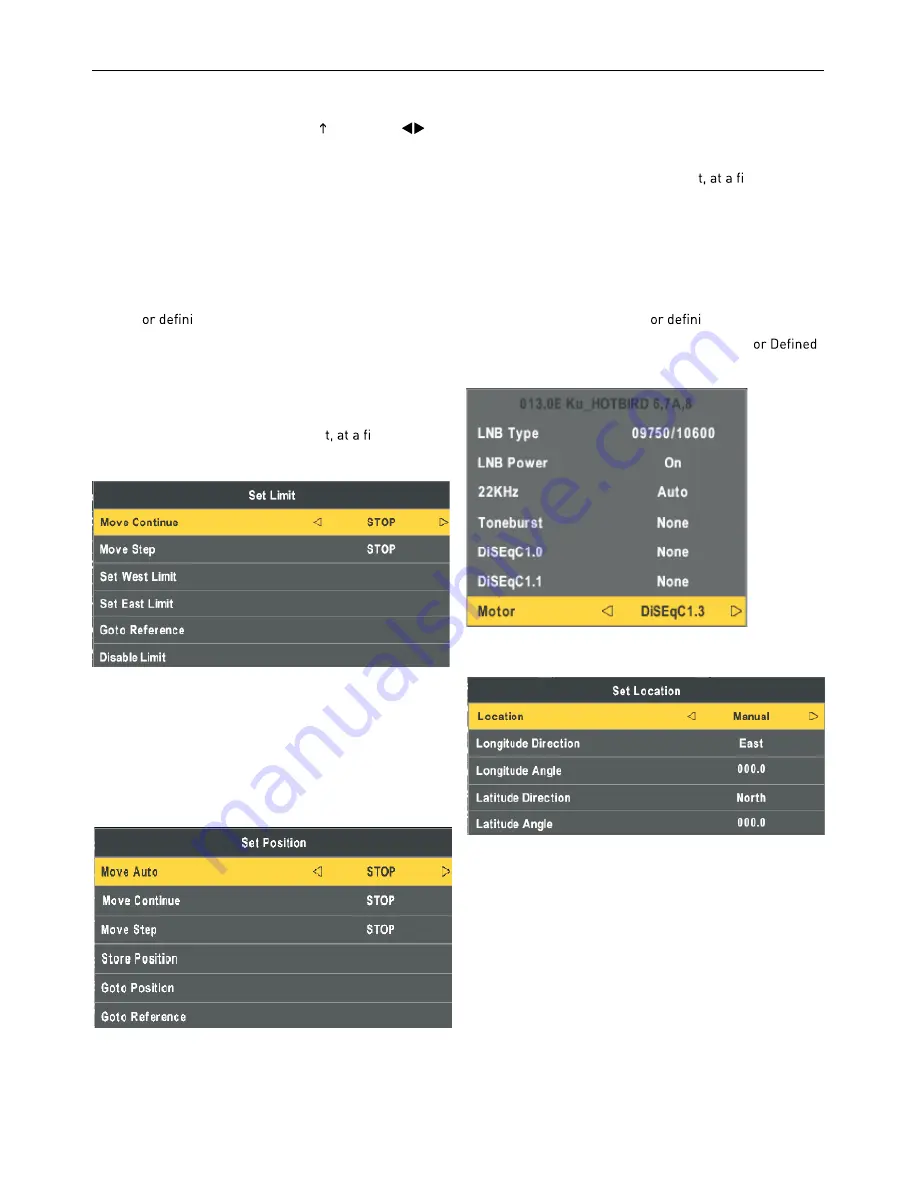
te “DiSEqC1.2“ , Operating Instructions:
Press RED button to enter “Set Limit" menu.
Press OK button to enter Set Position menu.
Move Continue:
Control of the east or the west continued
to turn the polar axis to the desired position.
Move Step:
Control of the east or wes
xed polar
axis step rotation.
Set West Limit:
The current position is set to the maxi-
mum point of the west.
Set East Limit:
The current position is set to the maxi-
mum point of the east.
Goto Reference:
Back to the default values.
Disable Limit:
Abolish the current limit set.
Move Auto:
East or west of Automatic Control continued
to turn the polar axis to the desired position.
Move Continue:
Manual control of the east or the west
continued to turn the polar axis to the desired position.
Move Step:
Control of the east or wes
xed polar
axis step rotation.
Store Position:
Save the current rotation angle of polar
axis.
Goto Position:
Control the polar angle automatically to
the previously saved.
Goto Reference:
Control the angle of polar axis automati-
cally to the default. When Mot
te “DiSEqC1.3“.
Press RED button to enter “Set Limit“ and Mot
as “DiSEqC1.3“ “Set Limit’ menu same.
Press GREEN button to enter Set Location menu.
Location:
Select the user area or similar areas, if the user
is not in the system default settings when in these areas,
can select Manual custom settings.
Longitude Direction:
Select the user area in the east
longitude or longitude.
Longitude Angle:
Longitude angle. Select the user area in
which the longitude, Enter the appropriate values to move
the cursor.
Latitude Direction:
Select the user area in the latitude or
latitude.
Latitude Angle:
Select the user latitude area, Enter the
appropriate values to move the cursor.
Press OK button to enter Set Position menu.


